Installing Components
Installing the Electronics Enclosure
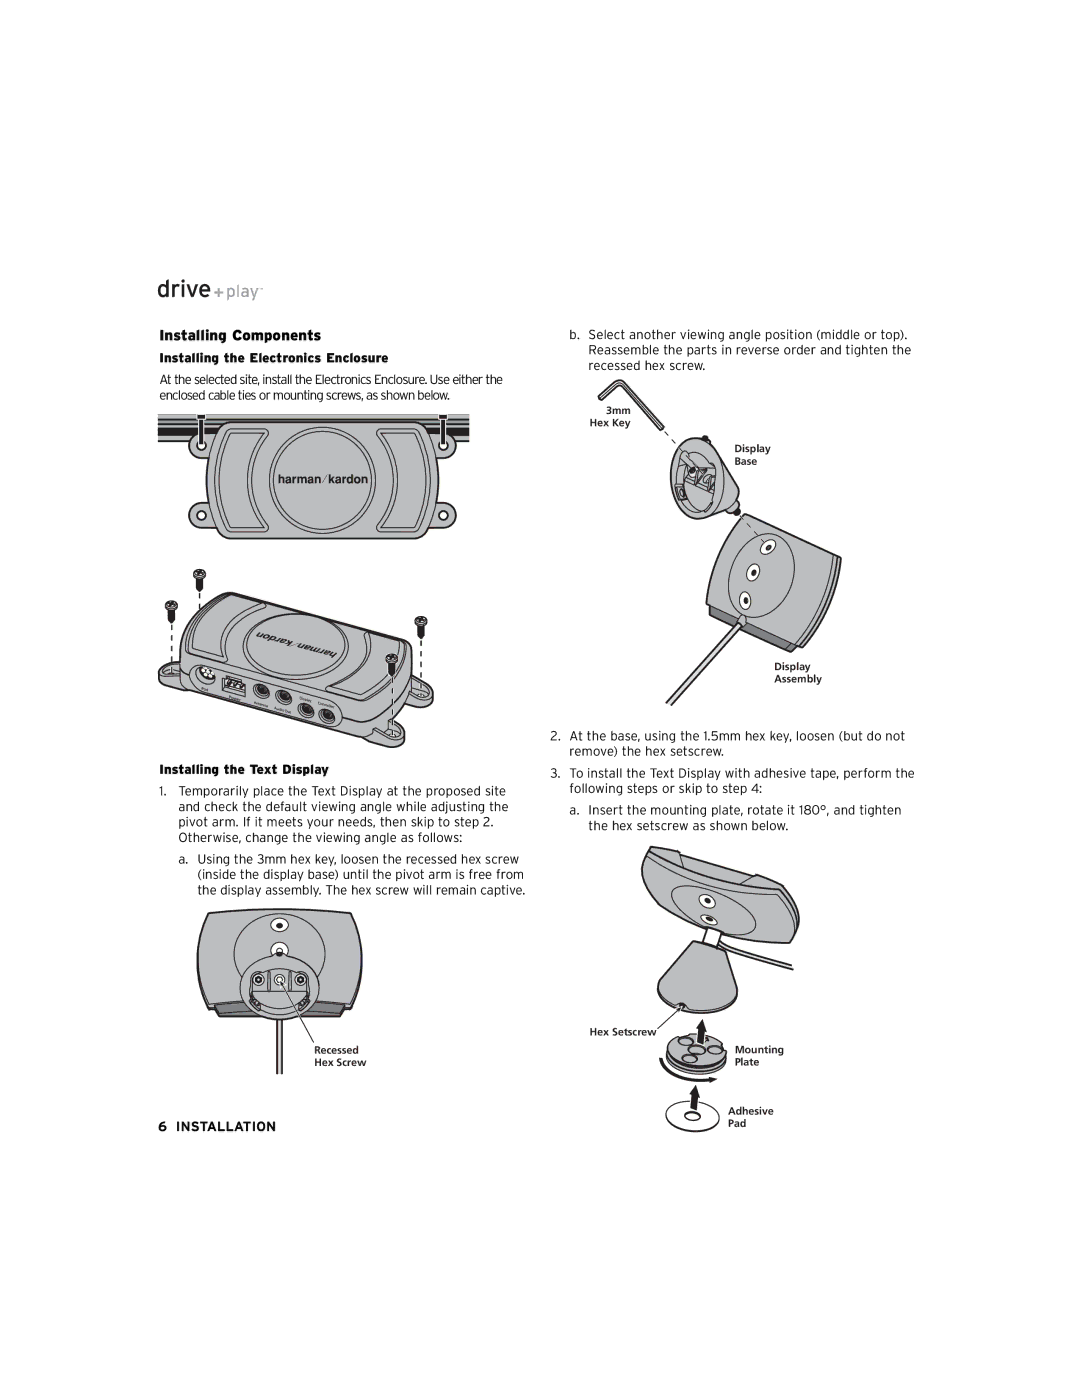
At the selected site, install the Electronics Enclosure. Use either the enclosed cable ties or mounting screws, as shown below.
Installing the Text Display
1.Temporarily place the Text Display at the proposed site and check the default viewing angle while adjusting the pivot arm. If it meets your needs, then skip to step 2.
Otherwise, change the viewing angle as follows:
a.Using the 3mm hex key, loosen the recessed hex screw (inside the display base) until the pivot arm is free from the display assembly. The hex screw will remain captive.
b.Select another viewing angle position (middle or top). Reassemble the parts in reverse order and tighten the recessed hex screw.
3mm Hex Key
Display
Base
Display
Assembly
2.At the base, using the 1.5mm hex key, loosen (but do not remove) the hex setscrew.
3.To install the Text Display with adhesive tape, perform the following steps or skip to step 4:
a.Insert the mounting plate, rotate it 180°, and tighten the hex setscrew as shown below.
| Hex Setscrew |
Recessed | Mounting |
Hex Screw | Plate |
| Adhesive |
6 INSTALLATION | Pad |
