b.At the proposed site, wipe the surface and exposed mounting plate with one of the enclosed alcohol pads. Allow both to dry.
c.Remove the protective tape from one side of one of the enclosed adhesive pads, and press the pad against the mounting plate.
d.Remove the remaining protective tape, and press and hold the Text Display to its site for 5 seconds.
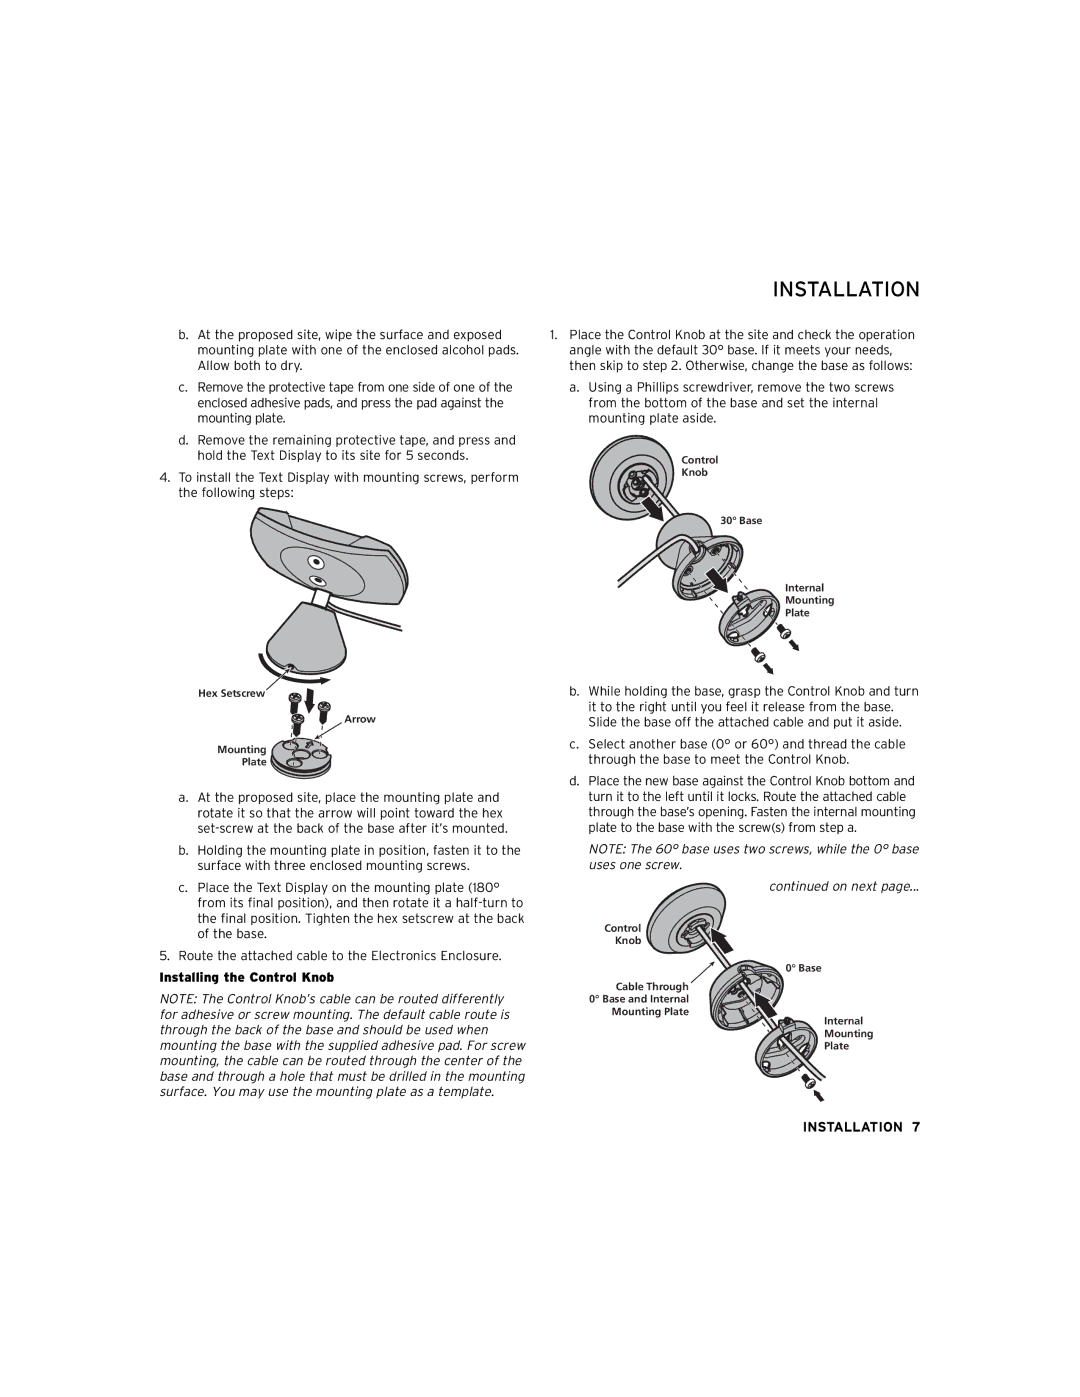
4.To install the Text Display with mounting screws, perform the following steps:
INSTALLATION
1.Place the Control Knob at the site and check the operation angle with the default 30° base. If it meets your needs, then skip to step 2. Otherwise, change the base as follows:
a.Using a Phillips screwdriver, remove the two screws from the bottom of the base and set the internal mounting plate aside.
Control
Knob
30° Base
Internal
Mounting
Plate
Hex Setscrew
Arrow
Mounting
Plate
a.At the proposed site, place the mounting plate and rotate it so that the arrow will point toward the hex
b.Holding the mounting plate in position, fasten it to the surface with three enclosed mounting screws.
c.Place the Text Display on the mounting plate (180° from its final position), and then rotate it a
5.Route the attached cable to the Electronics Enclosure.
Installing the Control Knob
NOTE: The Control Knob’s cable can be routed differently for adhesive or screw mounting. The default cable route is through the back of the base and should be used when mounting the base with the supplied adhesive pad. For screw mounting, the cable can be routed through the center of the base and through a hole that must be drilled in the mounting surface. You may use the mounting plate as a template.
b.While holding the base, grasp the Control Knob and turn it to the right until you feel it release from the base. Slide the base off the attached cable and put it aside.
c.Select another base (0° or 60°) and thread the cable through the base to meet the Control Knob.
d.Place the new base against the Control Knob bottom and turn it to the left until it locks. Route the attached cable through the base’s opening. Fasten the internal mounting plate to the base with the screw(s) from step a.
NOTE: The 60° base uses two screws, while the 0° base uses one screw.
continued on next page...
Control
Knob
0° Base
Cable Through
0° Base and Internal
Mounting Plate
Internal
Mounting
Plate
INSTALLATION 7