Maintenance
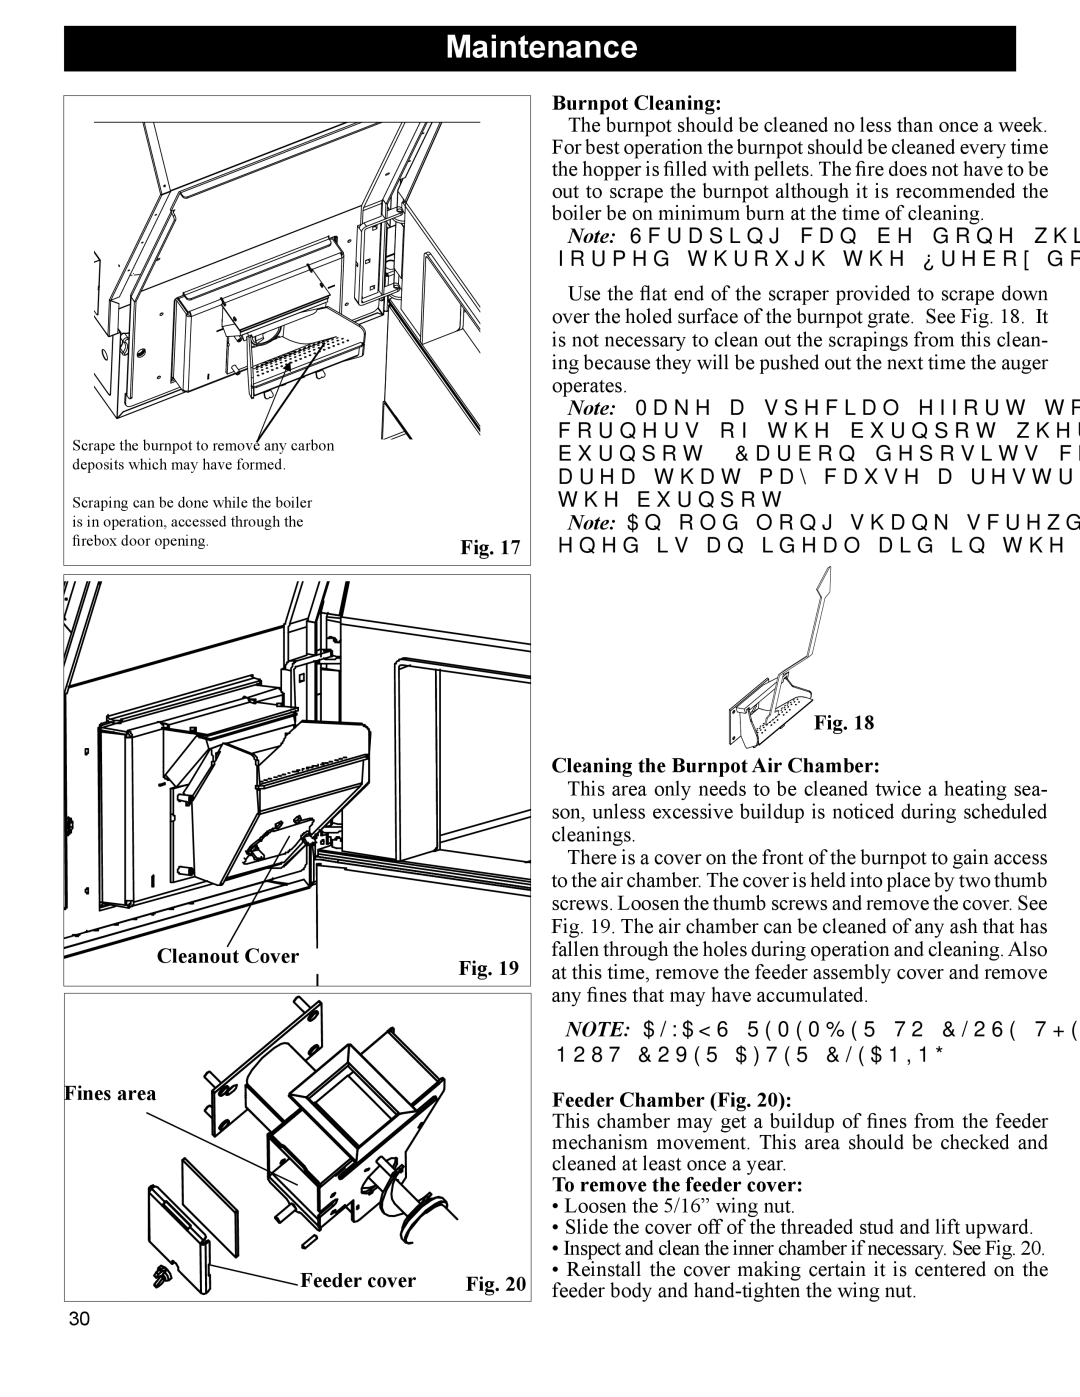
Scrape the burnpot to remove any carbon |
|
deposits which may have formed. |
|
Scraping can be done while the boiler |
|
is in operation, accessed through the |
|
firebox door opening. | Fig. 17 |
|
Burnpot Cleaning:
The burnpot should be cleaned no less than once a week. For best operation the burnpot should be cleaned every time the hopper is filled with pellets. The fire does not have to be out to scrape the burnpot although it is recommended the boiler be on minimum burn at the time of cleaning.
Note: Scraping can be done while in operation if per- formed through the firebox door opening. See Fig. 17
Use the flat end of the scraper provided to scrape down over the holed surface of the burnpot grate. See Fig. 18. It is not necessary to clean out the scrapings from this clean- ing because they will be pushed out the next time the auger operates.
Note: Make a special effort to scrape the bottom inside corners of the burnpot where the auger tube enters the burnpot. Carbon deposits can build up over time in this area that may cause a restriction to the flow of pellets into the burnpot.
Note: An old long shank screwdriver with the end sharp- ened is an ideal aid in the removal of these deposits.
Cleanout Cover | Fig. 19 |
|
Fines area
Feeder cover | Fig. 20 |
![]()
![]()
![]()
![]()
![]()
![]()
![]()
![]()
![]()
![]()
![]()
![]()
![]() Fig. 18
Fig. 18
Cleaning the Burnpot Air Chamber:
This area only needs to be cleaned twice a heating sea- son, unless excessive buildup is noticed during scheduled cleanings.
There is a cover on the front of the burnpot to gain access to the air chamber. The cover is held into place by two thumb screws. Loosen the thumb screws and remove the cover. See Fig. 19. The air chamber can be cleaned of any ash that has fallen through the holes during operation and cleaning. Also at this time, remove the feeder assembly cover and remove any fines that may have accumulated.
NOTE: ALWAYS REMEMBER TO CLOSE THE CLEA- NOUT COVER AFTER CLEANING.
Feeder Chamber (Fig. 20):
This chamber may get a buildup of fines from the feeder mechanism movement. This area should be checked and cleaned at least once a year.
To remove the feeder cover:
• Loosen the 5/16” wing nut.
• Slide the cover off of the threaded stud and lift upward.
• Inspect and clean the inner chamber if necessary. See Fig. 20.
• Reinstall the cover making certain it is centered on the feeder body and
30
