2700-I WOOD INSERT (ACT)
R
OPTIONAL QUICK CONNECT COLLAR
If you would like to use the Quick Connect Collar for easy flue installation and removal, follow the directions below.
1.Attach venting to Quick Connect Collar. Secure with 2 screws.
2.Remove baffle and ceramic blanket. See page 20.
3.Partially insert chimney ring bolts
4.Slide appliance into place.
5.From inside the unit, reach through chimney ring hole, grab the horizontal bar handle pulling venting to the unit.
Line up the slots in Quick Connect Collar with the bolts.
6.Rotate Quick Connect Collar clockwise and tighten bolts.
7.
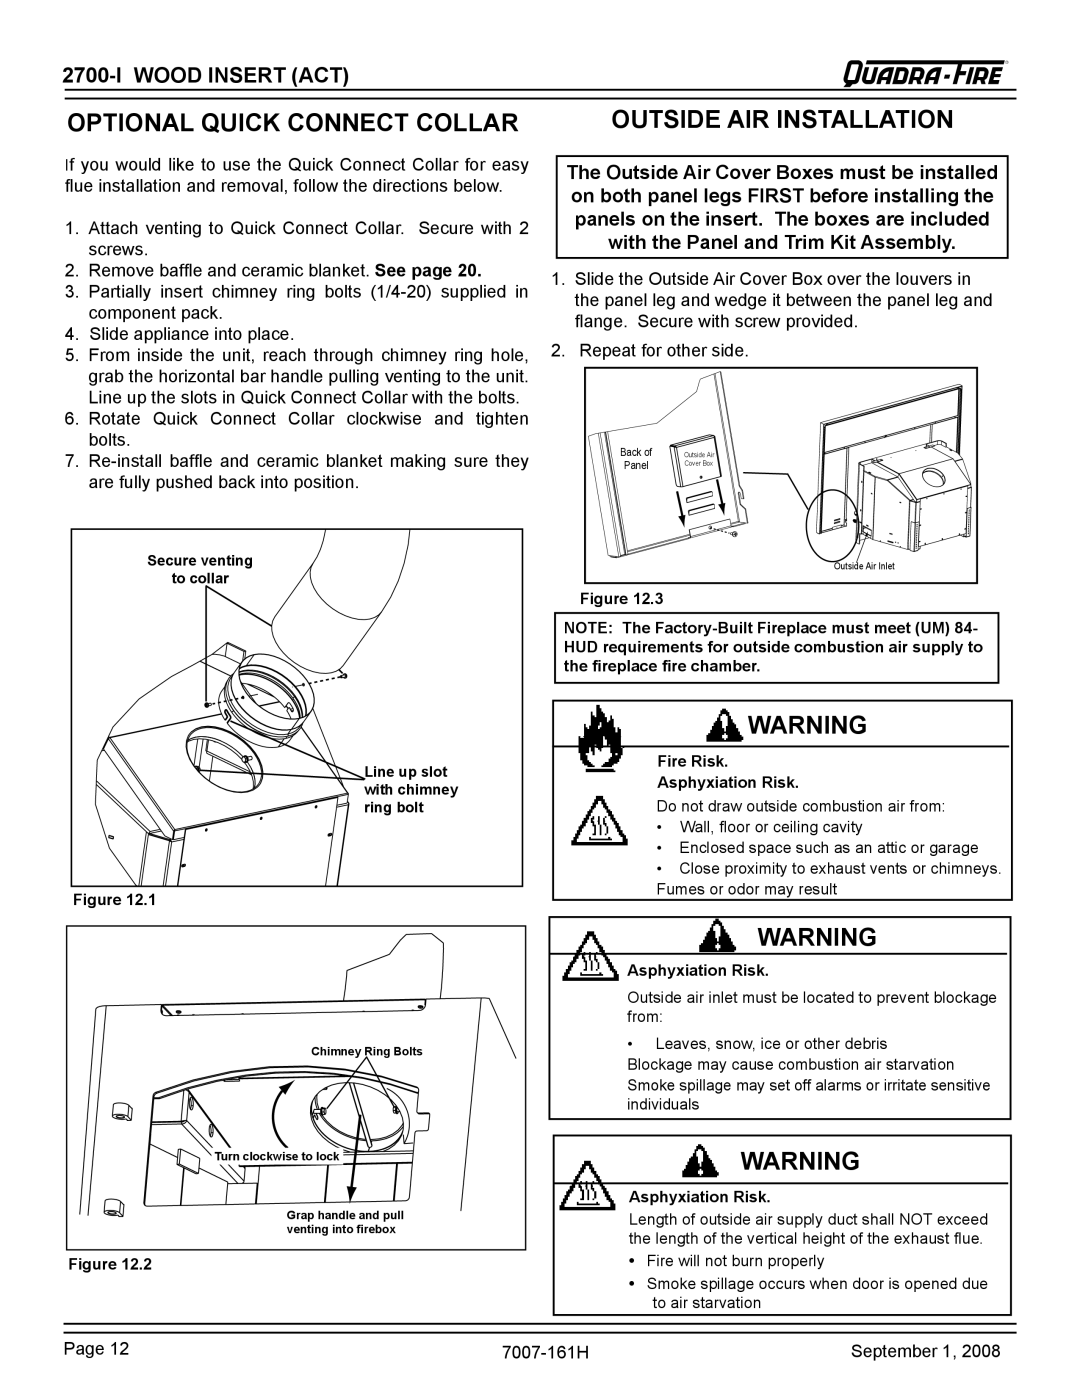
Secure venting
to collar
Line up slot with chimney ring bolt
Figure 12.1
Chimney Ring Bolts |
Turn clockwise to lock |
Grap handle and pull |
venting into firebox |
Figure 12.2
OUTSIDE AIR INSTALLATION
The Outside Air Cover Boxes must be installed on both panel legs FIRST before installing the panels on the insert. The boxes are included with the Panel and Trim Kit Assembly.
1.Slide the Outside Air Cover Box over the louvers in the panel leg and wedge it between the panel leg and flange. Secure with screw provided.
2.Repeat for other side.
Back of | Outside Air |
Panel | Cover Box |
| |
| Outside Air Inlet |
Figure 12.3
NOTE: The
WARNING
Fire Risk.
Asphyxiation Risk.
Do not draw outside combustion air from:
•Wall, floor or ceiling cavity
•Enclosed space such as an attic or garage
•Close proximity to exhaust vents or chimneys.
Fumes or odor may result
WARNING
Asphyxiation Risk.
Outside air inlet must be located to prevent blockage from:
•Leaves, snow, ice or other debris
Blockage may cause combustion air starvation Smoke spillage may set off alarms or irritate sensitive individuals
WARNING
Asphyxiation Risk.
Length of outside air supply duct shall NOT exceed the length of the vertical height of the exhaust flue.
•Fire will not burn properly
•Smoke spillage occurs when door is opened due to air starvation
Page 12 | September 1, 2008 |