R
BLOWER CORD LOCATION & BLOWER
CONTROL BOX WITH SWITCH
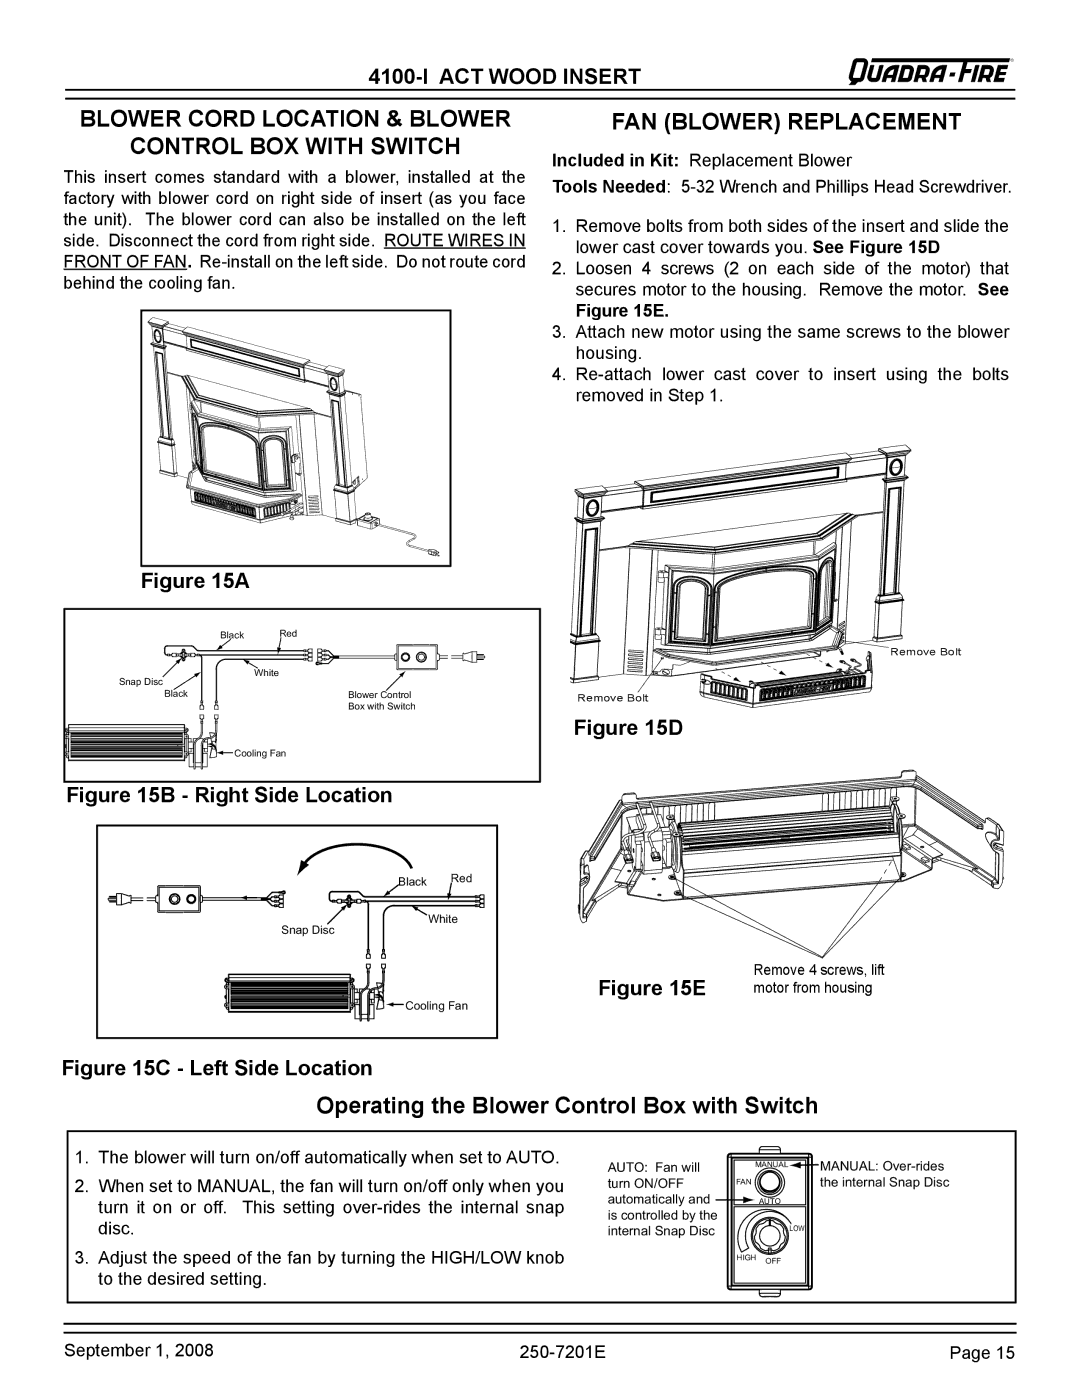
This insert comes standard with a blower, installed at the factory with blower cord on right side of insert (as you face the unit). The blower cord can also be installed on the left side. Disconnect the cord from right side. ROUTE WIRES IN FRONT OF FAN.
FAN (BLOWER) REPLACEMENT
Included in Kit: Replacement Blower
Tools Needed:
1.Remove bolts from both sides of the insert and slide the lower cast cover towards you. See Figure 15D
2.Loosen 4 screws (2 on each side of the motor) that secures motor to the housing. Remove the motor. See
Figure 15E.
3.Attach new motor using the same screws to the blower housing.
4.
Figure 15A
Black | Red |
Snap Disc | White |
| |
Black | Blower Control |
| Box with Switch |
Cooling Fan | |
Figure 15B - Right Side Location | |
Remove Bolt
Remove Bolt
Figure 15D
Black | Red |
Snap Disc | White |
| |
Cooling Fan | |
Figure 15E
Remove 4 screws, lift motor from housing
Figure 15C - Left Side Location
Operating the Blower Control Box with Switch
1.The blower will turn on/off automatically when set to AUTO.
2.When set to MANUAL, the fan will turn on/off only when you turn it on or off. This setting
3.Adjust the speed of the fan by turning the HIGH/LOW knob to the desired setting.
AUTO: Fan will | MANUAL |
| |
turn ON/OFF | FAN |
automatically and | AUTO |
is controlled by the |
|
|
internal Snap Disc |
| LOW |
|
| |
| HIGH | OFF |
|
|
MANUAL:
September 1, 2008 | Page 15 |
