CAUTION
Risk of damage to control.
Ensure wires are placed into correct color coded terminals without touching other wires.
•Incorrect placement or crossed wires may damage wall control.
6.Place front cover plate onto wall control.
7.Place bottom of wall control faceplate into grooves. Snap upper faceplate into place.
Installing the Hi/Lo Solenoid
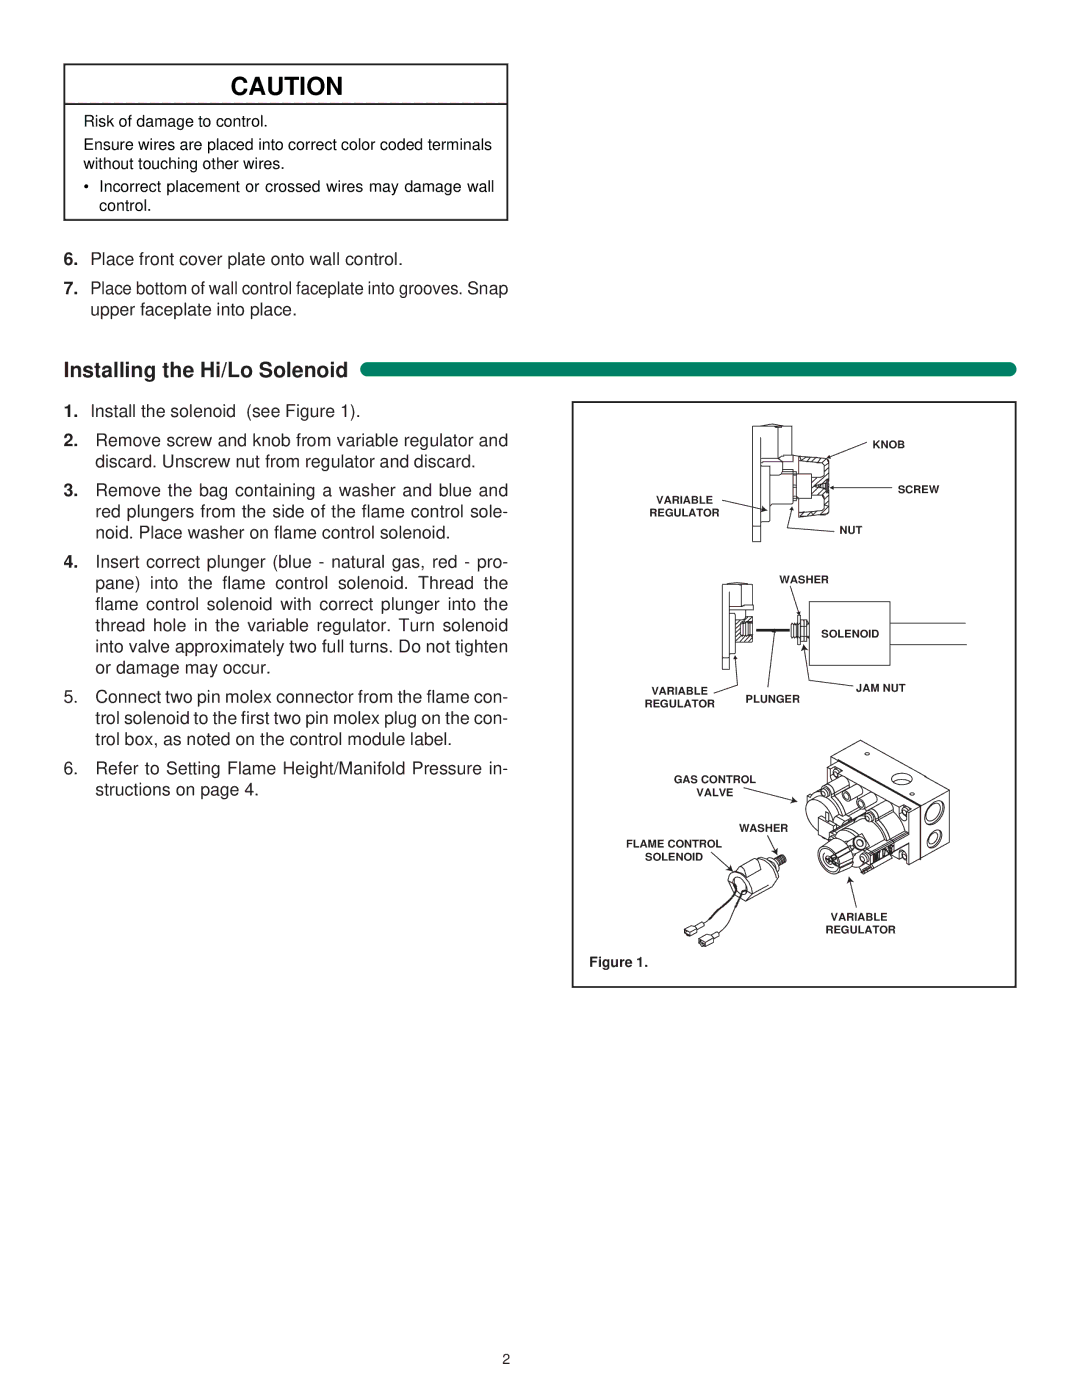
1.Install the solenoid (see Figure 1).
2.Remove screw and knob from variable regulator and discard. Unscrew nut from regulator and discard.
3.Remove the bag containing a washer and blue and red plungers from the side of the flame control sole- noid. Place washer on flame control solenoid.
4.Insert correct plunger (blue - natural gas, red - pro- pane) into the flame control solenoid. Thread the flame control solenoid with correct plunger into the thread hole in the variable regulator. Turn solenoid into valve approximately two full turns. Do not tighten or damage may occur.
5.Connect two pin molex connector from the flame con- trol solenoid to the first two pin molex plug on the con- trol box, as noted on the control module label.
6.Refer to Setting Flame Height/Manifold Pressure in- structions on page 4.
![]() KNOB
KNOB
SCREW
VARIABLE REGULATOR
NUT
| WASHER |
| SOLENOID |
VARIABLE | JAM NUT |
REGULATOR | PLUNGER |
|
GAS CONTROL
VALVE
WASHER
FLAME CONTROL
SOLENOID
VARIABLE
REGULATOR
Figure 1.
2