2.SERVICE
GRASS BAG REMOVAL AND INSTALLATION
![]() Objects thrown by the blades can Off (RT.O.1, and shut off the engine, before opening the worn or damaged grass bags.
Objects thrown by the blades can Off (RT.O.1, and shut off the engine, before opening the worn or damaged grass bags.
Removal
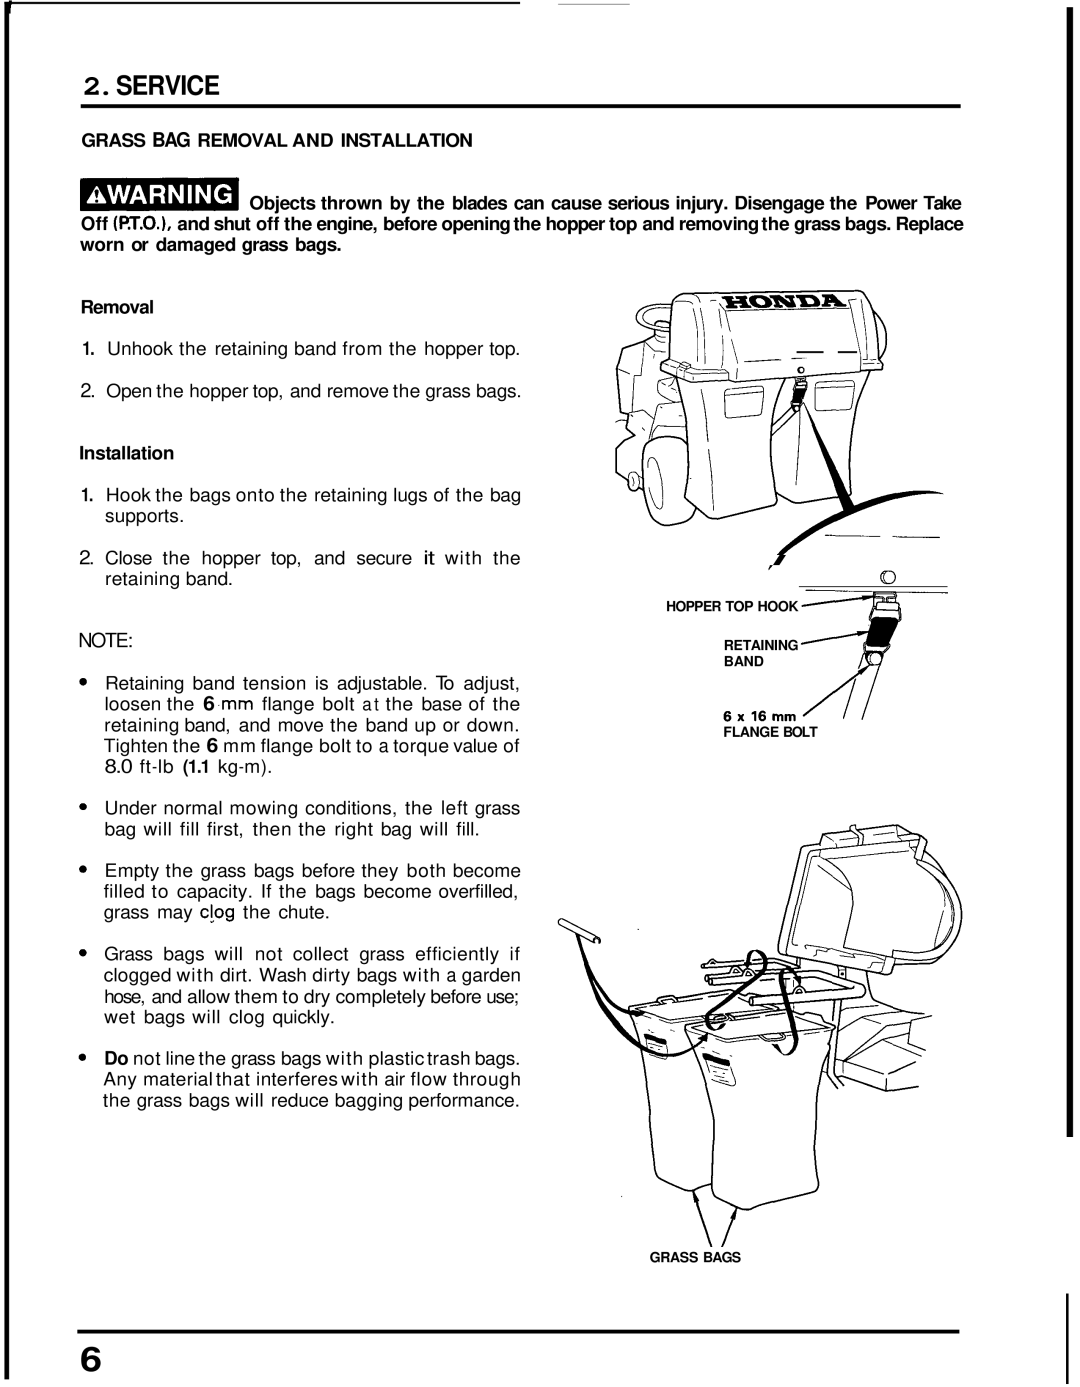
1.Unhook the retaining band from the hopper top.
2.Open the hopper top, and remove the grass bags.
Installation
1.Hook the bags onto the retaining lugs of the bag supports.
cause serious injury. Disengage the Power Take hopper top and removing the grass bags. Replace
- -
2.Close the hopper top, and secure it with the retaining band.
I
UJ
HOPPER TOP HOOK
NOTE:
Retaining band tension is adjustable. To adjust, loosen the 6 .mm flange bolt a t the base of the retaining band, and move the band up or down. Tighten the 6 mm flange bolt to a torque value of
8.0
Under normal mowing conditions, the left grass bag will fill first, then the right bag will fill.
Empty the grass bags before they both become filled to capacity. If the bags become overfilled, grass may c!og the chute.
Grass bags will not collect grass efficiently if clogged with dirt. Wash dirty bags with a garden hose, and allow them to dry completely before use; wet bags will clog quickly.
Do not line the grass bags with plastic trash bags. Any material that interferes with air flow through the grass bags will reduce bagging performance.
RETAINING
BAND
6 x l 6 m m
FLANGE BOLT
. _
GRASS BAGS
6
