
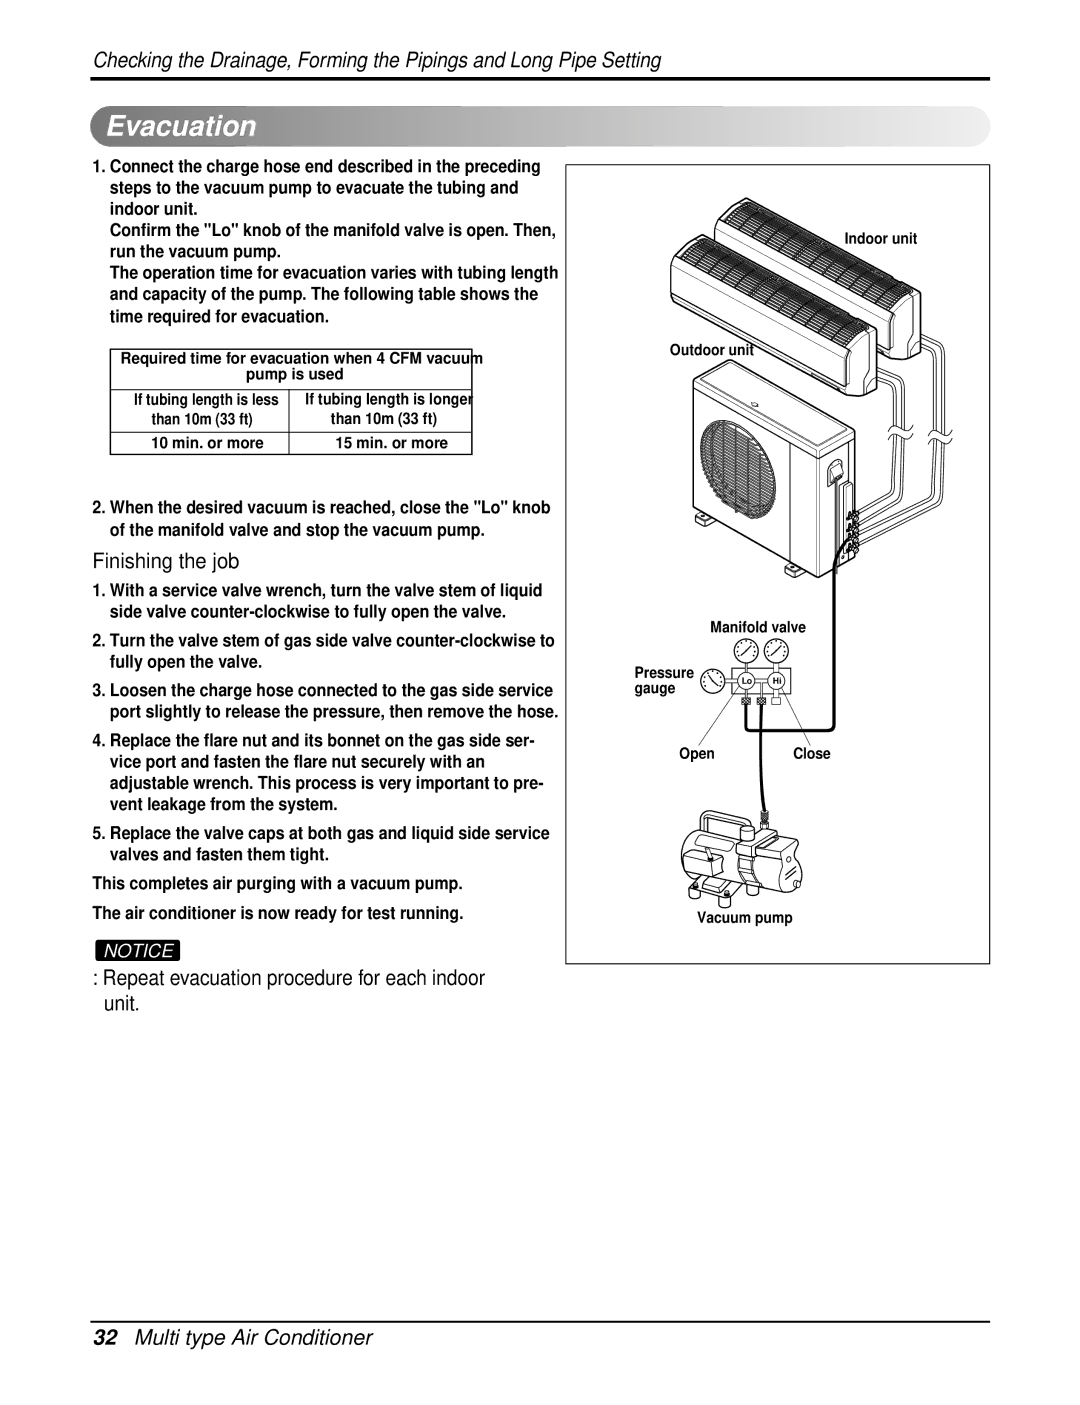
DMC24DB-1, DMH24DB-1 specifications
The Heat Controller DMH24DB-1 and DMC24DB-1 units stand out in the realm of climate control solutions, combining advanced technology with user-friendly features to enhance indoor comfort. These air conditioning systems are designed to provide efficient cooling and heating for both residential and commercial spaces.One of the main features of the DMH24DB-1 and DMC24DB-1 is their inverter technology. This cutting-edge technology allows the units to adjust the compressor speed according to the cooling demands of the space, leading to significant energy savings. By operating at variable speeds instead of a fixed setting, the inverter provides a more consistent temperature, reduces wear and tear on components, and minimizes energy consumption, which can translate to lower electricity bills.
Both models offer a sleek and modern design, making them not only functional but also aesthetically pleasing. The indoor units are designed for easy placement in various environments and can blend seamlessly with any decor. In addition, they are relatively quiet during operation, with low noise levels that enhance indoor comfort without disturbing daily activities.
Another notable feature is the integrated smart control system that allows users to operate the units via a smartphone or tablet. This capability offers the convenience of adjusting settings from anywhere, ensuring that your space is always at the desired temperature when you arrive home or the office. The app can provide insights into energy consumption, allowing users to make informed decisions about their heating and cooling usage.
The DMH24DB-1 and DMC24DB-1 models also boast efficient filtration systems that help improve indoor air quality. The filters are designed to capture dust, pollen, and other allergens, contributing to a healthier living or working environment. This is particularly important for individuals with allergies or respiratory issues.
With a variety of cooling and heating modes, these units can cater to different user preferences and seasonal demands. Features like turbo mode are designed to quickly bring a space to the desired temperature, while the eco-friendly refrigerant helps reduce environmental impact.
In summary, the Heat Controller DMH24DB-1 and DMC24DB-1 units are high-performance air conditioning systems equipped with advanced technologies and practical features, making them an excellent choice for anyone seeking efficient and reliable climate control solutions. Their energy efficiency, enhanced air quality, and smart technology integration position them as leaders in the market.