English
CUTTING OPERATIONS
There are two basic types of cuts: ripping and crosscutting. Ripping is cutting along the length and the grain of the workpiece. Crosscutting is cutting either across the width or across the grain of the workpiece. Neither ripping nor crosscutting may be done safely freehand. Ripping requires the use of the rip fence, and crosscutting requires the miter gauge.
![]() WARNING
WARNING
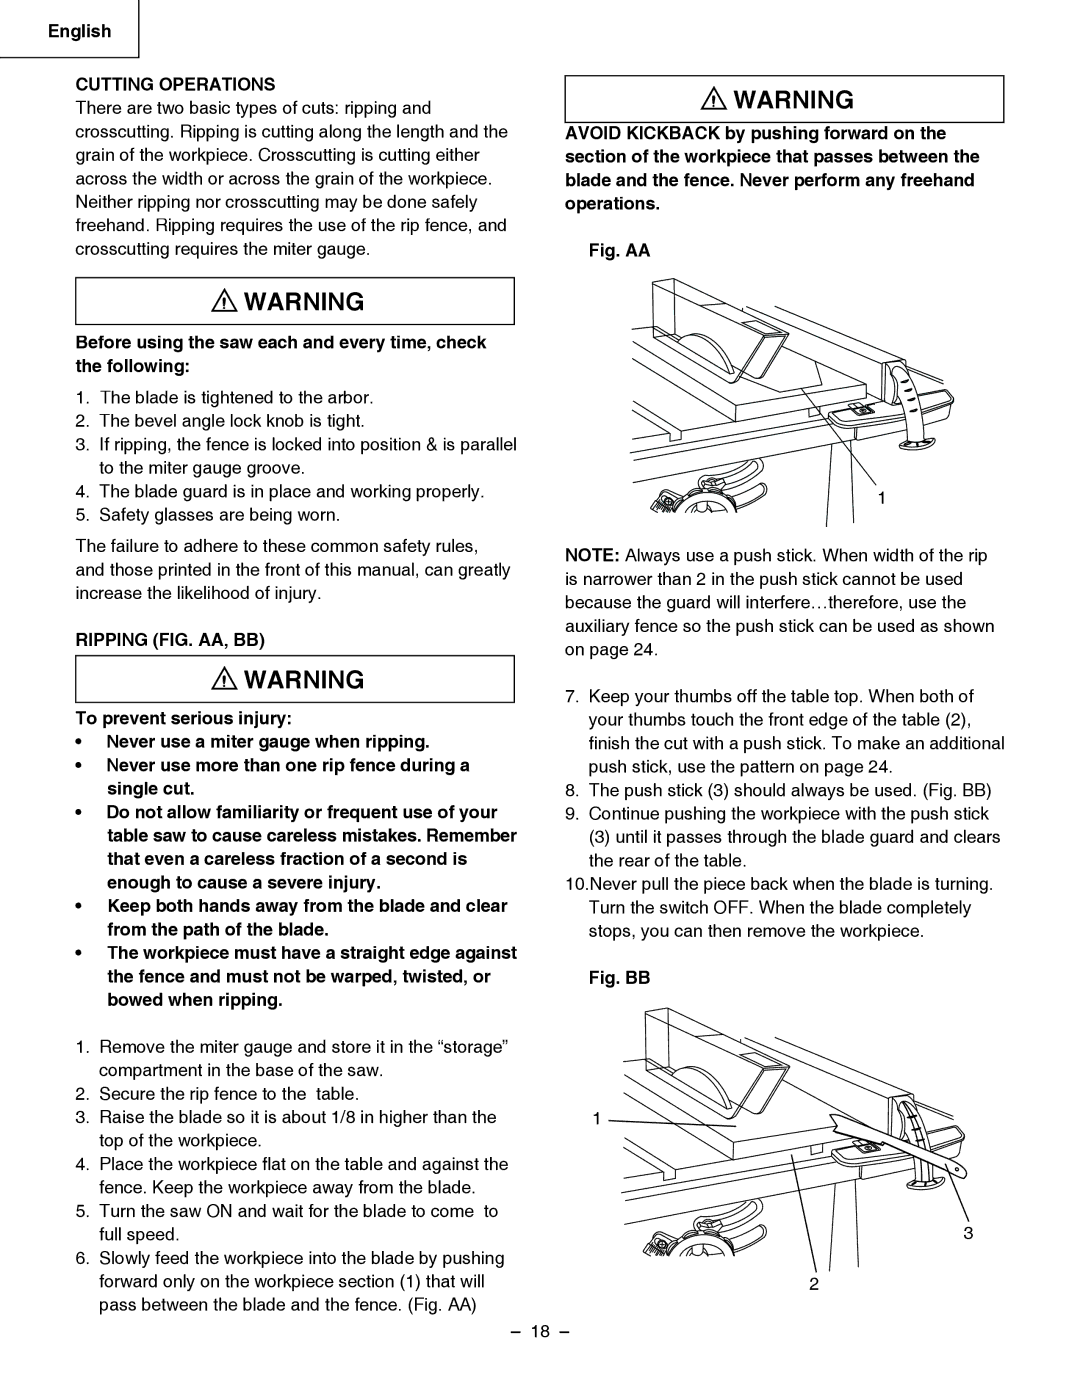
AVOID KICKBACK by pushing forward on the section of the workpiece that passes between the blade and the fence. Never perform any freehand operations.
Fig. AA
![]() WARNING
WARNING
Before using the saw each and every time, check the following:
1.The blade is tightened to the arbor.
2.The bevel angle lock knob is tight.
3.If ripping, the fence is locked into position & is parallel to the miter gauge groove.
4.The blade guard is in place and working properly.
5.Safety glasses are being worn.
The failure to adhere to these common safety rules, and those printed in the front of this manual, can greatly increase the likelihood of injury.
RIPPING (FIG. AA, BB)
1
NOTE: Always use a push stick. When width of the rip is narrower than 2 in the push stick cannot be used because the guard will interfere…therefore, use the auxiliary fence so the push stick can be used as shown on page 24.
![]() WARNING
WARNING
To prevent serious injury: | 7. | Keep your thumbs off the table top. When both of | |
| your thumbs touch the front edge of the table (2), | ||
• | Never use a miter gauge when ripping. |
| fi nish the cut with a push stick. To make an additional |
• Never use more than one rip fence during a |
| push stick, use the pattern on page 24. | |
| single cut. | 8. | The push stick (3) should always be used. (Fig. BB) |
• | Do not allow familiarity or frequent use of your | 9. | Continue pushing the workpiece with the push stick |
| table saw to cause careless mistakes. Remember |
| (3) until it passes through the blade guard and clears |
| that even a careless fraction of a second is |
| the rear of the table. |
| enough to cause a severe injury. | 10.Never pull the piece back when the blade is turning. | |
• | Keep both hands away from the blade and clear |
| Turn the switch OFF. When the blade completely |
| from the path of the blade. |
| stops, you can then remove the workpiece. |
•The workpiece must have a straight edge against
| the fence and must not be warped, twisted, or | Fig. BB |
| bowed when ripping. |
|
1. | Remove the miter gauge and store it in the “storage” |
|
| compartment in the base of the saw. |
|
2. | Secure the rip fence to the table. |
|
3. | Raise the blade so it is about 1/8 in higher than the | 1 |
| top of the workpiece. |
|
4. | Place the workpiece fl at on the table and against the |
|
| fence. Keep the workpiece away from the blade. |
|
5. | Turn the saw ON and wait for the blade to come to |
|
| full speed. | 3 |
6. | Slowly feed the workpiece into the blade by pushing |
|
| forward only on the workpiece section (1) that will | 2 |
| pass between the blade and the fence. (Fig. AA) |
|
|
| – 18 – |