English
9.Check the Power Receptacle.
To prevent overheating, accidental stopping or intermittent operation, confirm that the power plug fits properly in the electrical receptacle and does not fall out after it is inserted.
Repair or replace the receptacle, if it is faulty.
10.Confirm that the tool’s cabtire power cable is not damaged.
Repair or replace the power cord if an inspection of the cabtire cable indicates that it is damaged.
AFTER CONNECTING THE POWER PLUG TO AN APPROPRIATE AC POWER SOURCE, CHECK THE OPERATION OF THE TOOL, AS FOLLOWS:
11.Trial Run.
After confirming that no one is standing in front of it, step away from the front position and start the power tool and confirm that no operating abnormalities exist before attempting a cutting operation.
Trial run periods:
When replacing the
12.Inspect the rotating stability of the cut-off wheel.
For precise cutting, rotate the
PRACTICAL APPLICATIONS
![]() WARNING: Never remove or install a workpiece while the
WARNING: Never remove or install a workpiece while the
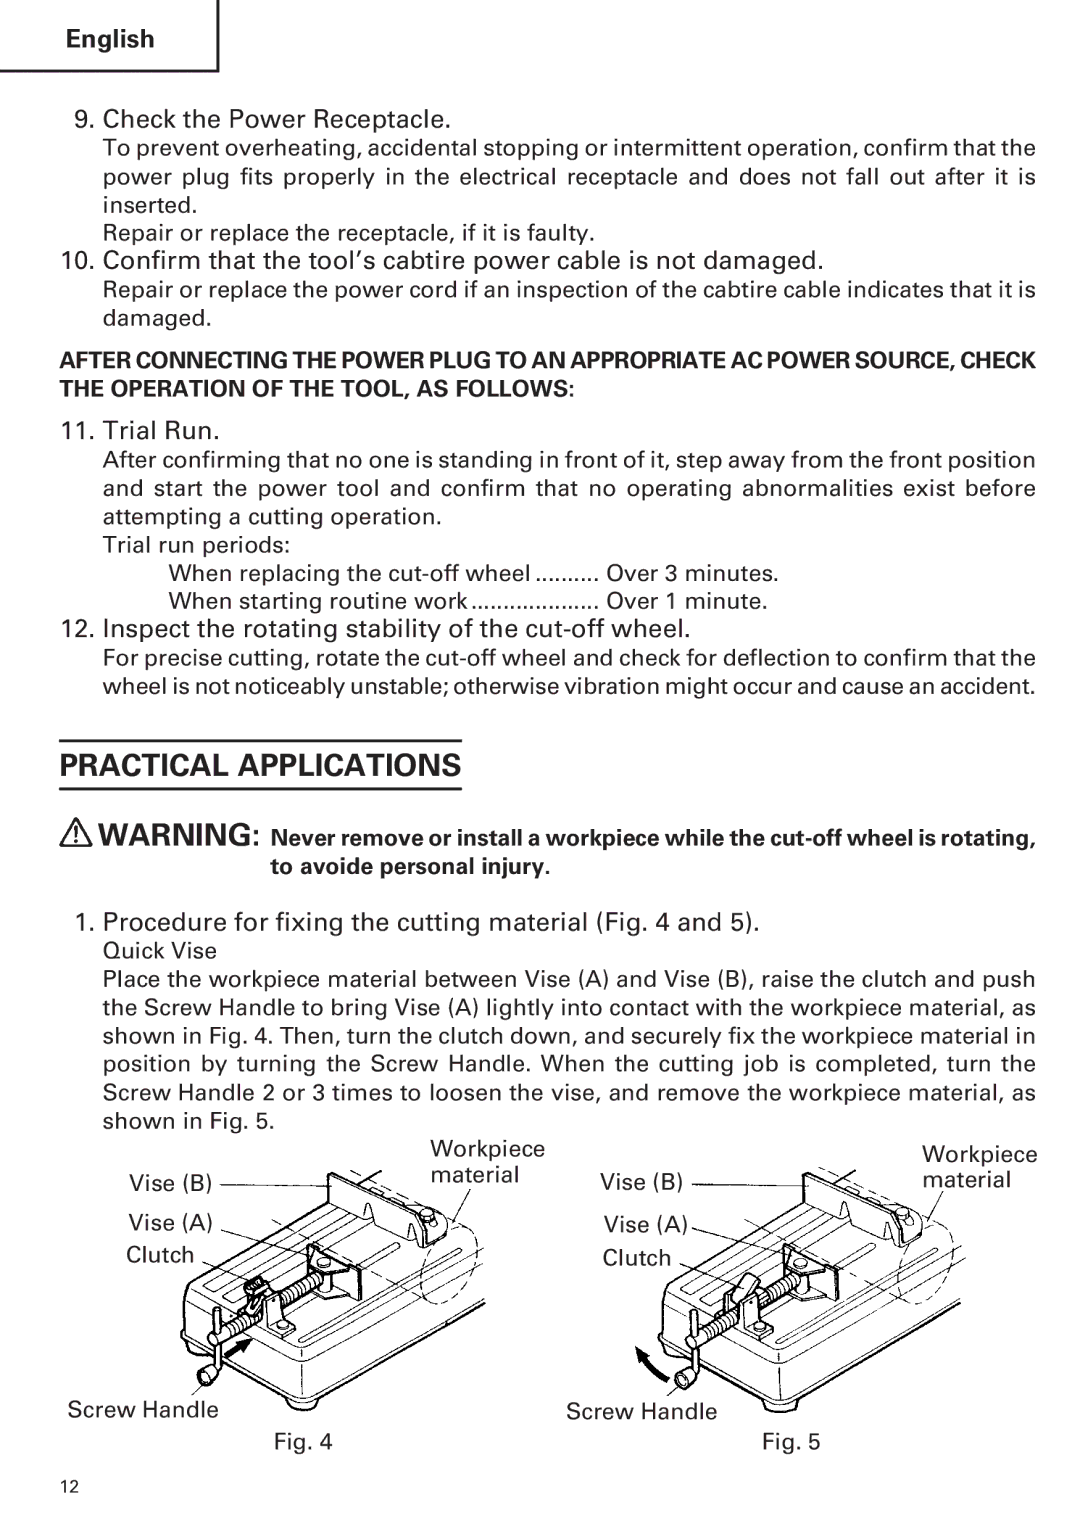
1.Procedure for fixing the cutting material (Fig. 4 and 5).
Quick Vise
Place the workpiece material between Vise (A) and Vise (B), raise the clutch and push the Screw Handle to bring Vise (A) lightly into contact with the workpiece material, as shown in Fig. 4. Then, turn the clutch down, and securely fix the workpiece material in position by turning the Screw Handle. When the cutting job is completed, turn the Screw Handle 2 or 3 times to loosen the vise, and remove the workpiece material, as shown in Fig. 5.
| Workpiece |
| Workpiece |
Vise (B) | material | Vise (B) | material |
Vise (A) |
| Vise (A) |
|
Clutch |
| Clutch |
|
Screw Handle | Screw Handle |
Fig. 4 | Fig. 5 |
12
