Example
DVD Video Recorder
Getting
FCC Note
Before moving the unit, ensure the disc tray is empty
Getting started
Features
Accessories
Table of contents
Antenna and television connections
Setting up
Do not connect the unit through a video cassette recorder
Batteries
Remote control
Use
Do not
Adding and deleting channels
If Plug-in Auto Tuning fails
Press 3, 4 to select VCR Plusr
CH Setting and press Enter
Press 3, 4 to Select Guide
Channel you want to set and press
Press 3, 4 to select the caption and then press
Other channel settings
Press 3, 4 to select the channel and then press
Press 3, 4 to select the first char- acter and then press
Television operation
Set up to match your television
Press 3, 4 to select TV Screen and press
Press 3, 4 to select TV Type and press Enter
Disc information
How to open the remote control
Remote control
Power button Í, DVD Power
Control reference guide
Unit’s display
Main unit
Recording television programs
Press REC Mode to select the recording mode next
Press ¥, REC to start recording
Recording
Recording modes and approximate recording times in hours
Inserting discs
Watching the television while recording
Recording from a video cassette recorder
Press 1 Play
Playing discs
Back
Playing
Using the Direct Navigator
When a menu screen appears on the television
Position Memory
Skipping
Other methods of play
Slow-motion play
Frame-by-frame viewing
Fast forward and rewind-SEARCH
Selecting an amount of time to skip- Time Slip
Playback by skipping to a desired time Time Navi
Marking places to play again-MARKER
Using on-screen menus to mark positions
1s10 1
Marking positions directly
Using the tree screen to find a group
Using menus to play MP3 discs
Press TOP Menu
Press 3, 4, 2, 1 to select a group and press Enter
Simultaneous rec and play
Playing while you are recording
Press 3, 4 to select a program and press Enter
Reviewing the recorded images while recording-Time Slip
Changing audio
Using the Functions window
Press Audio
Press 3, 4, 2, 1 to select an item
Using VCR Plusr codes to make timer recordings
Timer recording
Specify a time to stop recording
Press
Manually programming timer recordings
Check programs
Press Cancel or ADD/DLT to delete
Change or delete the program
Press 3, 4 to select the program
Press 3, 4, 2, 1 to select
Entering text
Character and press Enter
Editing
Press Enter at the start point
Creating play lists
To clear the play list screen
To stop partway through
Press 3, 4 to select the play list and press Enter
Playing play lists
Playing play list scenes
To erase a play list or a play list scene during playback
Editing play lists
Re-edit
Move
Erase
Editing programs
Enter at
Protection and press
Press Enter at
Start point
Erase all programs
Disc setting
Format
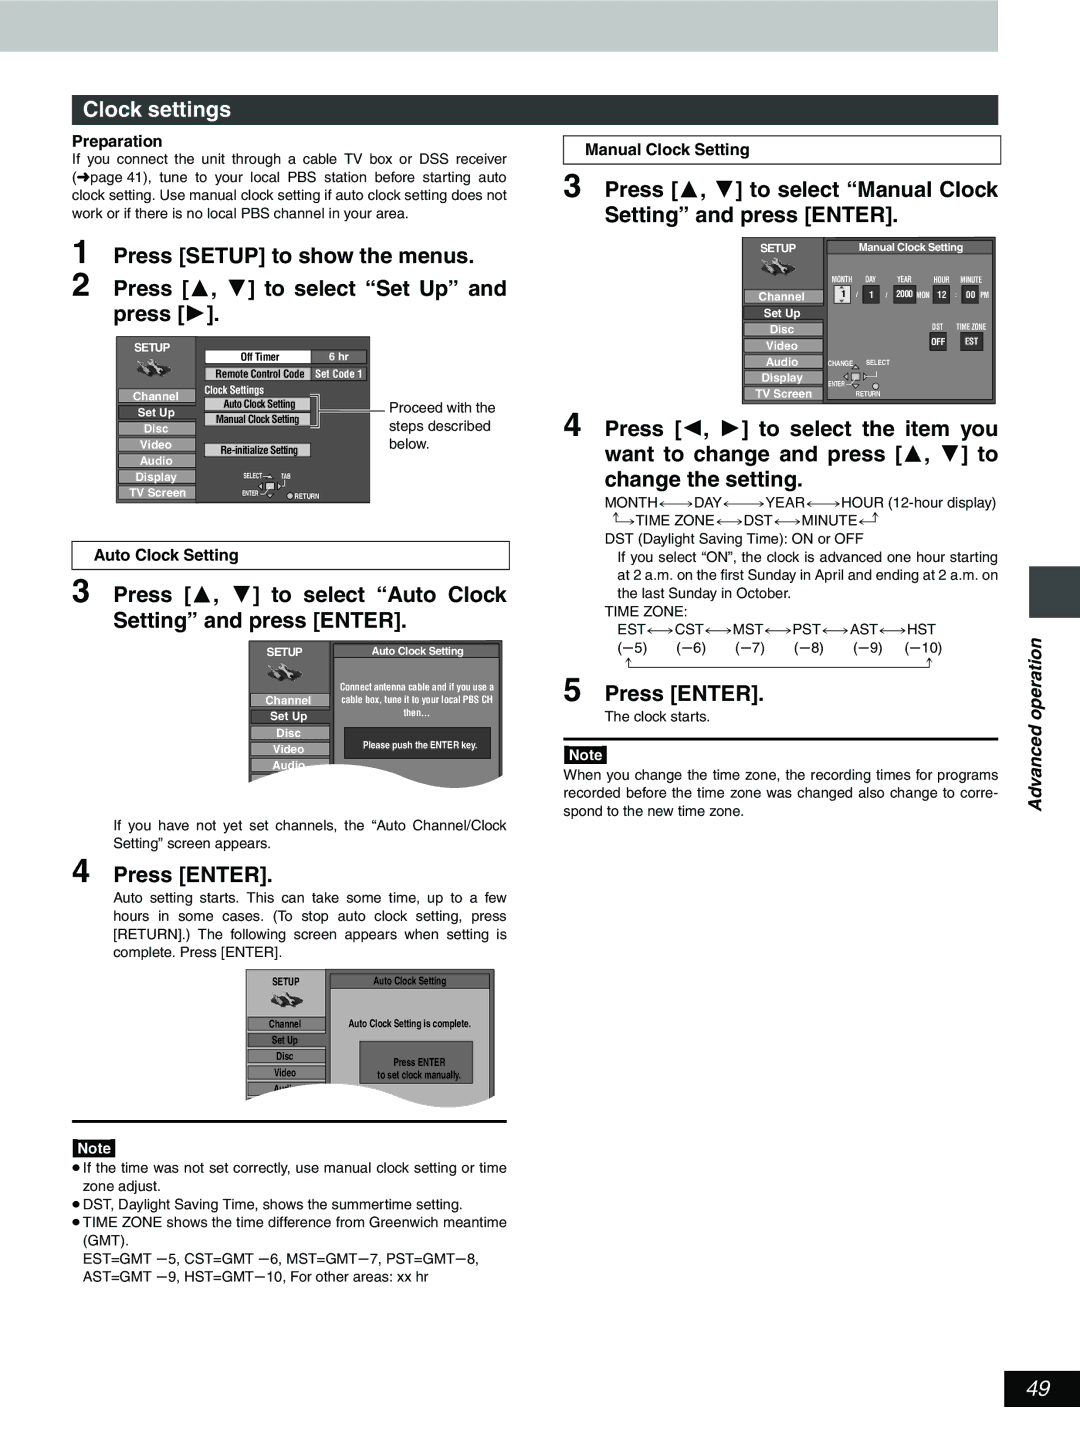
Preparation
Press 2 to Press 2 to select
Press 2 to set disc protection and press Enter
Select Yes Start and press
To stop formatting
Common procedures
Using on-screen menus
Disc menu
Advanced operation
Audio menu
Play menu
MPEG-DNR
Video menu
OFF
Changing the information displayed
On-screen displays
Press Status
Display examples
Home Theater
Enjoying more powerful sound
Enjoying CATV/Satellite broadcasts
Operation
Connecting a cable TV box/satellite receiver
Advanced
One cable TV box/satellite receiver
Recording to digital recording equipment or cassette tapes
Connecting an amplifier or system component
Digital connection
Analog connection
Video cable§
Connecting other video equipment
Other video equipment
Connect to the video and audio output terminals
Other antenna connection to the unit
Other antenna connections
Other antenna connection from the unit to the television
Press Setup
Changing the remote control code
Remote control code on the unit has been set
Remote control code on the remote control has been set
Summary of settings
Changing the unit’s settings
Screen
Audio
DTS
See page 46 for menu and option details
Set Up Disc Video Audio Display TV Screen
Press 3, 4 to select Auto Clock Setting and press Enter
Clock settings
Press 3, 4 to select Manual Clock Setting and press Enter
Auto Clock Setting
Disc handling
\Glossary
Reference
On the television
Error messages
On the unit’s display
Troubleshooting guide
Title or chapter doesn’t play
Product Service
Maintenance
To clean this unit, wipe with a soft, dry cloth
Disc or use a new disc
Specifications
Conexiones del televisor y de la antena
Instalación básica
Plug-in para Sintonización automática
Para disfrutar del vídeo progresivo
Instalación para ajustar su televisor
Guía VCR Plusi para ajuste de canales
Grabación de programas de televisión
Reproducción durante la grabación
Introducción de discos
Visualización del televisor durante la grabación
Para detener la reproducción
Reproducción de discos
Para hacer una pausa en la reproducción
Bandeja del disco
Utilización del Navegador directo
Cuando aparece una pantalla de menús en el televisor
Memoria de posición
Para borrar un programa que se está reproduciendo
Index
Clock setting CM Skip Connection
Erase
Protection