|
|
| Part names | |
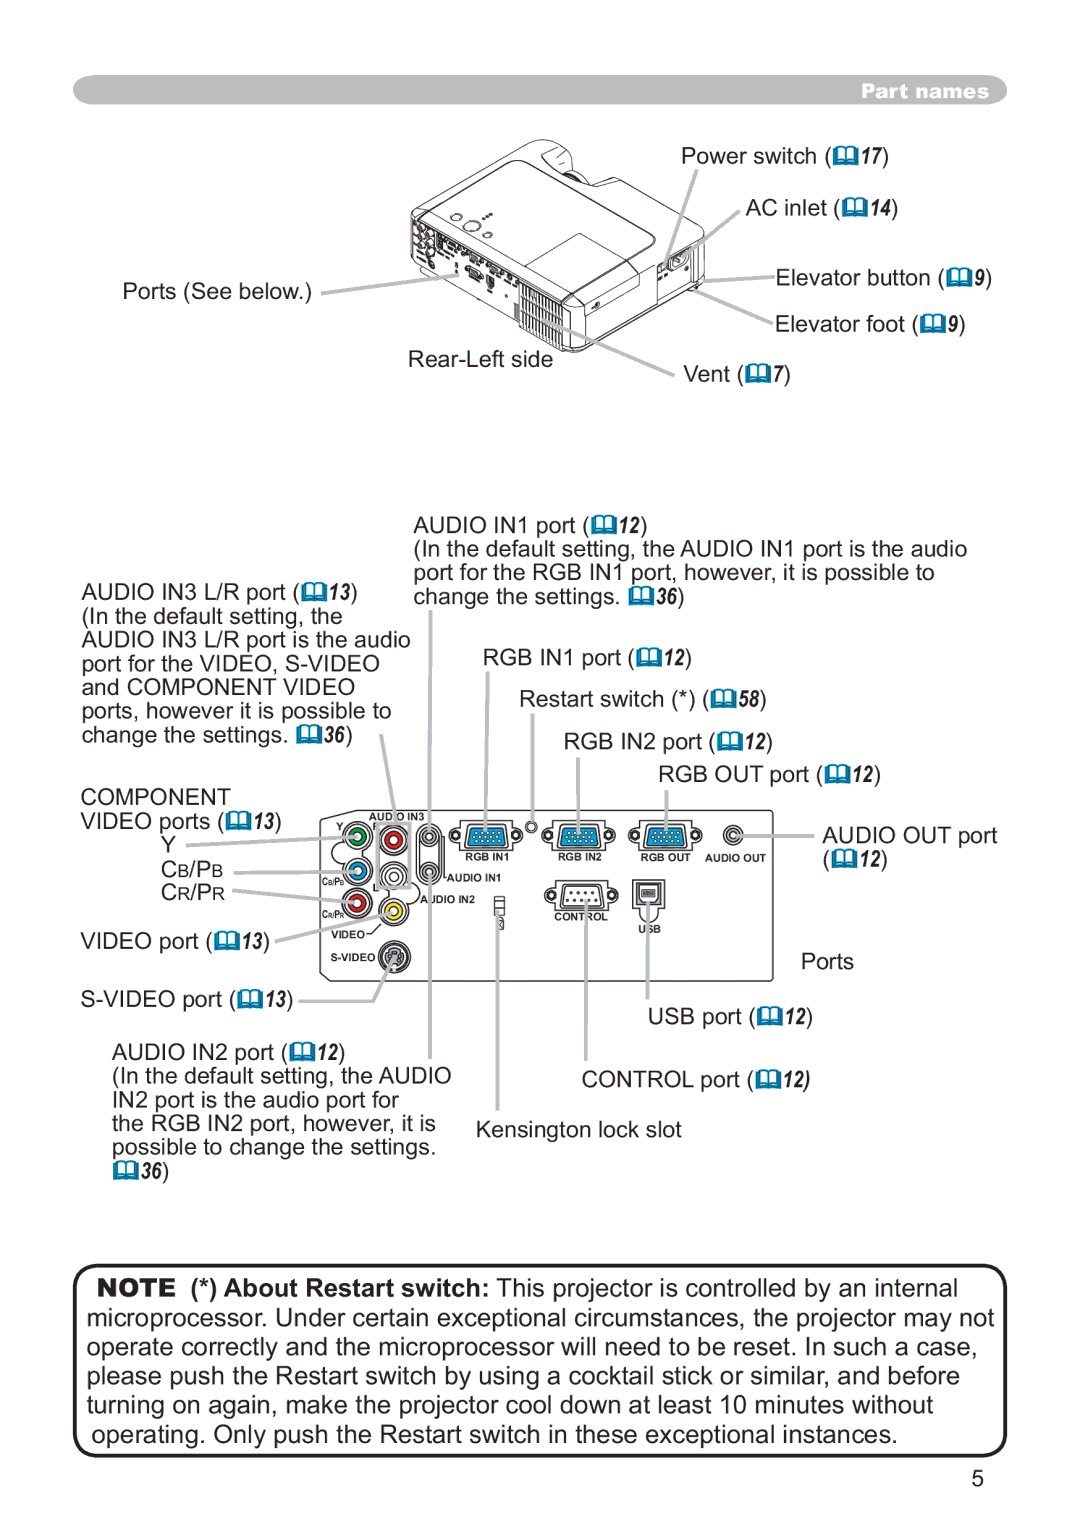
| Power switch ( | 17) |
| |
|
| AC inlet ( | 14) |
|
Ports (See below.) |
| Elevator button ( | 9) | |
|
|
| 9) | |
|
| Elevator foot ( | ||
Vent ( | 7) |
|
| |
|
|
| ||
AUDIO IN3 L/R port (![]() 13) (In the default setting, the AUDIO IN3 L/R port is the audio port for the VIDEO,
13) (In the default setting, the AUDIO IN3 L/R port is the audio port for the VIDEO, ![]() 36)
36)
AUDIO IN1 port (![]() 12)
12)
(In the default setting, the AUDIO IN1 port is the audio port for the RGB IN1 port, however, it is possible to change the settings. ![]() 36)
36)
RGB IN1 port (![]() 12)
12)
Restart switch (*) (![]() 58)
58)
RGB IN2 port (![]() 12)
12)
RGB OUT port (![]() 12)
12)
COMPONENT VIDEO ports (![]() 13)
13)
Y
CB/PB
CR/PR
VIDEO port ( 13)
13)
Y | AUDIO IN3 |
|
|
R |
|
| |
| RGB IN1 | RGB IN2 | RGB OUT AUDIO OUT |
CB/PB | AUDIO IN1 |
|
|
| L |
|
|
| AUDIO IN2 |
|
|
CR/PR | K | CONTROL | USB |
VIDEO |
| ||
|
|
|
AUDIO OUT port ( 12)
12)
![]() 13)
13)
AUDIO IN2 port (![]() 12)
12)
(In the default setting, the AUDIO IN2 port is the audio port for the RGB IN2 port, however, it is possible to change the settings.
![]() 36)
36)
Ports
USB port (![]() 12)
12)
CONTROL port (![]() 12)
12)
Kensington lock slot
NOTE (*) About Restart switch: This projector is controlled by an internal microprocessor. Under certain exceptional circumstances, the projector may not operate correctly and the microprocessor will need to be reset. In such a case, please push the Restart switch by using a cocktail stick or similar, and before turning on again, make the projector cool down at least 10 minutes without operating. Only push the Restart switch in these exceptional instances.
5