CHAPTER 2 INSTALLATION METHOD OF PRINTED BOARD

2.1 INSTALLATION METHOD OF PRINTED BOARD

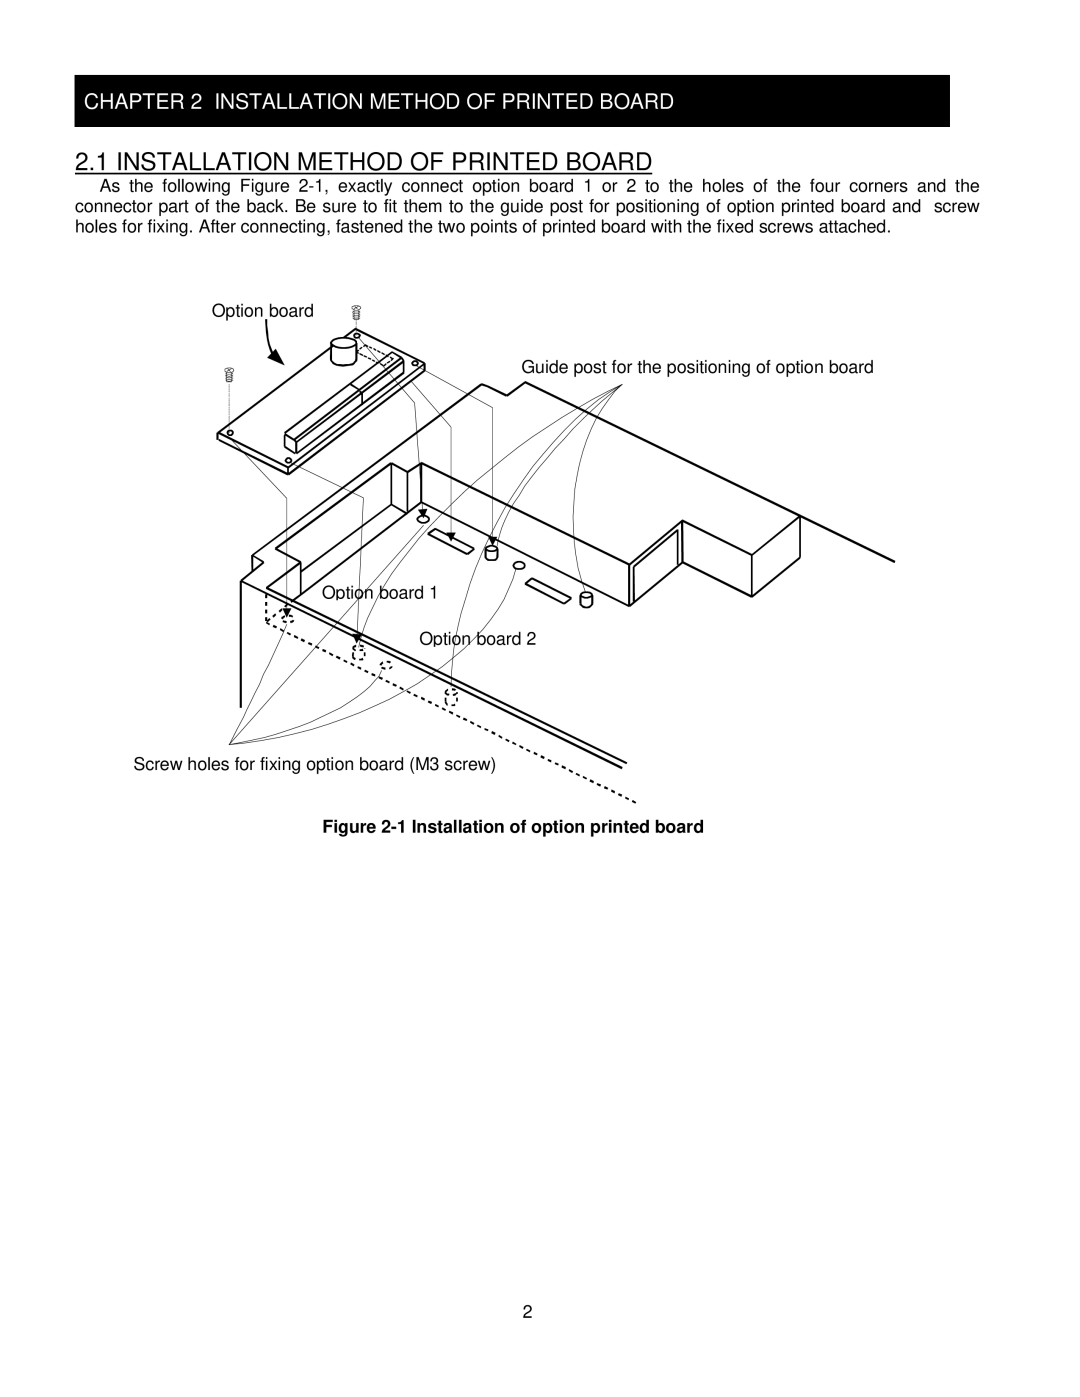
As the following Figure 2-1, exactly connect option board 1 or 2 to the holes of the four corners and the connector part of the back. Be sure to fit them to the guide post for positioning of option printed board and screw holes for fixing. After connecting, fastened the two points of printed board with the fixed screws attached.

Option board

Guide post for the positioning of option board

Option board 1

Option board 2

Screw holes for fixing option board (M3 screw)

Figure 2-1 Installation of option printed board

2
Page 8
Image 8
Hitachi SJ-DG instruction manual Installation Method of Printed Board, Installation of option printed board