QUICK START GUIDE (continued)
| Insert the Batteries into the Remote | |
3 | ||
Control... 17 | ||
| ||
|
|
4 Power On... 22 | Monitor |
|
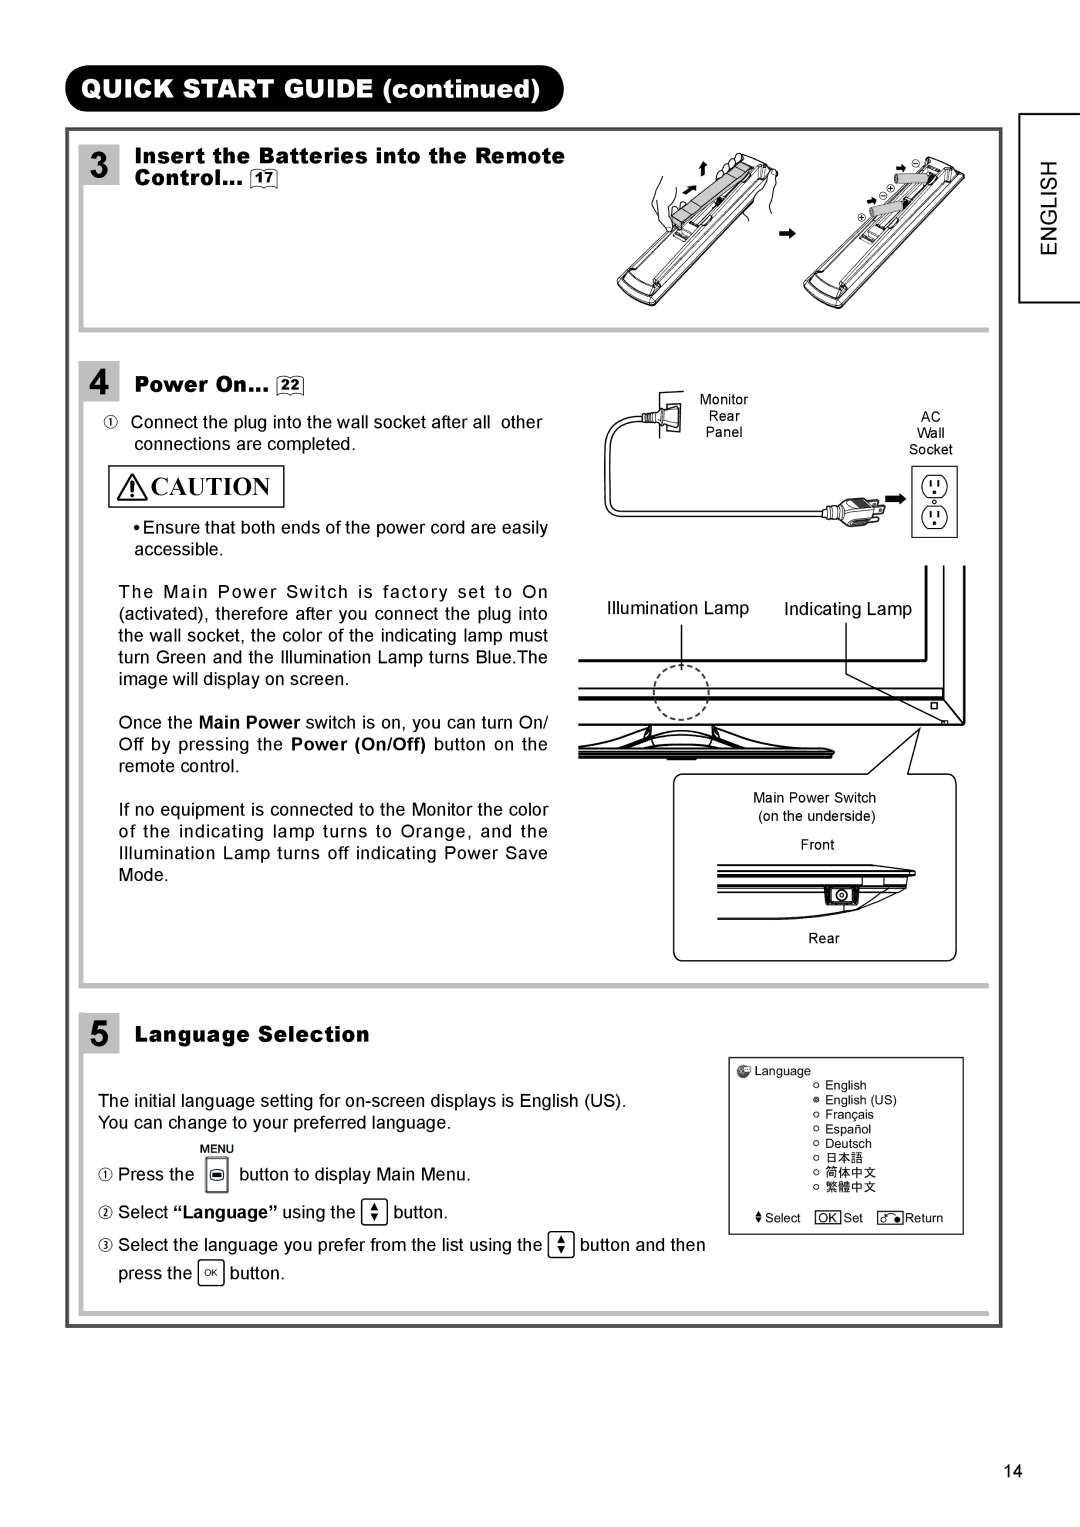
q Connect the plug into the wall socket after all other | Rear | AC |
connections are completed. | Panel | Wall |
| Socket |
ENGLISH
![]()
![]() CAUTION
CAUTION
![]() Ensure that both ends of the power cord are easily accessible.
Ensure that both ends of the power cord are easily accessible.
The Main Power Switch is factory set to On (activated), therefore after you connect the plug into the wall socket, the color of the indicating lamp must turn Green and the Illumination Lamp turns Blue.The image will display on screen.
Once the Main Power switch is on, you can turn On/ Off by pressing the Power (On/Off) button on the remote control.
If no equipment is connected to the Monitor the color of the indicating lamp turns to Orange, and the Illumination Lamp turns off indicating Power Save Mode.
Illumination Lamp | Indicating Lamp |
Main Power Switch (on the underside)
Front
Rear
5 Language Selection
The initial language setting for
qPress the ![]() button to display Main Menu.
button to display Main Menu.
wSelect “Language” using the ◄► button.
eSelect the language you prefer from the list using the ◄► button and then press the OK button.
![]() Language
Language
English
English (US)
Français
Español
Deutsch
Select OK Set | Return |
14
