Chapter 34
HowMessagingto Use the | Outbox |
|
|
| ||
Telephone |
|
|
| |||
| Displaying, editing, deleting, and |
| ||||
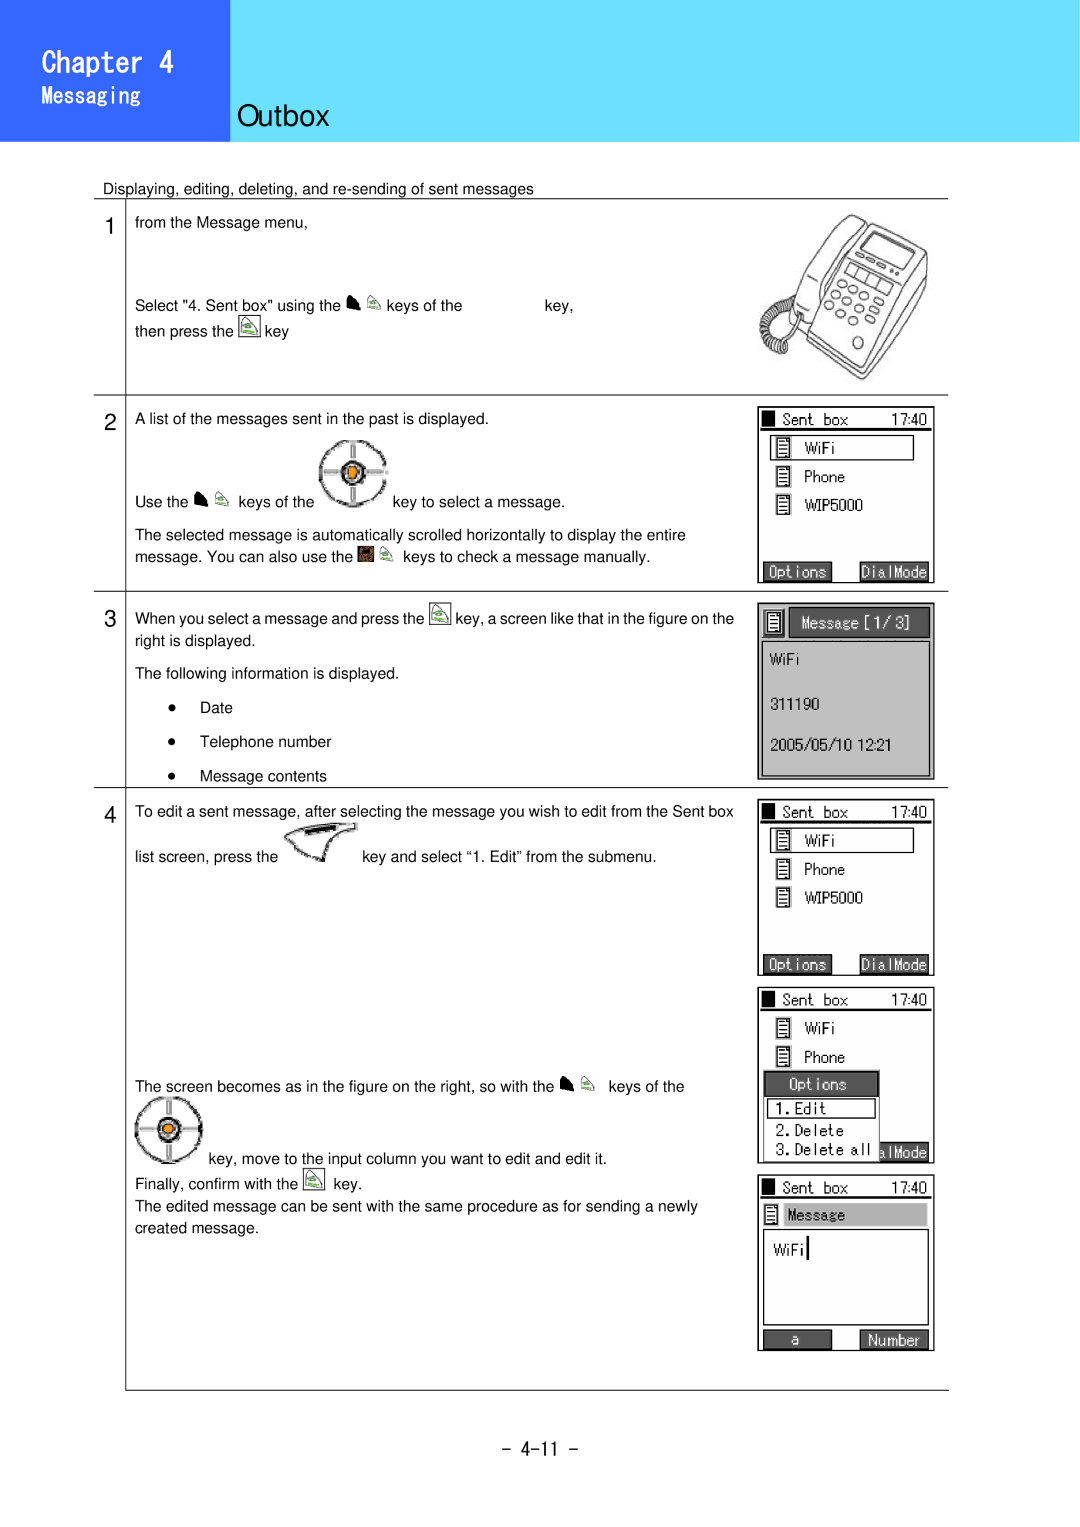
1 | from the Message menu, |
|
|
| ||
|
| Select "4. Sent box" using the | keys of the | key, | ||
|
| then press the | key |
|
|
|
|
|
|
| |||
2 | A list of the messages sent in the past is displayed. |
| ||||
|
| Use the | keys of the | key to select a message. | ||
|
| The selected message is automatically scrolled horizontally to display the entire | ||||
|
| message. You can also use the | keys to check a message manually. | |||
|
|
|
| |||
3 | When you select a message and press the | key, a screen like that in the figure on the | ||||
|
| right is displayed. |
|
|
| |
The following information is displayed.
•Date
•Telephone number
•Message contents
4 To edit a sent message, after selecting the message you wish to edit from the Sent box | |
list screen, press the | key and select “1. Edit” from the submenu. |
The screen becomes as in the figure on the right, so with the ![]()
![]() keys of the
keys of the
key, move to the input column you want to edit and edit it.
Finally, confirm with the |
| key. |
The edited message can be sent with the same procedure as for sending a newly created message.
-
