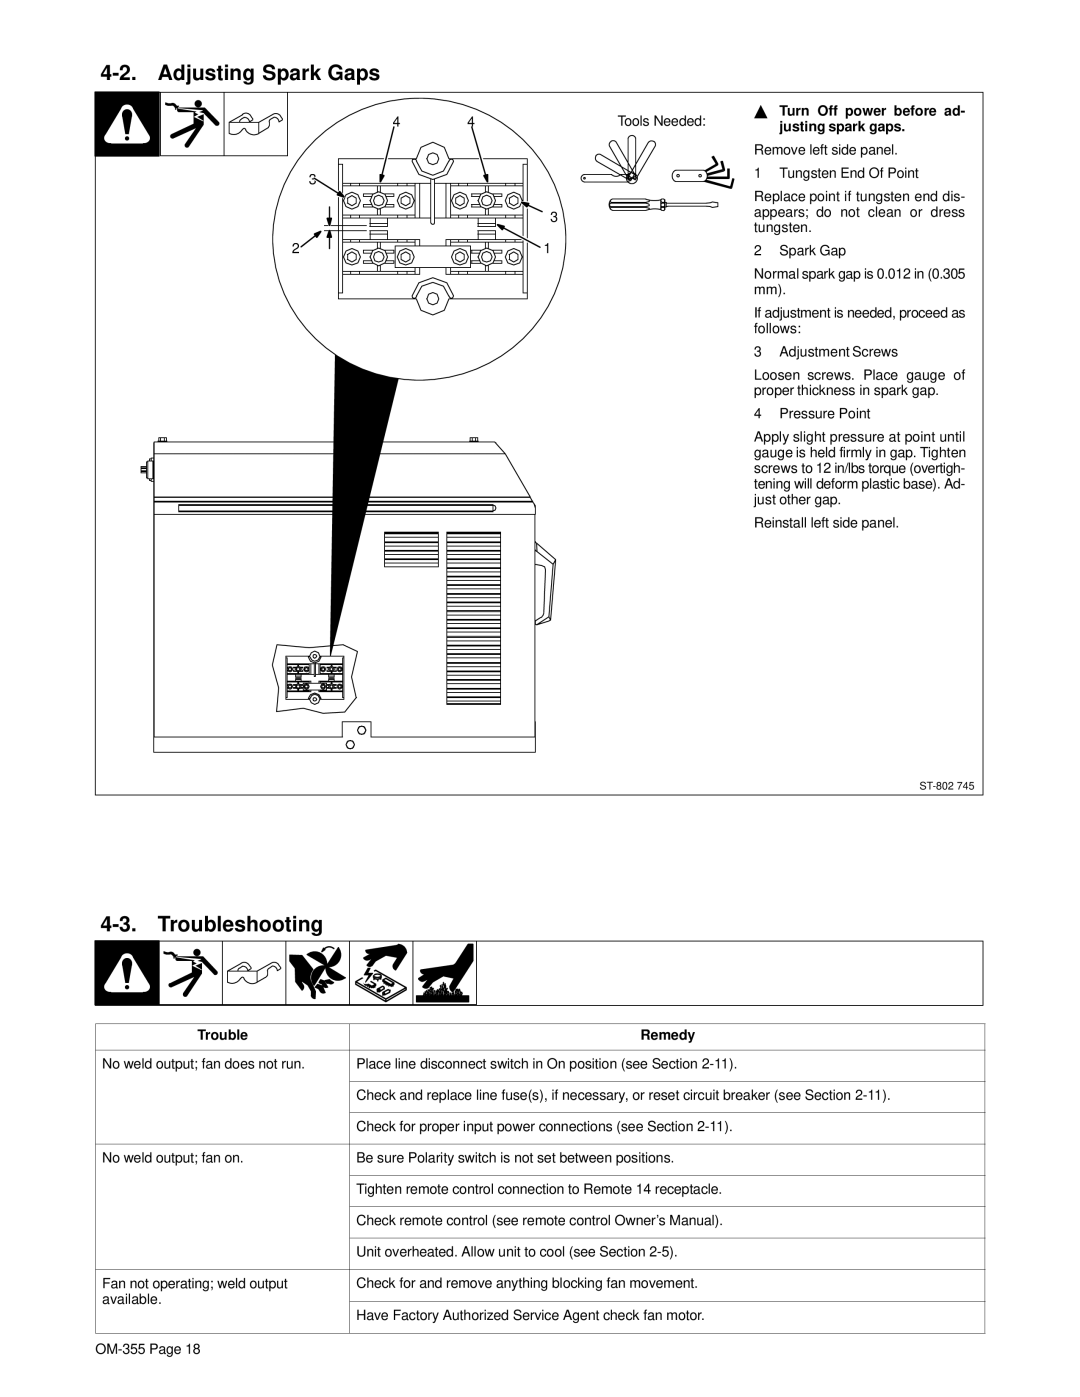
4-2. Adjusting Spark Gaps
4 | 4 |
| Y Turn Off power before ad- | |
| Tools Needed: | justing spark gaps. | ||
|
|
|
| |
|
|
| Remove left side panel. | |
3 |
|
| 1 Tungsten End Of Point | |
|
|
|
| |
|
|
| Replace point if tungsten end dis- | |
|
| 3 | appears; do not clean or dress | |
|
| tungsten. | ||
|
|
| ||
2 |
| 1 | 2 | Spark Gap |
|
|
| Normal spark gap is 0.012 in (0.305 | |
|
|
| mm). | |
|
|
| If adjustment is needed, proceed as | |
|
|
| follows: | |
|
|
| 3 | Adjustment Screws |
|
|
| Loosen screws. Place gauge of | |
|
|
| proper thickness in spark gap. | |
|
|
| 4 | Pressure Point |
|
|
| Apply slight pressure at point until | |
|
|
| gauge is held firmly in gap. Tighten | |
|
|
| screws to 12 in/lbs torque (overtigh- | |
|
|
| tening will deform plastic base). Ad- | |
|
|
| just other gap. | |
Reinstall left side panel.
4-3. Troubleshooting
Trouble | Remedy | |
|
| |
No weld output; fan does not run. | Place line disconnect switch in On position (see Section | |
|
| |
| Check and replace line fuse(s), if necessary, or reset circuit breaker (see Section | |
|
| |
| Check for proper input power connections (see Section | |
|
| |
No weld output; fan on. | Be sure Polarity switch is not set between positions. | |
|
| |
| Tighten remote control connection to Remote 14 receptacle. | |
|
| |
| Check remote control (see remote control Owner’s Manual). | |
|
| |
| Unit overheated. Allow unit to cool (see Section | |
|
| |
Fan not operating; weld output | Check for and remove anything blocking fan movement. | |
available. |
| |
Have Factory Authorized Service Agent check fan motor. | ||
| ||
|
|
