SECTION 8 – GUIDELINES FOR TIG WELDING (GTAW)
8-1. Positioning The Torch
|
| Y Grinding the tungsten elec- | ||
|
|
| trode produces dust and fly- | |
|
|
| ing sparks which can cause | |
|
|
| injury and start fires. Use lo- | |
|
|
| cal exhaust (forced ventila- | |
| 3 |
| tion) at the grinder or wear an | |
|
| approved respirator. Read | ||
|
|
| ||
|
|
| MSDS for safety information. | |
| 2 |
| Consider using | cerium or |
|
| lanthanum based tungsten | ||
|
|
| ||
|
|
| instead of thoriated. Tho- | |
|
|
| rium dust contains | |
|
| 4 | radioactive material. Proper- | |
|
| ly dispose of grinder dust in | ||
|
|
| an environmentally safe way. | |
|
|
| Wear proper face, hand, and | |
| 90° |
| body protection. Keep flam- | |
|
|
| mables away. |
|
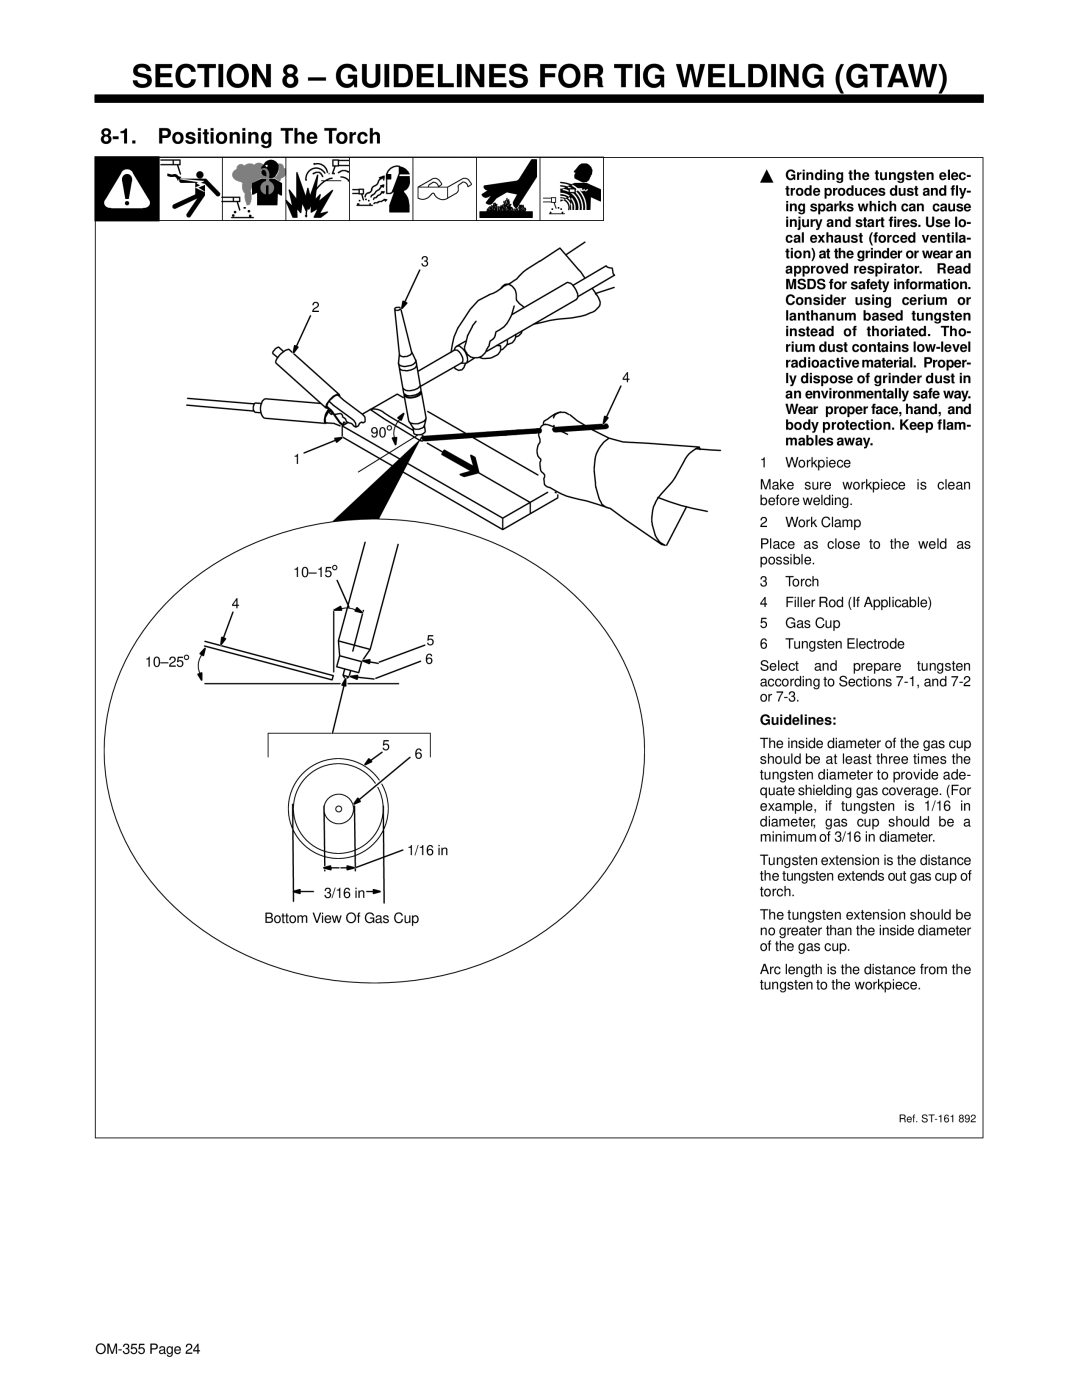
| 1 | 1 | Workpiece |
|
|
| Make sure workpiece is clean | ||
|
| before welding. |
| |
|
| 2 | Work Clamp |
|
|
| Place as close to the weld as | ||
| possible. |
| ||
| 3 | Torch |
| |
|
|
| ||
| 4 | 4 | Filler Rod (If Applicable) | |
|
| 5 | Gas Cup |
|
° | 5 | 6 | Tungsten Electrode | |
6 | Select and prepare | tungsten | ||
| ||||
|
| according to Sections | ||
|
| or |
| |
|
| Guidelines: |
| |
5
6
![]() 1/16 in
1/16 in
 3/16 in
  Bottom View Of Gas Cup
The inside diameter of the gas cup should be at least three times the tungsten diameter to provide ade- quate shielding gas coverage. (For example, if tungsten is 1/16 in diameter, gas cup should be a minimum of 3/16 in diameter.
Tungsten extension is the distance the tungsten extends out gas cup of torch.
The tungsten extension should be no greater than the inside diameter of the gas cup.
Arc length is the distance from the tungsten to the workpiece.
Ref.