LEVELING
1.Install the racks and place a spirit level or pan of water on a rack in the steamer.
2.Adjust the leveling feet or the feet on the adjustable legs to level the steamer
3.After the drain is connected, check for level by pouring water onto the floor of the compartment.
•All water should drain through the opening at the back of the compartment cavity.
ANCHORING STEAMER (WITHOUT LEGS)
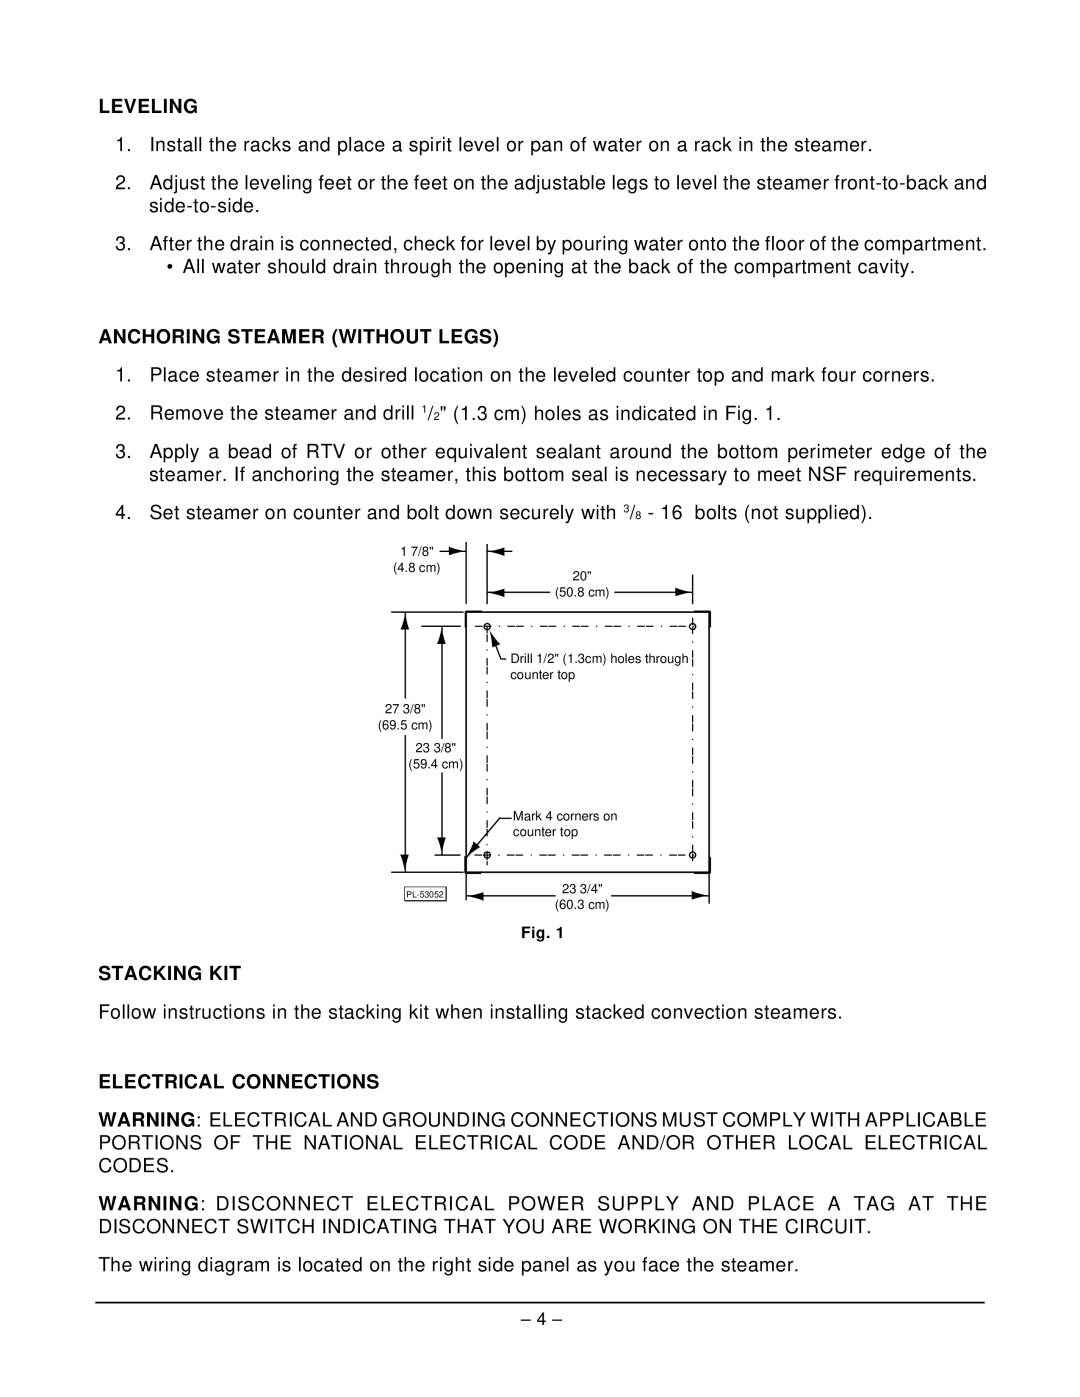
1.Place steamer in the desired location on the leveled counter top and mark four corners.
2.Remove the steamer and drill 1/2" (1.3 cm) holes as indicated in Fig. 1.
3.Apply a bead of RTV or other equivalent sealant around the bottom perimeter edge of the steamer. If anchoring the steamer, this bottom seal is necessary to meet NSF requirements.
4.Set steamer on counter and bolt down securely with 3/8 - 16 bolts (not supplied).
1 7/8" ![]()
(4.8 cm)
20"
(50.8 cm)
273/8"
(69.5 cm)
23 3/8"
(59.4 cm)
![]() Drill 1/2" (1.3cm) holes through counter top
Drill 1/2" (1.3cm) holes through counter top
Mark 4 corners on counter top
STACKING KIT
23 3/4"
(60.3 cm)
Fig. 1
Follow instructions in the stacking kit when installing stacked convection steamers.
ELECTRICAL CONNECTIONS
WARNING: ELECTRICAL AND GROUNDING CONNECTIONS MUST COMPLY WITH APPLICABLE PORTIONS OF THE NATIONAL ELECTRICAL CODE AND/OR OTHER LOCAL ELECTRICAL CODES.
WARNING: DISCONNECT ELECTRICAL POWER SUPPLY AND PLACE A TAG AT THE DISCONNECT SWITCH INDICATING THAT YOU ARE WORKING ON THE CIRCUIT.
The wiring diagram is located on the right side panel as you face the steamer.
– 4 –