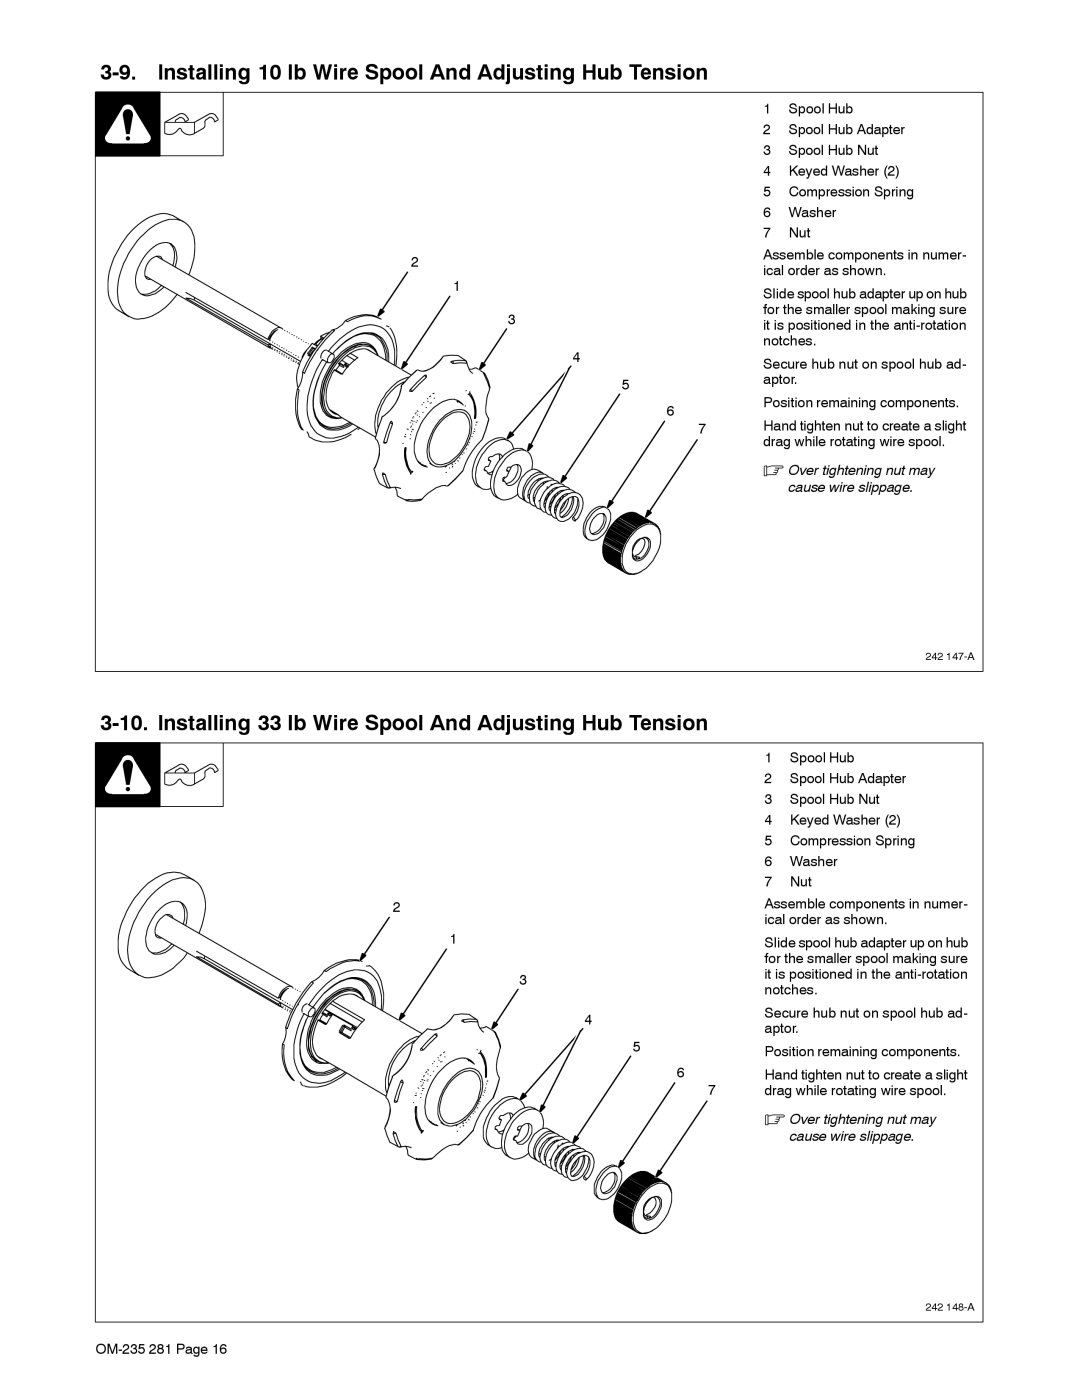
3-9. Installing 10 lb Wire Spool And Adjusting Hub Tension
2
1
3
4
5
6
7
1Spool Hub
2Spool Hub Adapter
3Spool Hub Nut
4Keyed Washer (2)
5Compression Spring
6Washer
7Nut
Assemble components in numer- ical order as shown.
Slide spool hub adapter up on hub for the smaller spool making sure it is positioned in the
Secure hub nut on spool hub ad- aptor.
Position remaining components.
Hand tighten nut to create a slight drag while rotating wire spool.
.Over tightening nut may cause wire slippage.
242
3-10. Installing 33 lb Wire Spool And Adjusting Hub Tension
| 1 | Spool Hub | |
| 2 | Spool Hub Adapter | |
| 3 | Spool Hub Nut | |
| 4 | Keyed Washer (2) | |
| 5 | Compression Spring | |
| 6 | Washer | |
| 7 | Nut | |
2 | Assemble components in numer- | ||
| ical order as shown. | ||
1 | Slide spool hub adapter up on hub | ||
| for the smaller spool making sure | ||
3 | it is positioned in the | ||
notches. | |||
| |||
4 | Secure hub nut on spool hub ad- | ||
aptor. | |||
| |||
5 | Position remaining components. | ||
| |||
6 | Hand tighten nut to create a slight | ||
7 | drag while rotating wire spool. | ||
| . Over tightening nut may | ||
|
| cause wire slippage. | |
242