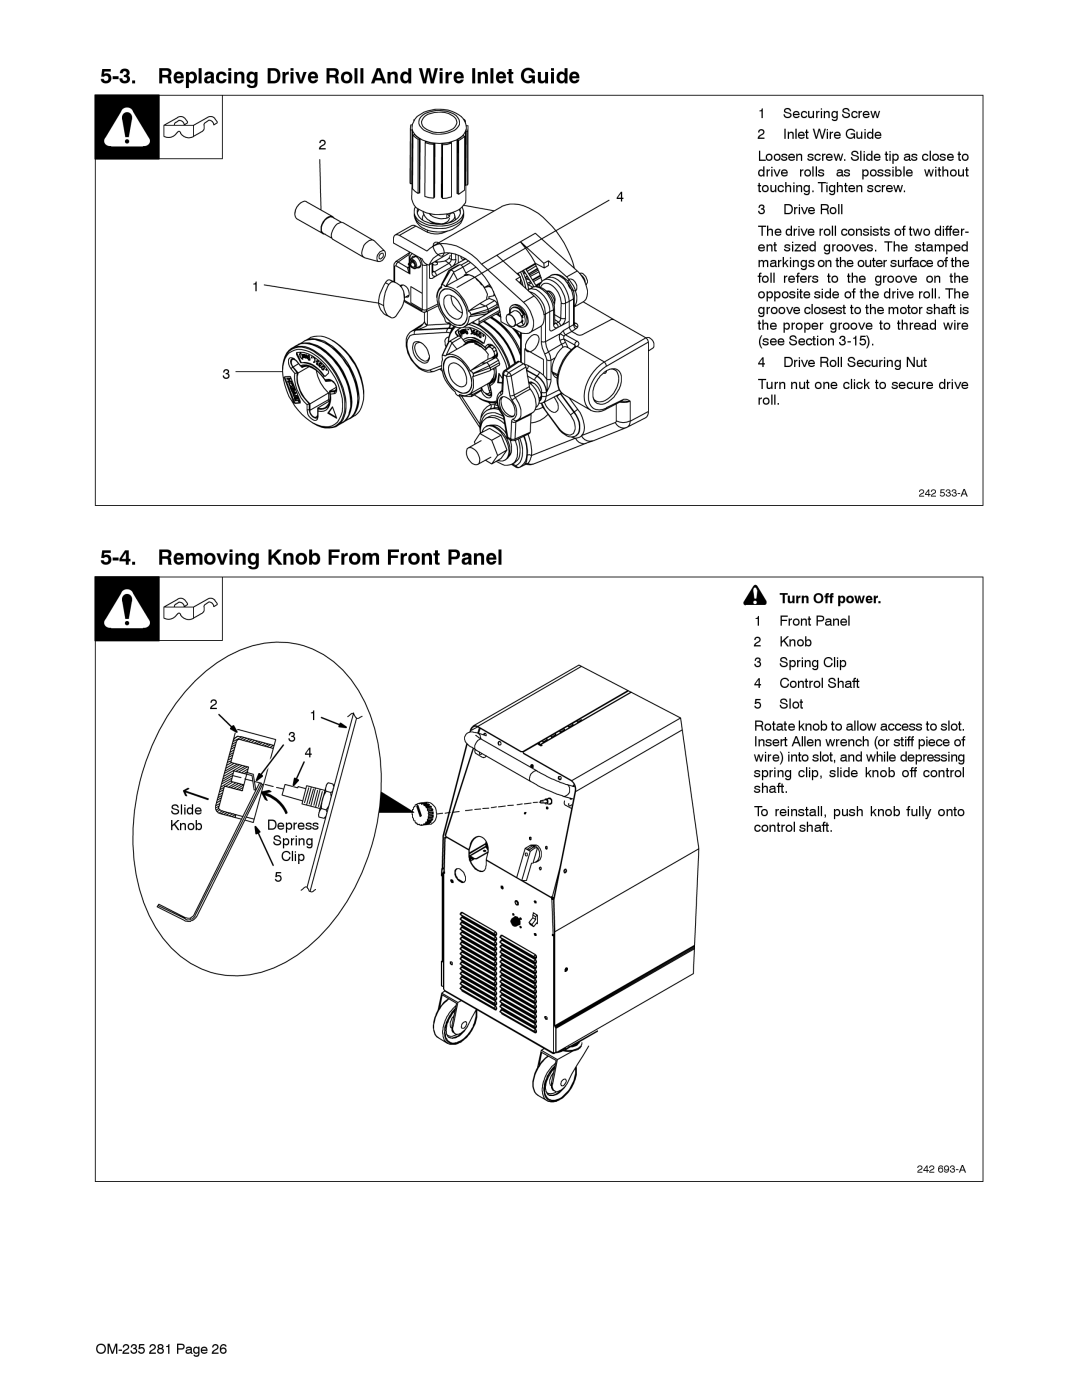
5-3. Replacing Drive Roll And Wire Inlet Guide
|
| 1 | Securing Screw |
2 |
| 2 | Inlet Wire Guide |
| Loosen screw. Slide tip as close to | ||
|
| ||
|
| drive rolls as possible without | |
| 4 | touching. Tighten screw. | |
| 3 | Drive Roll | |
|
| ||
The drive roll consists of two differ- ent sized grooves. The stamped markings on the outer surface of the
1foll refers to the groove on the opposite side of the drive roll. The groove closest to the motor shaft is the proper groove to thread wire (see Section
3 | 4 Drive Roll Securing Nut | |
Turn nut one click to secure drive | ||
| ||
| roll. |
242
5-4. Removing Knob From Front Panel
! Turn Off power.
2
1
3
4
Slide
Knob Depress Spring
Clip 5
1Front Panel
2Knob
3Spring Clip
4Control Shaft
5Slot
Rotate knob to allow access to slot. Insert Allen wrench (or stiff piece of wire) into slot, and while depressing spring clip, slide knob off control shaft.
To reinstall, push knob fully onto control shaft.
242
