SOAPY WATER TEST
In a small bowl mix half liquid detergent and half water. Turn on propane tank valve. Using a small brush, soap all connections from tank to grill and look for bubbles. Correct all leaks before proceeding. Turn off propane tank valve.
NOTE: The Holland Grill uses a
FOR NATURAL GAS SUPPLY
The Holland Grill, including the gas
The Holland Grill must be isolated from the gas supply piping system by closing the individual manual
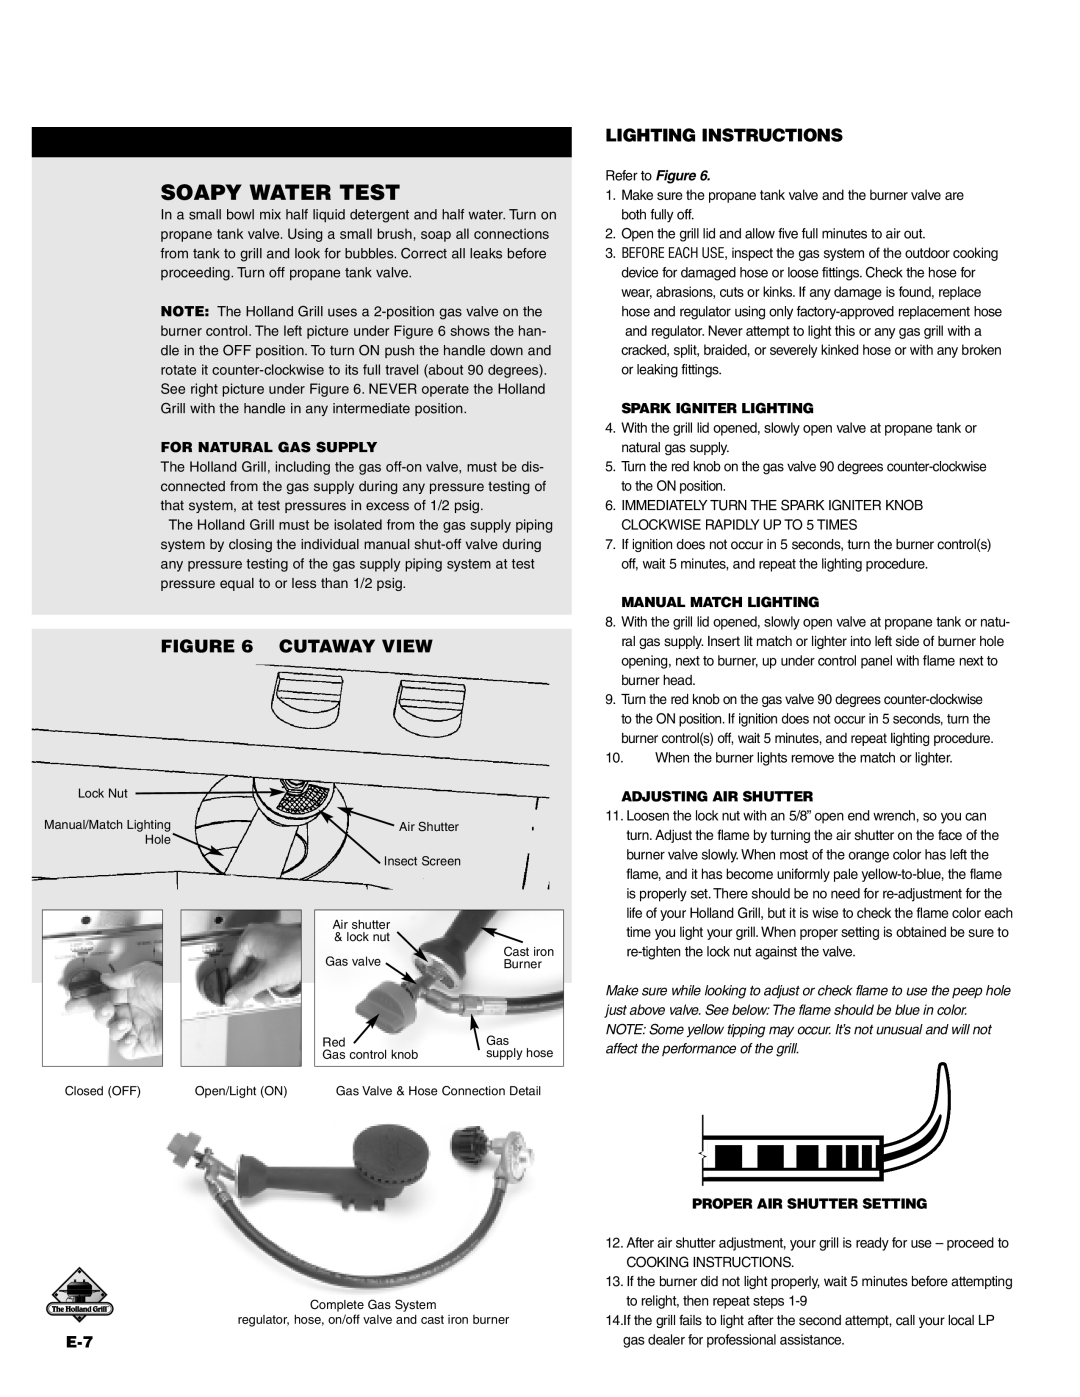
FIGURE 6 CUTAWAY VIEW
Lock Nut |
|
|
|
| |
Manual/Match Lighting |
|
| Air Shutter |
| |
Hole |
|
|
|
| |
|
|
|
| Insect Screen |
|
|
|
|
|
|
|
|
|
|
| Air shutter |
|
|
|
|
| & lock nut |
|
|
|
|
| Gas valve | Cast iron |
|
|
|
| Burner | |
|
|
|
| Red | Gas |
|
|
|
| Gas control knob | supply hose |
|
|
|
|
| |
Closed (OFF) | Open/Light (ON) |
| Gas Valve & Hose Connection Detail | ||
Complete Gas System
regulator, hose, on/off valve and cast iron burner
LIGHTING INSTRUCTIONS
Refer to Figure 6.
1.Make sure the propane tank valve and the burner valve are both fully off.
2.Open the grill lid and allow five full minutes to air out.
3.BEFORE EACH USE, inspect the gas system of the outdoor cooking device for damaged hose or loose fittings. Check the hose for wear, abrasions, cuts or kinks. If any damage is found, replace hose and regulator using only
SPARK IGNITER LIGHTING
4.With the grill lid opened, slowly open valve at propane tank or natural gas supply.
5.Turn the red knob on the gas valve 90 degrees
6.IMMEDIATELY TURN THE SPARK IGNITER KNOB CLOCKWISE RAPIDLY UP TO 5 TIMES
7.If ignition does not occur in 5 seconds, turn the burner control(s) off, wait 5 minutes, and repeat the lighting procedure.
MANUAL MATCH LIGHTING
8.With the grill lid opened, slowly open valve at propane tank or natu- ral gas supply. Insert lit match or lighter into left side of burner hole opening, next to burner, up under control panel with flame next to burner head.
9.Turn the red knob on the gas valve 90 degrees
10.When the burner lights remove the match or lighter.
ADJUSTING AIR SHUTTER
11.Loosen the lock nut with an 5/8” open end wrench, so you can turn. Adjust the flame by turning the air shutter on the face of the burner valve slowly. When most of the orange color has left the flame, and it has become uniformly pale
Make sure while looking to adjust or check flame to use the peep hole just above valve. See below: The flame should be blue in color. NOTE: Some yellow tipping may occur. It’s not unusual and will not affect the performance of the grill.
PROPER AIR SHUTTER SETTING
12.After air shutter adjustment, your grill is ready for use – proceed to
COOKING INSTRUCTIONS.
13.If the burner did not light properly, wait 5 minutes before attempting to relight, then repeat steps
14.If the grill fails to light after the second attempt, call your local LP gas dealer for professional assistance.