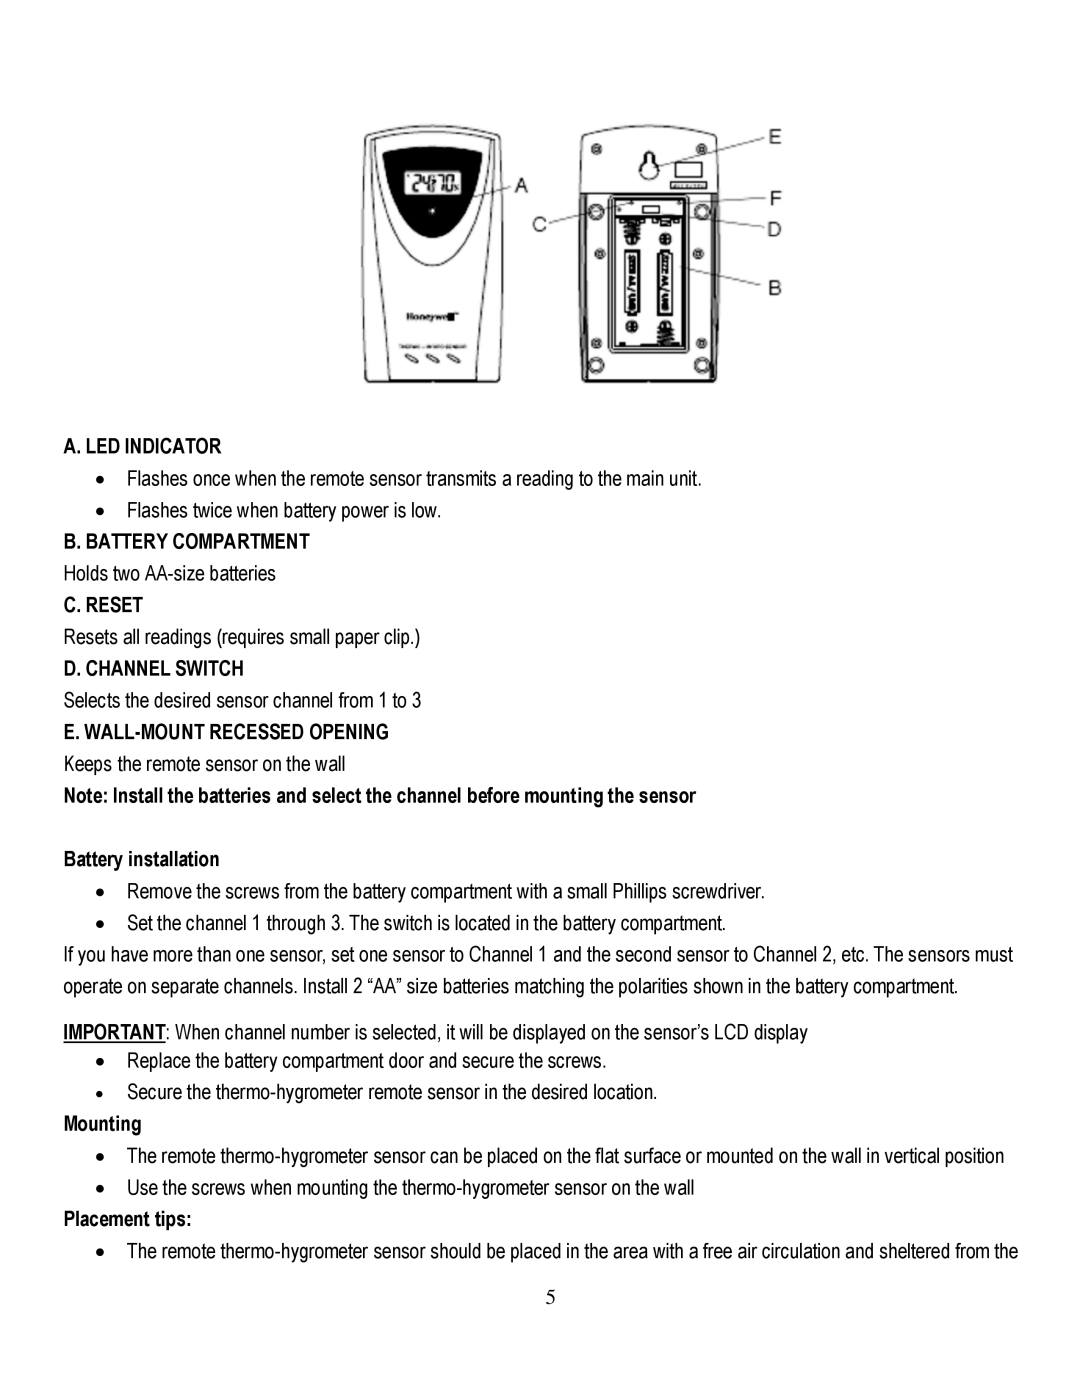
A. LED INDICATOR
∙Flashes once when the remote sensor transmits a reading to the main unit.
∙Flashes twice when battery power is low.
B. BATTERY COMPARTMENT
Holds two
C. RESET
Resets all readings (requires small paper clip.)
D. CHANNEL SWITCH
Selects the desired sensor channel from 1 to 3
E.
Note: Install the batteries and select the channel before mounting the sensor
Battery installation
∙Remove the screws from the battery compartment with a small Phillips screwdriver.
∙Set the channel 1 through 3. The switch is located in the battery compartment.
If you have more than one sensor, set one sensor to Channel 1 and the second sensor to Channel 2, etc. The sensors must operate on separate channels. Install 2 “AA” size batteries matching the polarities shown in the battery compartment.
IMPORTANT: When channel number is selected, it will be displayed on the sensor’s LCD display
∙Replace the battery compartment door and secure the screws.
∙Secure the
Mounting
∙The remote
∙Use the screws when mounting the
Placement tips:
∙The remote
5
