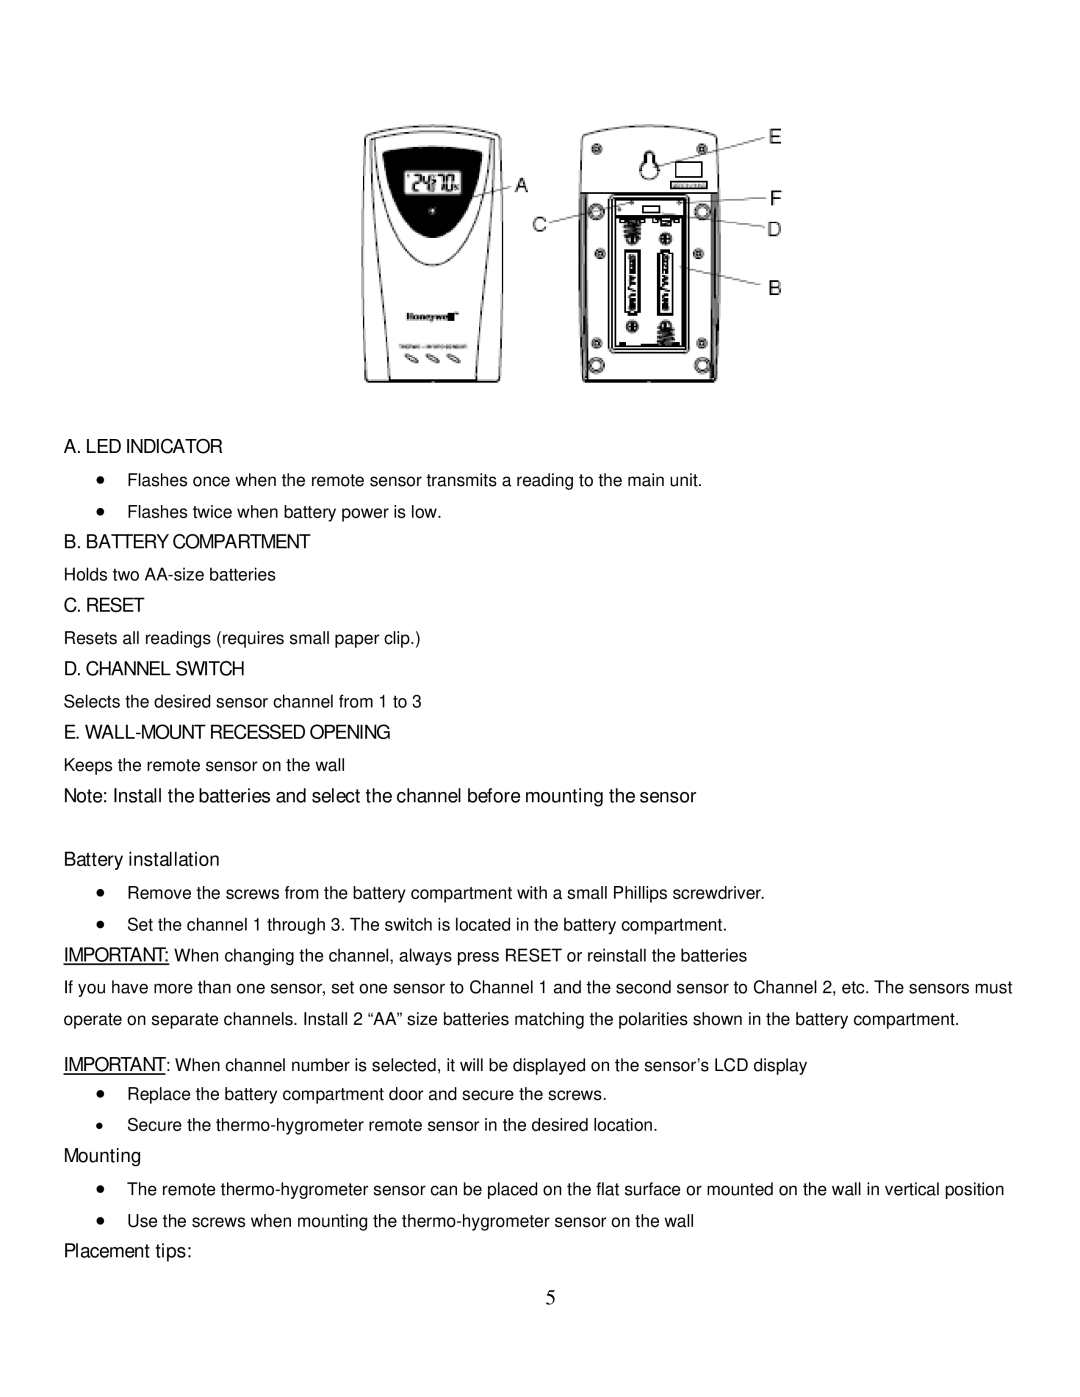
A. LED INDICATOR
•Flashes once when the remote sensor transmits a reading to the main unit.
•Flashes twice when battery power is low.
B. BATTERY COMPARTMENT
Holds two
C. RESET
Resets all readings (requires small paper clip.)
D. CHANNEL SWITCH
Selects the desired sensor channel from 1 to 3
E. WALL-MOUNT RECESSED OPENING
Keeps the remote sensor on the wall
Note: Install the batteries and select the channel before mounting the sensor
Battery installation
•Remove the screws from the battery compartment with a small Phillips screwdriver.
•Set the channel 1 through 3. The switch is located in the battery compartment. IMPORTANT: When changing the channel, always press RESET or reinstall the batteries
If you have more than one sensor, set one sensor to Channel 1 and the second sensor to Channel 2, etc. The sensors must operate on separate channels. Install 2 “AA” size batteries matching the polarities shown in the battery compartment.
IMPORTANT: When channel number is selected, it will be displayed on the sensor’s LCD display
•Replace the battery compartment door and secure the screws.
•Secure the
Mounting
•The remote
•Use the screws when mounting the
Placement tips:
5