Bagless Upright Vacuum Cleaner specifications
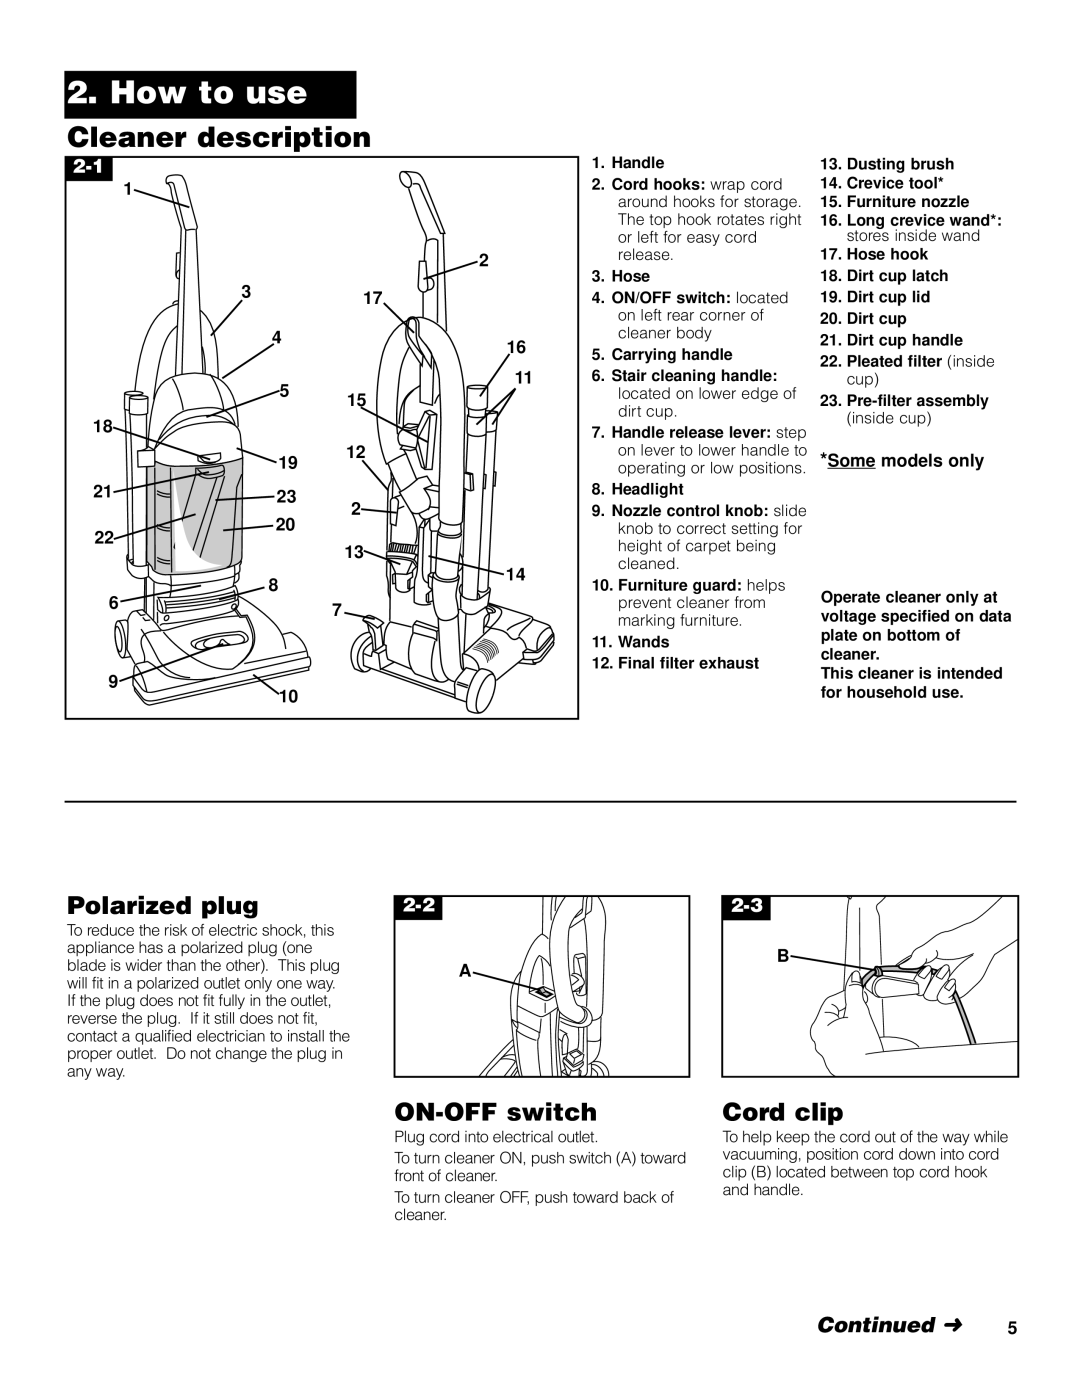
The Hoover Bagless Upright Vacuum Cleaner is a modern cleaning solution designed to make home cleaning more efficient and convenient. With its combination of advanced technology and user-friendly design, this vacuum cleaner has become a popular choice among homeowners looking for an effective way to keep their spaces clean.One of the standout features of the Hoover Bagless Upright Vacuum Cleaner is its bagless design, which eliminates the need for disposable vacuum bags. This not only helps reduce waste but also saves money in the long run. The vacuum is equipped with a transparent dust container, allowing users to easily monitor dirt levels and know when it’s time for a cleanup.
The vacuum cleaner is powered by a robust motor that provides strong suction, ensuring even the most stubborn dirt and debris are effectively lifted from carpets and hard floors. The Hoover Bagless Upright Vacuum Cleaner comes with multiple height adjustment settings, making it versatile enough to clean various surfaces, from plush carpets to hardwood floors.
Another key feature is its extensive range of cleaning attachments. Included with the vacuum are tools such as a crevice tool for tight spaces, an upholstery nozzle for furniture, and a dusting brush for delicate surfaces. This versatility makes it easy to tackle every corner of your home, providing a thorough cleaning experience.
The vacuum is designed for ease of use, with a lightweight construction that makes it easy to carry from room to room. The ergonomic handle offers a comfortable grip, while the vacuum’s low-profile design allows it to fit under furniture with minimal effort. Additionally, the vacuum features a long power cord, giving users the freedom to clean larger areas without frequent re-plugging.
Filtering technology in the Hoover Bagless Upright Vacuum Cleaner is designed to capture allergens and dust particles. Many models come equipped with HEPA filters, which are known for their efficiency in trapping microscopic particles, making this vacuum a suitable choice for allergy sufferers.
In summary, the Hoover Bagless Upright Vacuum Cleaner combines functionality, ease of use, and innovative technology. Its bagless design, powerful suction, adjustable settings, versatile attachments, and effective filtration system make it an excellent choice for maintaining a clean home. Whether dealing with everyday messes or deep cleaning tasks, this vacuum cleaner delivers reliable performance that homeowners can trust.

