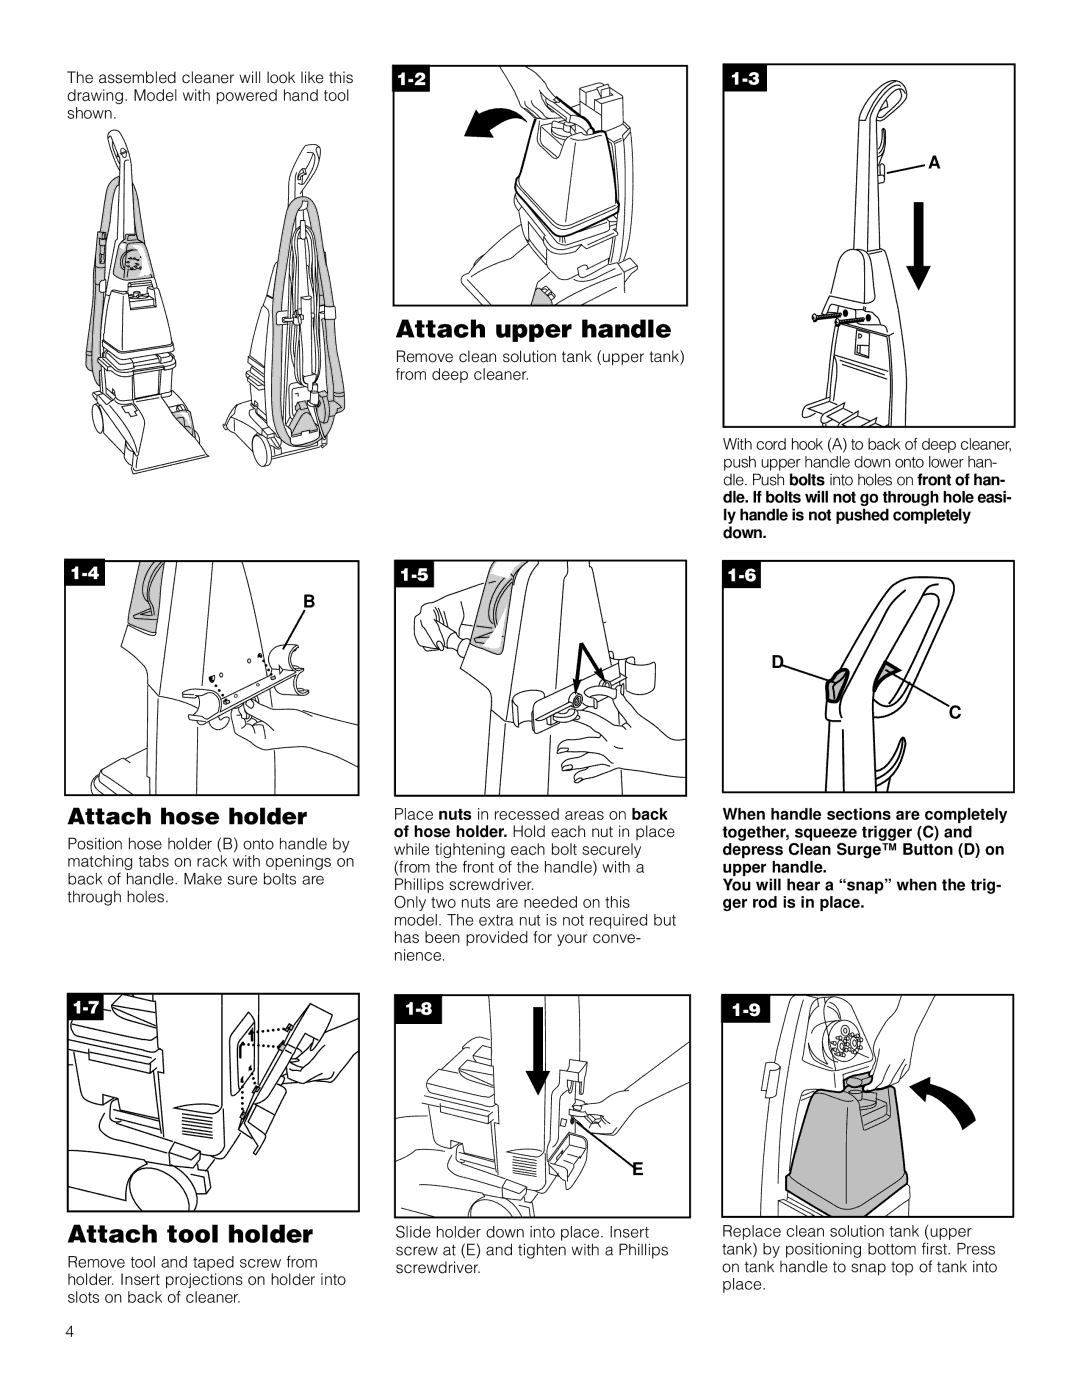
The assembled cleaner will look like this |
|
|
|
|
| |||
drawing. Model with powered hand tool |
|
|
|
|
|
| ||
shown. |
|
|
|
|
|
| ||
|
|
|
|
|
|
|
|
|
|
|
|
|
|
|
|
|
|
|
|
|
|
|
|
|
|
|
|
|
|
|
|
|
|
|
|
|
|
|
|
|
|
|
|
|
|
|
|
|
|
|
|
|
|
Attach upper handle
Remove clean solution tank (upper tank) from deep cleaner.
A
With cord hook (A) to back of deep cleaner, push upper handle down onto lower han- dle. Push bolts into holes on front of han- dle. If bolts will not go through hole easi- ly handle is not pushed completely down.
B |
Attach hose holder
Position hose holder (B) onto handle by matching tabs on rack with openings on back of handle. Make sure bolts are through holes.
Place nuts in recessed areas on back of hose holder. Hold each nut in place while tightening each bolt securely (from the front of the handle) with a Phillips screwdriver.
Only two nuts are needed on this model. The extra nut is not required but has been provided for your conve- nience.
D
C
When handle sections are completely together, squeeze trigger (C) and depress Clean Surge™ Button (D) on upper handle.
You will hear a “snap” when the trig - ger rod is in place.
| E | |
Attach tool holder | Slide holder down into place. Insert | |
Remove tool and taped screw from | screw at (E) and tighten with a Phillips | |
screwdriver. | ||
holder. Insert projections on holder into | ||
| ||
slots on back of cleaner. |
|
Replace clean solution tank (upper tank) by positioning bottom first. Press on tank handle to snap top of tank into place.
4
