A S S E M B LY STEP 2
INTRODUCTION
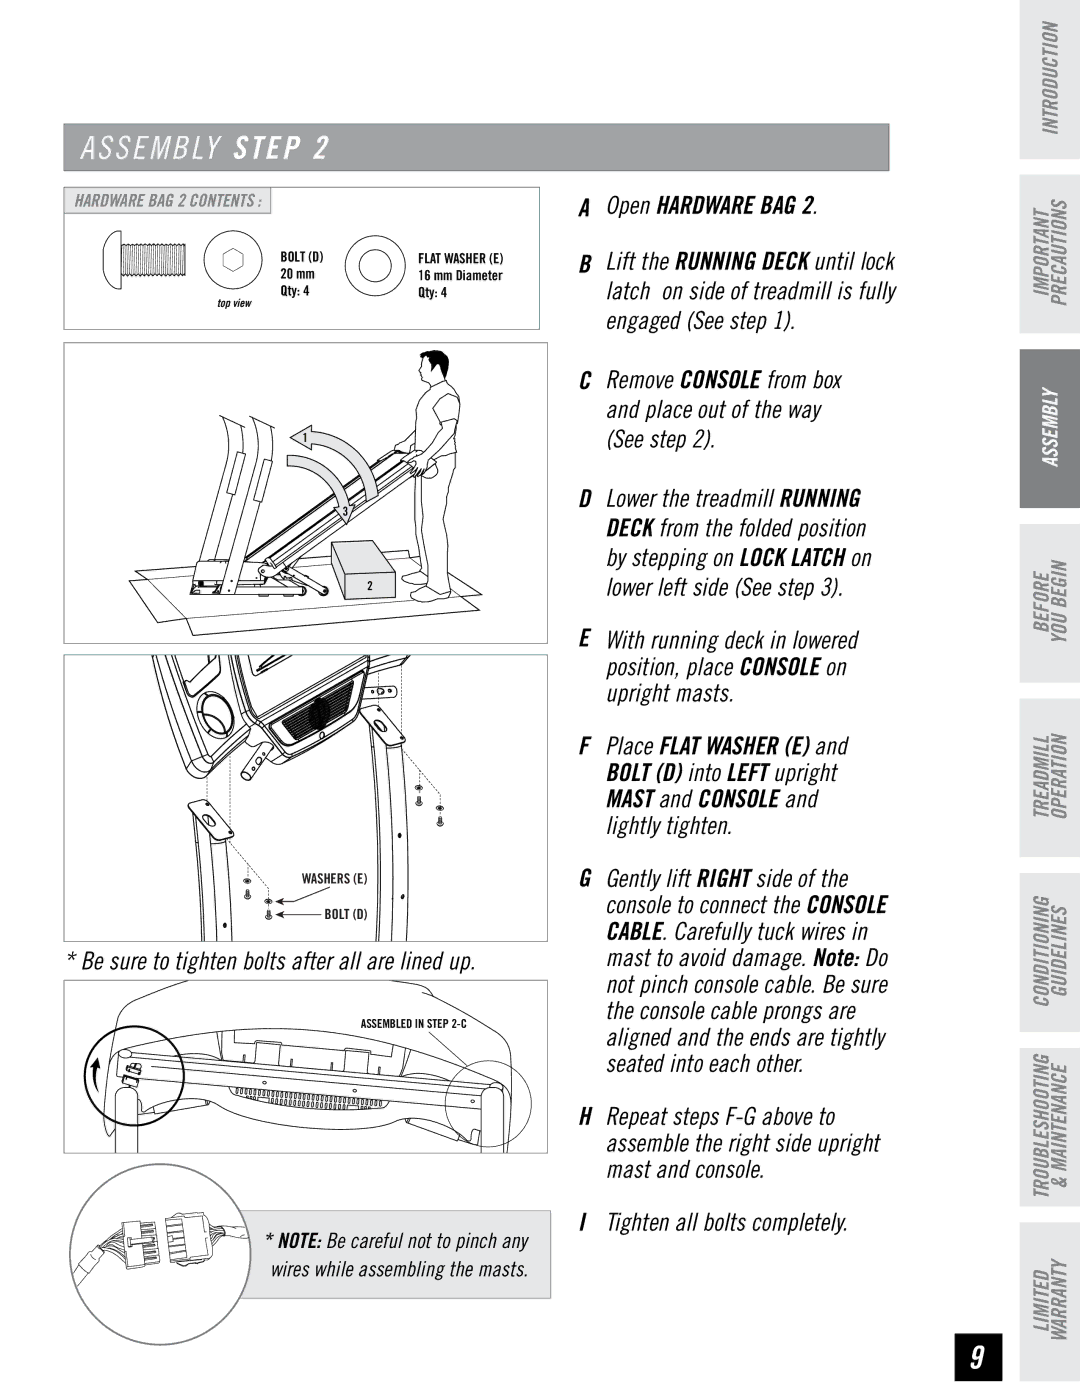
HARDWARE BAG 2 CONTENTS :
BOLT (D) | FLAT WASHER (E) |
20 mm | 16 mm Diameter |
Qty: 4 | Qty: 4 |
top view |
|
1 |
3 |
2 |
WASHERS (E) |
BOLT (D) |
* Be sure to tighten bolts after all are lined up.
ASSEMBLED IN STEP |
* Note: Be careful not to pinch any wires while assembling the masts.
AOpen HARDWARE BAG 2.
BLift the running deck until lock latch on side of treadmill is fully engaged (See step 1).
CRemove console from box and place out of the way (See step 2).
DLower the treadmill running deck from the folded position by stepping on LOCK LATCH on lower left side (See step 3).
EWith running deck in lowered position, place console on upright masts.
FPlace FLAT Washer (E) and bolt (D) into left upright mast and CONSOLE and lightly tighten.
GGently lift right side of the console to connect the console cable. Carefully tuck wires in mast to avoid damage. Note: Do not pinch console cable. Be sure the console cable prongs are aligned and the ends are tightly seated into each other.
HRepeat steps
ITighten all bolts completely.
IMPORTANT PRECAUTIONS
ASSEMBLY
BEFORE YOU BEGIN
TREADMILL OPERATION
LIMITED TROUBLESHOOTING CONDITIONING WARRANTY & MAINTENANCE GUIDELINES