
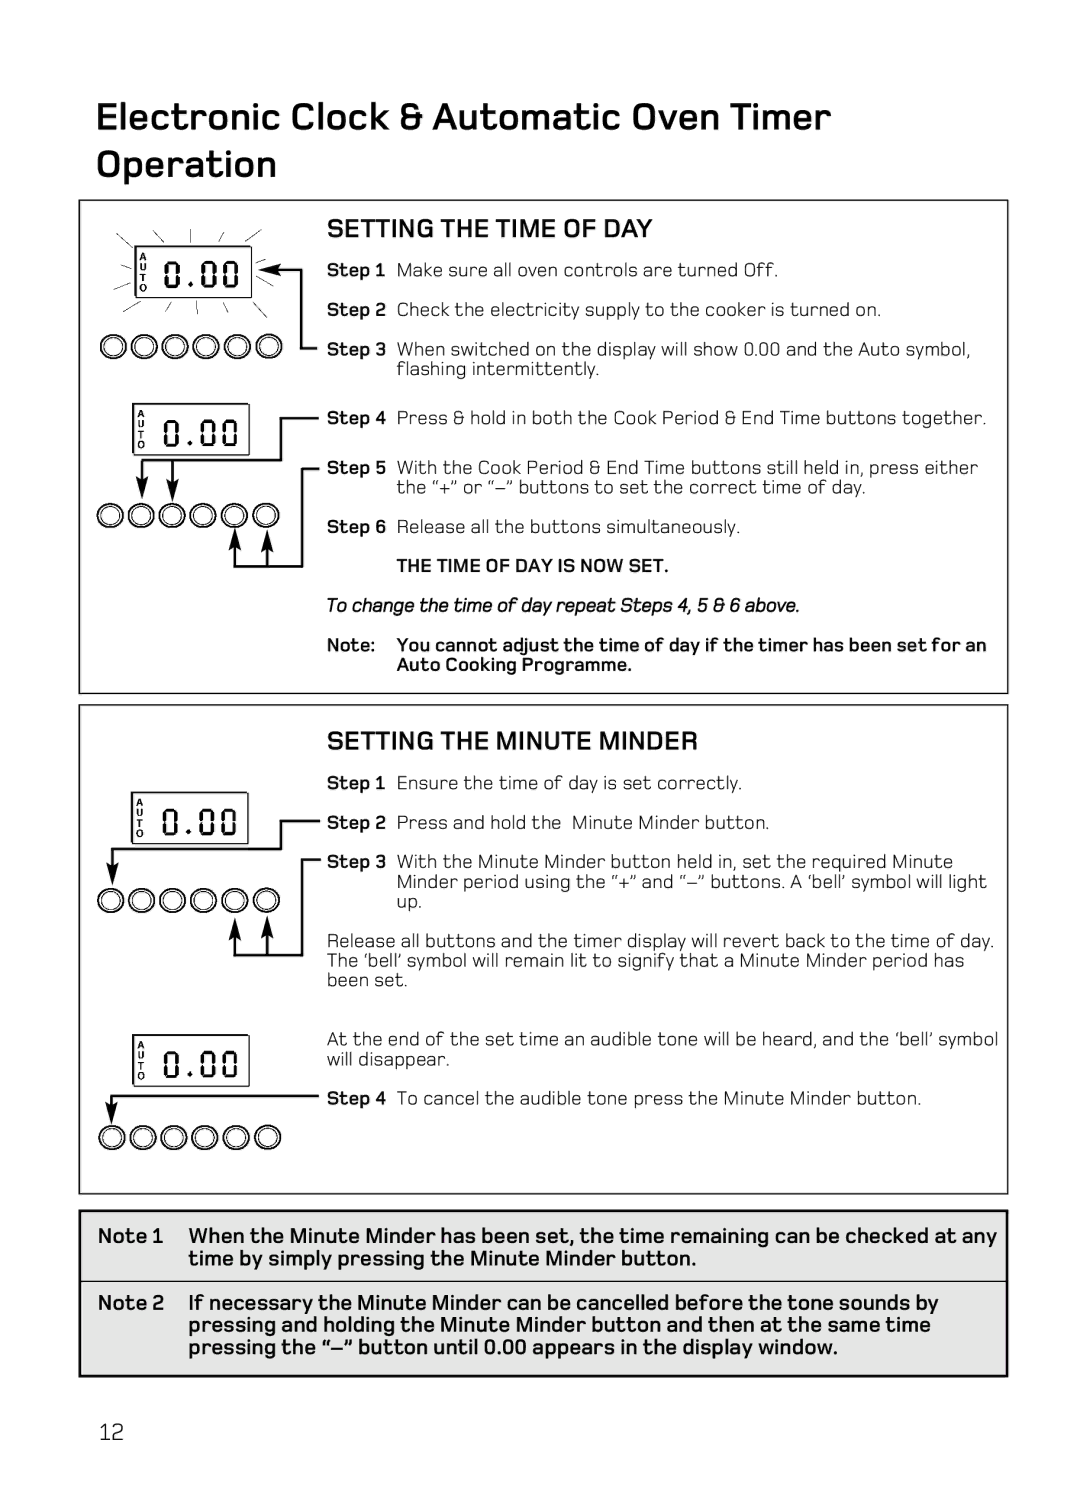
BD32 Mk2, DY46 Mk2, BD42 Mk2 specifications
Hotpoint appliances are known for their reliability and innovative features, with models like the BD42 Mk2, DY46 Mk2, and BD32 Mk2 standing out in the marketplace. Each of these models is designed to cater to the demands of modern households, providing efficiency and functionality.The Hotpoint BD42 Mk2 is a versatile fridge freezer that excels in organization and energy efficiency. It comes equipped with an impressive A+ energy rating, ensuring lower energy consumption without compromising on performance. Its spacious interior features adjustable shelves and dedicated compartments, allowing users to store groceries efficiently. One of its standout technologies is the "No Frost" feature, which prevents ice buildup, ensuring that users never have to defrost their freezer manually. The BD42 also includes an external water dispenser, providing chilled water on demand, a convenient addition for family gatherings and hot summer days.
The Hotpoint DY46 Mk2 is a dynamic washer dryer, merging advanced washing capabilities with drying efficiency. With a high spin speed and a variety of wash programs, the DY46 can handle large loads while maintaining fabric care. The model boasts a special "Anti-Allergy" cycle, designed to eliminate common allergens and bacteria, making it an excellent choice for households with sensitive skin. Additionally, its energy-efficient ratings save on utility bills. The washer dryer is also equipped with smart technology, allowing users to monitor and control their laundry from a smartphone app, an essential feature for busy lifestyles.
Finally, the Hotpoint BD32 Mk2 is a compact and efficient fridge freezer, perfect for smaller kitchens or apartments. It offers an A++ energy rating, making it one of the most energy-efficient models available. The design includes multiple shelves and storage compartments, maximizing space without compromising style. The BD32 features a modern LED lighting system, illuminating the interior and making it easier to find stored items. Its user-friendly controls and sleek finish make it an attractive addition to any kitchen.
In conclusion, the Hotpoint BD42 Mk2, DY46 Mk2, and BD32 Mk2 are exemplary models showcasing the brand's commitment to quality and innovation. Each model offers a blend of modern technology, energy efficiency, and user-friendly features, making them ideal choices for contemporary homes. Whether for refrigeration, laundry, or space-saving needs, these appliances fulfill a variety of household requirements impressively.