7.Click the link for the most recent BIOS.
8.Click the Download button, and then follow the
1.Shut down the computer. If you are unsure whether the computer is off or in Hibernation, turn the computer on, and then shut it down through the operating system.
2.Disconnect all external devices connected to the computer.
3.Disconnect the power from the computer by first unplugging the power cord from the AC outlet, and then unplugging the AC adapter from the computer.
4.Remove the battery (see Battery on page 42).
5.Remove the bottom door (see Bottom door on page 44).
Remove the memory module:
1.Position the computer
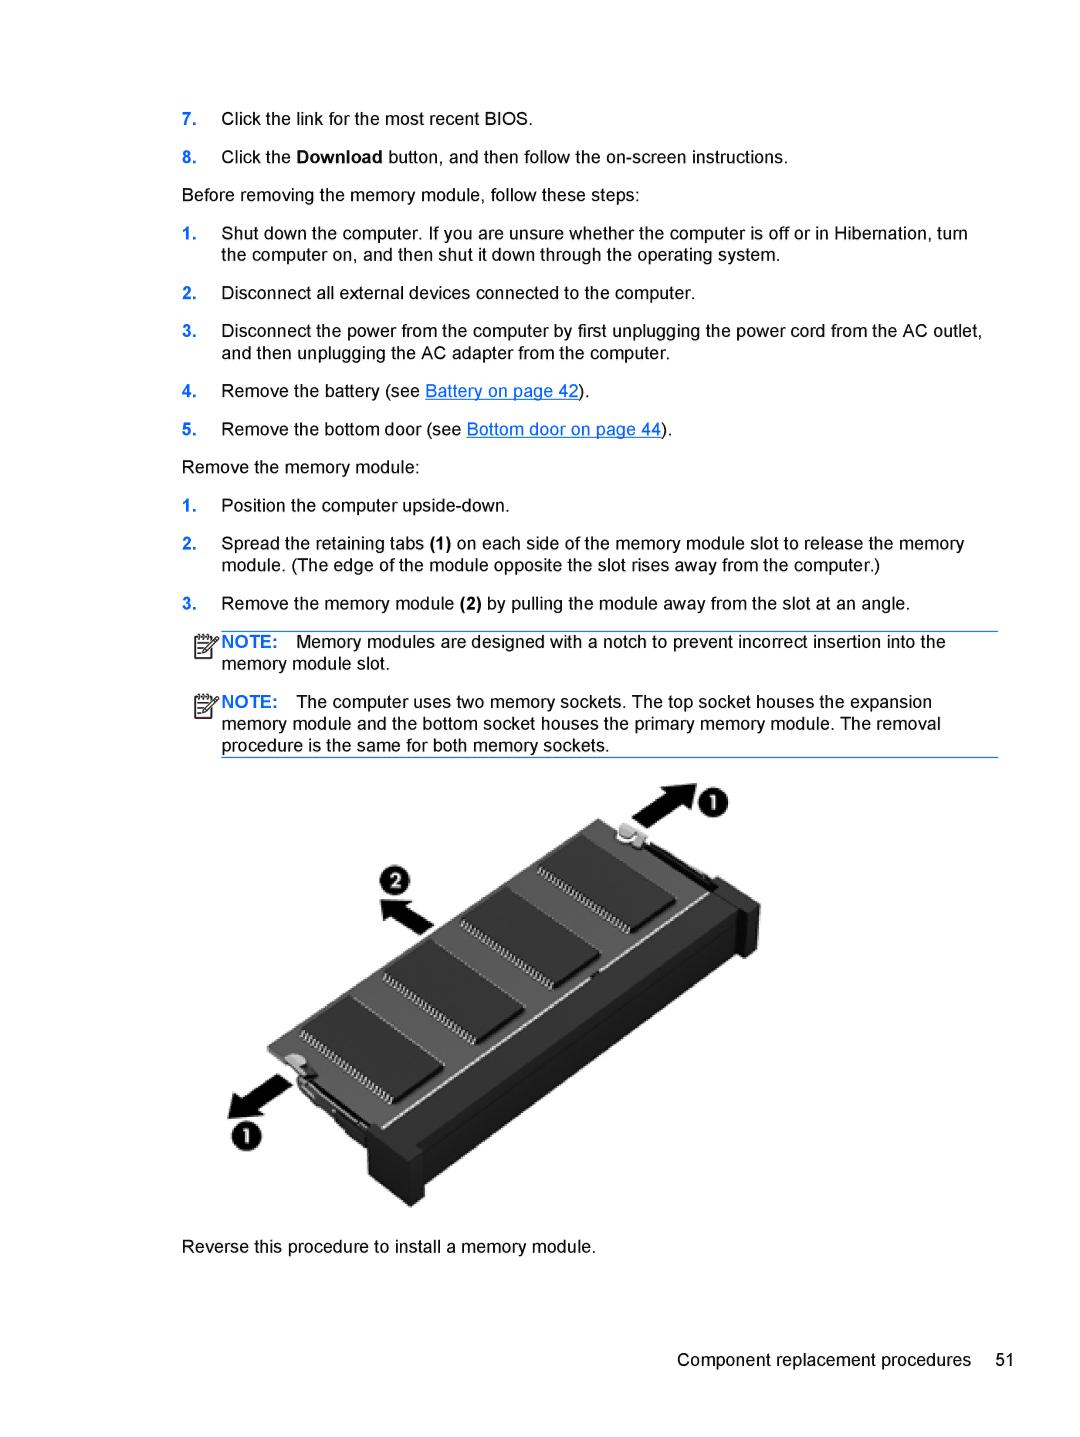
2.Spread the retaining tabs (1) on each side of the memory module slot to release the memory module. (The edge of the module opposite the slot rises away from the computer.)
3.Remove the memory module (2) by pulling the module away from the slot at an angle.
![]()
![]()
![]()
![]() NOTE: Memory modules are designed with a notch to prevent incorrect insertion into the memory module slot.
NOTE: Memory modules are designed with a notch to prevent incorrect insertion into the memory module slot.
![]()
![]()
![]()
![]() NOTE: The computer uses two memory sockets. The top socket houses the expansion memory module and the bottom socket houses the primary memory module. The removal procedure is the same for both memory sockets.
NOTE: The computer uses two memory sockets. The top socket houses the expansion memory module and the bottom socket houses the primary memory module. The removal procedure is the same for both memory sockets.
Reverse this procedure to install a memory module.
Component replacement procedures 51
