Maintenance & Service Guide
Presario 1900 Series
Models: XL1, XL160, XL161, XL162, XL163, and XL165
Before You Begin |
| Specifications |
| Parts Catalog |
|
|
|
|
|
Removal Sequence |
| Troubleshooting |
| Battery Operations |
|
|
|
|
|
|
|
|
|
|
Product Description |
| Pin Assignments |
| Index |
|
|
|
|
|
Removal and Replacement Procedures
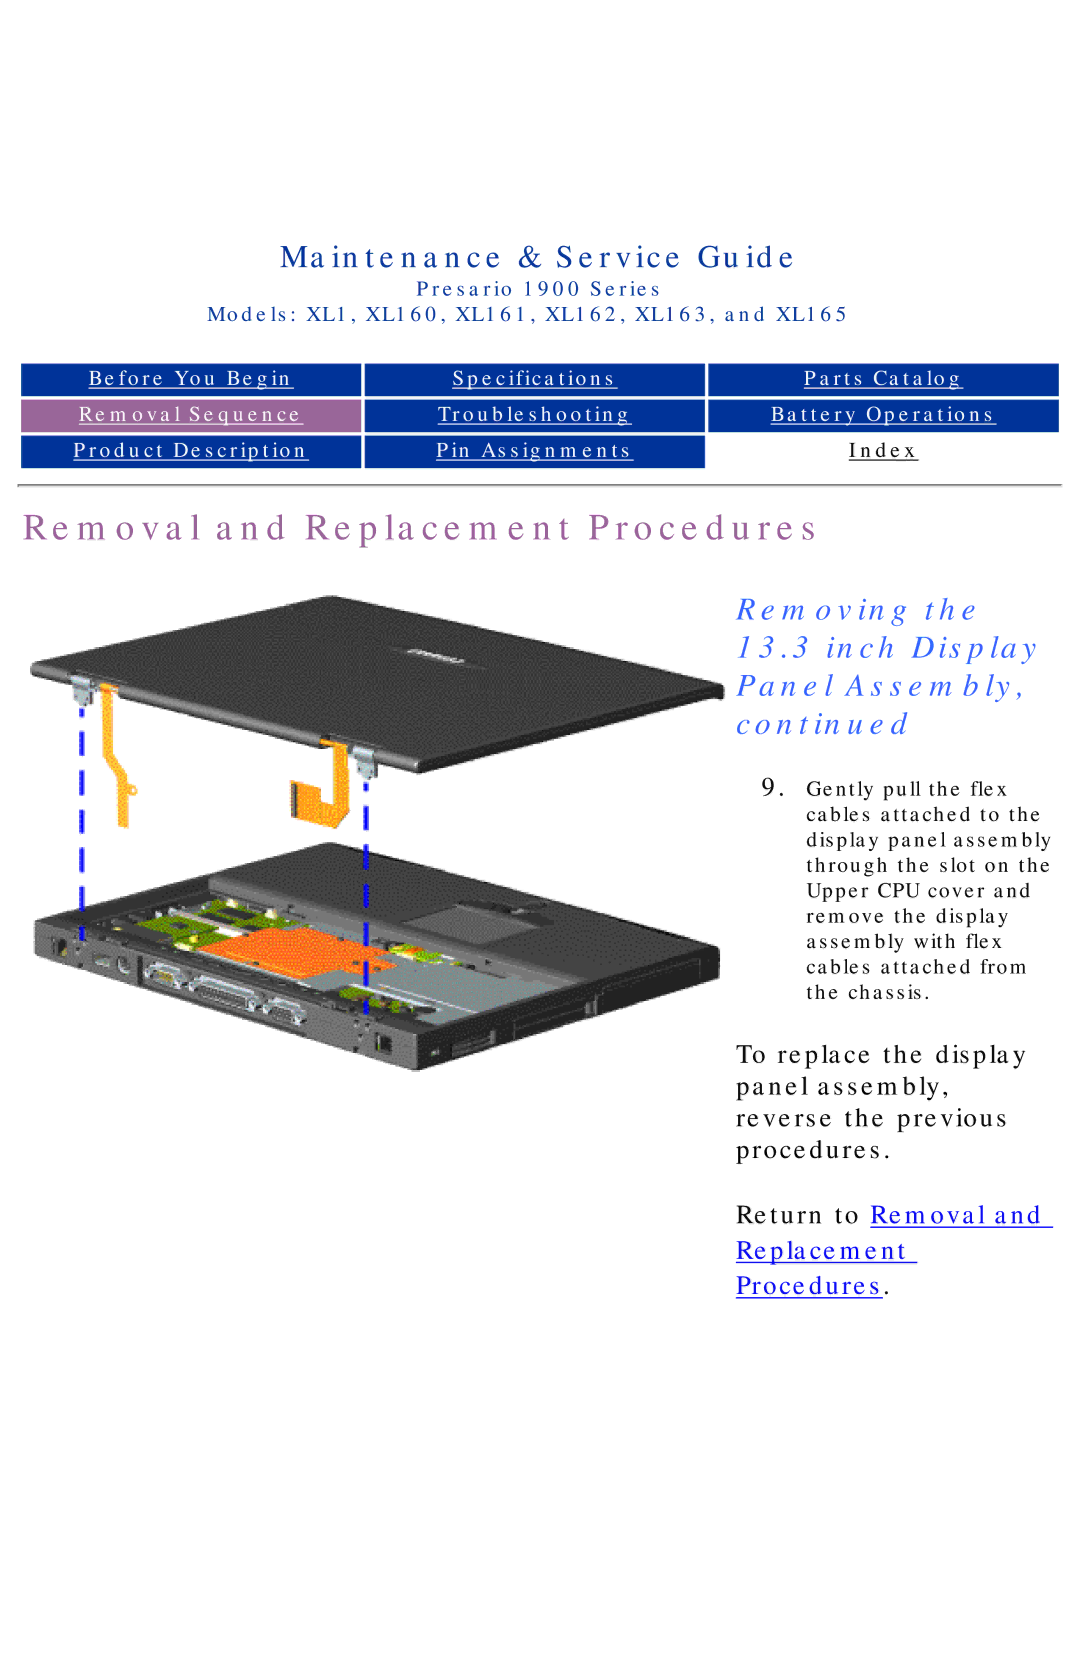
Removing the 13.3 inch Display Panel Assembly, continued
9. Gently pull the flex cables attached to the display panel assembly through the slot on the Upper CPU cover and remove the display assembly with flex cables attached from the chassis.
To replace the display panel assembly, reverse the previous procedures.