Maintenance & Service Guide
Presario 1900 Series
Models: XL1, XL160, XL161, XL162, XL163, and XL165
Before You Begin |
| Specifications |
| Parts Catalog |
|
|
|
|
|
Removal Sequence |
| Troubleshooting |
| Battery Operations |
|
|
|
|
|
|
|
|
|
|
Product Description |
| Pin Assignments |
| Index |
|
|
|
|
|
Removal and Replacement Procedures
Electrostatic
Discharge
Service
Considerations
Cables and
Connectors
Preparing the
Computer for
Disassembly
![]() Battery Pack
Battery Pack
![]() Hard Drive
Hard Drive
![]() Keyboard
Keyboard
Memory
Module
![]() Modem
Modem
![]() Heatspreader
Heatspreader
![]() Processor
Processor
Display Panel
Assembly
Upper CPU
Cover with
Palmrest and
TouchPad
Hard Drive/
Battery
Charger Board
Converter
Board
Low Voltage
Differential
Signal Board
![]() Fan Assembly
Fan Assembly ![]()
![]() System Board
System Board ![]()
Speaker
Assembly
DVD or CD
Drive
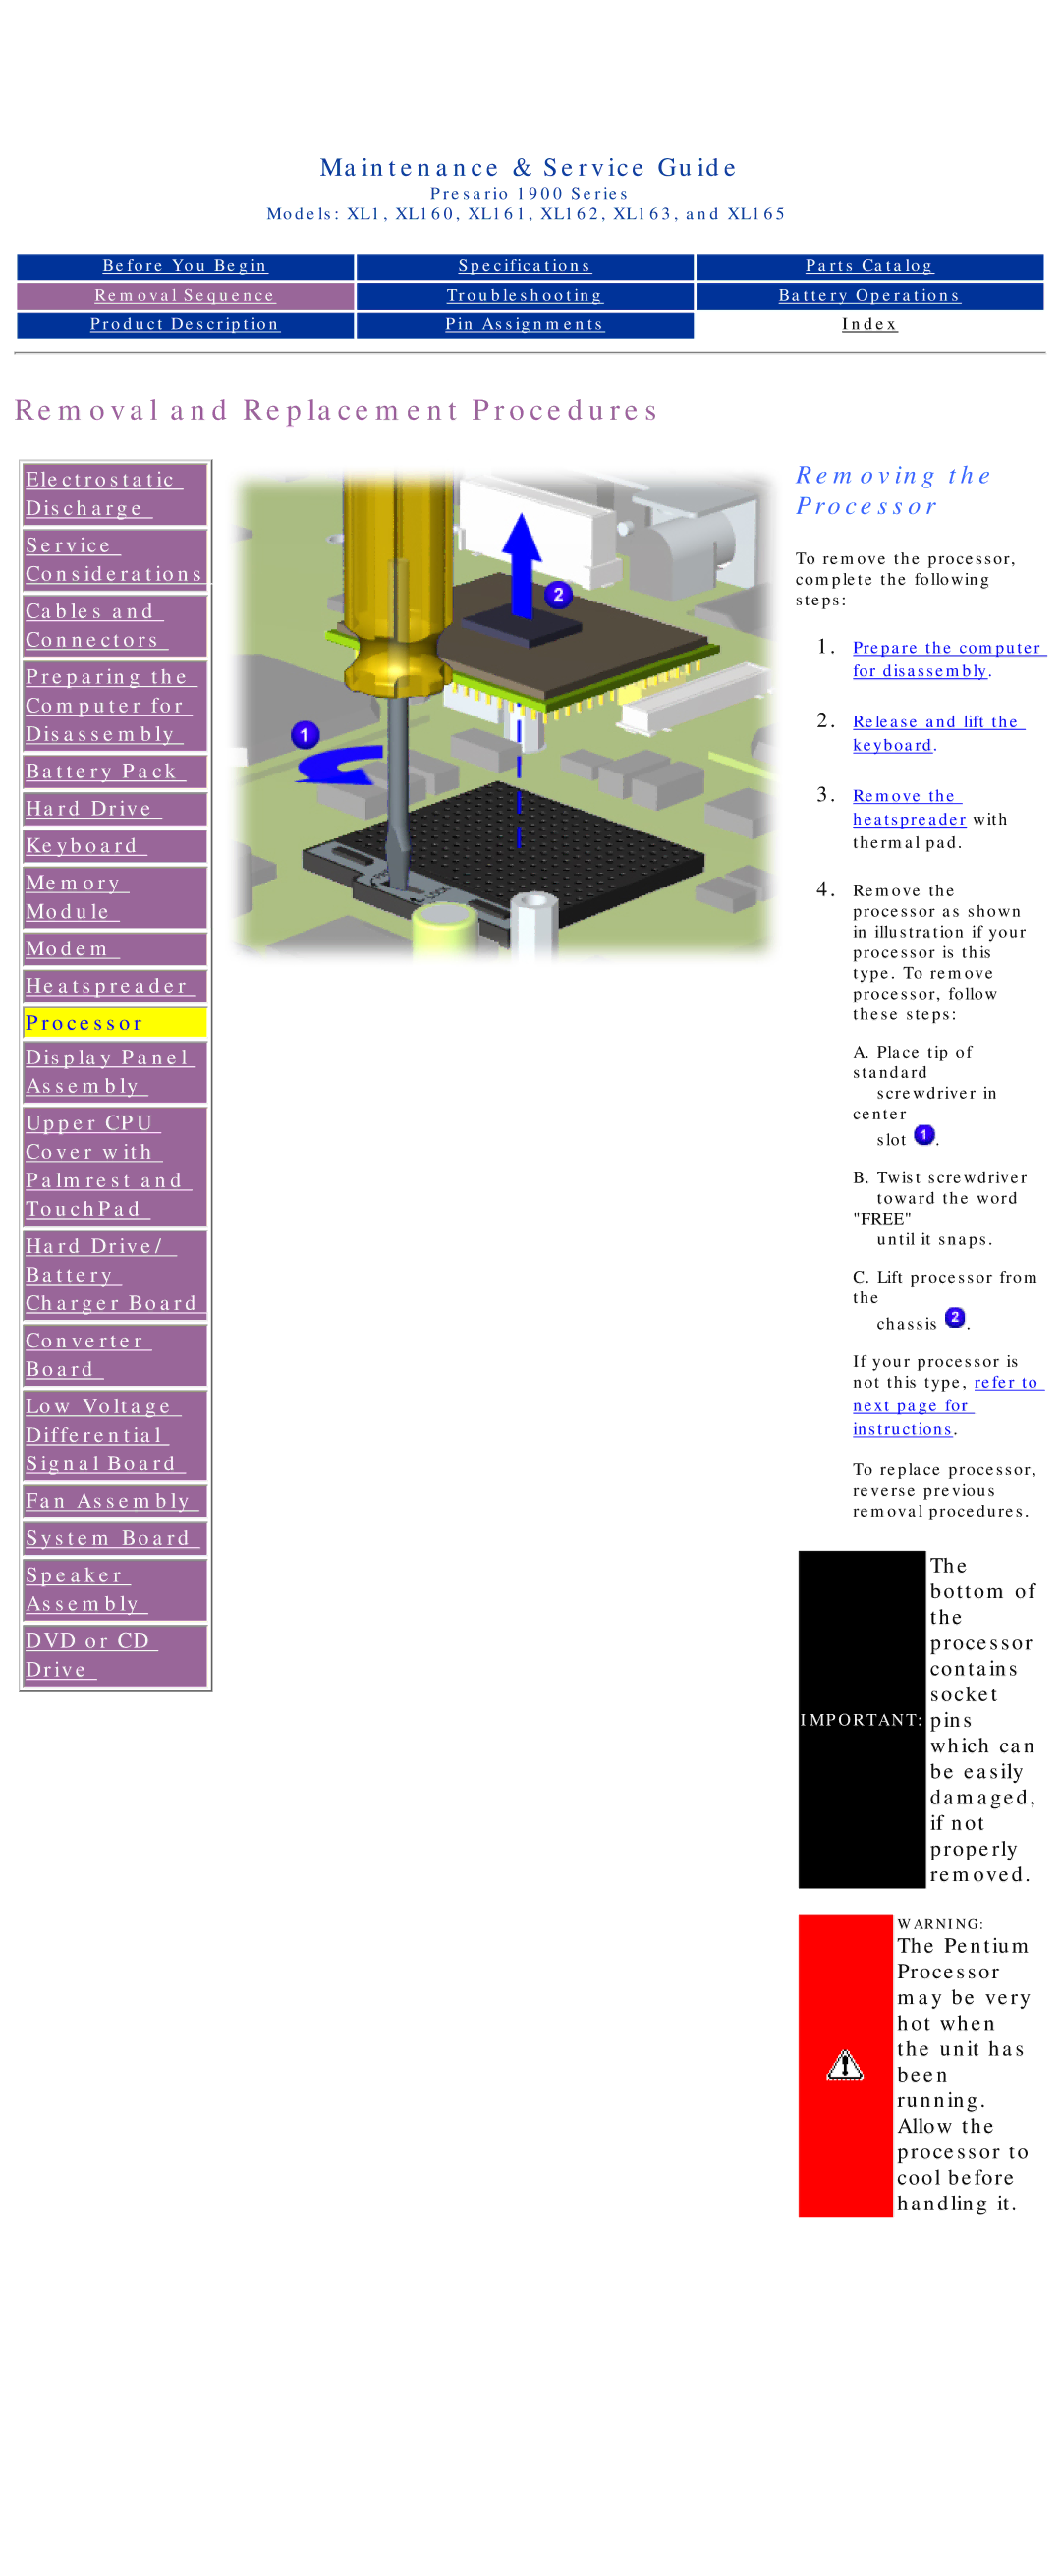
Removing the Processor
To remove the processor, complete the following steps:
1.Prepare the computer for disassembly.
2.Release and lift the keyboard.
3.Remove the heatspreader with thermal pad.
4.Remove the processor as shown in illustration if your processor is this type. To remove processor, follow these steps:
A. Place tip of standard
screwdriver in center
slot ![]() .
.
B. Twist screwdriver toward the word
"FREE"
until it snaps.
C. Lift processor from the
chassis ![]() .
.
If your processor is not this type, refer to
next page for instructions.
To replace processor, reverse previous removal procedures.
The bottom of the processor contains socket
IMPORTANT: pins
which can be easily damaged, if not properly removed.
WARNING:
The Pentium Processor may be very hot when the unit has been running. Allow the processor to cool before handling it.