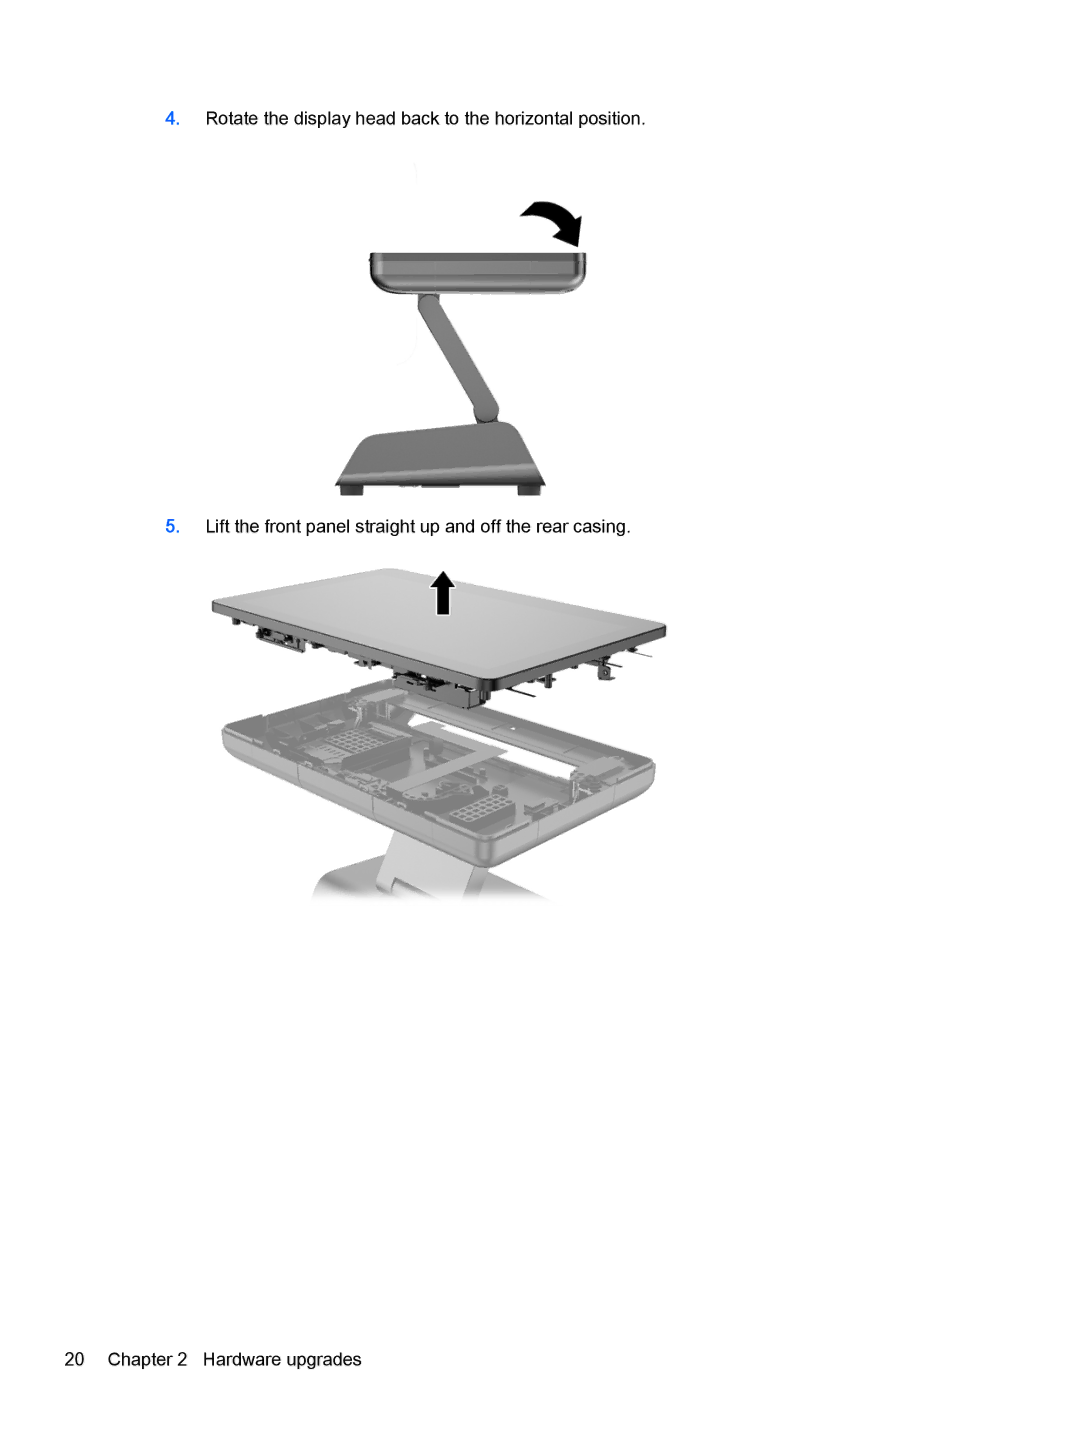
Manuals
/
HP
/
Computer Equipment
/
Point of Sale Systems
HP
2000 Base Model Rotate the display head back to the horizontal position, Hardware upgrades
Models:
2000
1
26
45
45
Download
45 pages
22.77 Kb
23
24
25
26
27
28
29
30
<
>
Troubleshooting
Install
Maintenance
Configuring the software
Connecting a serial device
Table A-1 Diagnostic Front Panel LEDs and Audible Codes continued
Flexible use with display tilt and height adjustments
Replacing the battery
Reconnect the power cord and press the power button
Hardware upgrades
Page 26
Image 26
4.
Rotate the display head back to the horizontal position.
5.
Lift the front panel straight up and off the rear casing.
20 Chapter 2 Hardware upgrades
Page 25
Page 27
Page 26
Image 26
Page 25
Page 27
Contents
Hardware Reference Guide
HP RP2 Retail System
Product notice
Software terms
About This Book
iv About This Book
Calibration for Windows 7 Professional and Embedded POSReady
Table of contents
Interpreting POST diagnostic front panel LEDs and audible codes
Grounding methods
Touch screen maintenance
Preventing electrostatic damage
Computer operating guidelines and routine care
Product Models
Standard features
1 Product overview
Cable management features
Flexible use with display tilt and height adjustments
Operating system choices Integrated NIC and WiFi some models
87% energy efficient internal power supply adapter
Rear components
Rear components
Connecting a serial device
powered serial ports on page 32 for more information
Warnings and cautions
2 Hardware upgrades
Tools needed
Mounting the RP2 to a wall, swing arm, or pole-mounted bracket
Adjusting the tilt angle
Unfolding the stand
Routing cables to external devices
7. Reconnect the power cord and press the power button
Routing cables to external devices
Replacing the power supply
7. Slide the new power supply into the left side of the base
Replacing the power supply
11. Connect the power cord to an electrical outlet
12 Chapter 2 Hardware upgrades
Installing optional HP integrated USB peripheral modules
14 Chapter 2 Hardware upgrades
Installing optional HP integrated USB peripheral modules
8. Reconnect the power cord and press the power button
16 Chapter 2 Hardware upgrades
Replacing the SODIMM
Installing memory
DDR3-SDRAM SODIMM
3. Remove the front panel. See Removing the front panel on page
6. Replace the front panel. See Replacing the front panel on page
Removing the front panel
5. Lift the front panel straight up and off the rear casing
20 Chapter 2 Hardware upgrades
4. Rotate the display head back to the horizontal position
Replacing the front panel
1. Place the display head straight down onto the rear casing
22 Chapter 2 Hardware upgrades
Replacing the hard drive
3. Remove the front panel. See Removing the front panel on page
24 Chapter 2 Hardware upgrades
7. Slide the hard drive out of the carrier
Replacing the hard drive
9. Install the four grommet screws into the sides of the carrier
8. Slide the new hard drive into the carrier
Replacing the battery
11. Replace the front panel. See Replacing the front panel on page
6. Replace the front panel. See Replacing the front panel on page
2. Disconnect the power cord from the power outlet
3. Remove the front panel. See Removing the front panel on page
Securing the RP2 to a counter top
Installing an external security lock
Cable lock
30 Chapter 2 Hardware upgrades
Padlock
1. Install the padlock security loop on the rear panel
A padlock can be used to secure the RP2 to an external object
Touch screen calibration
3 Configuring the software
Configuring the MSR
Calibration for Windows 7 Professional and Embedded POSReady
Configuring powered serial ports
A Troubleshooting
Interpreting POST diagnostic front panel LEDs and audible codes
Beeps
Table A-1 Diagnostic Front Panel LEDs and Audible Codes continued
Activity
Possible Cause
Beeps
Table A-1 Diagnostic Front Panel LEDs and Audible Codes continued
Activity
Possible Cause
Grounding methods
B Electrostatic discharge
Preventing electrostatic damage
Touch screen maintenance
Computer operating guidelines and routine care
Shipping preparation
Index