5.When you are notified that the array migration has completed, close all open programs and restart the computer. When the computer is restarted, the operating system detects the newly- created array and prompts you to restart the computer a second time.
6.After you have restarted the computer a second time, the RAID migration is complete.
![]()
![]()
![]()
![]() NOTE: Although the total capacity of the RAID 0 volume appears in the Console, the extra capacity created with the addition of the secondary HDD appears to the system as unallocated space. After the system reboots, you must allocate the unallocated space. For Windows XP, the only option through the operating system is to create and format a separate volume. Windows Vista and Windows 7 contain additional capabilities that allow you to create a single RAID 0 volume. Refer to Allocating unallocated HDD space for an HP image on page 30 for further instructions.
NOTE: Although the total capacity of the RAID 0 volume appears in the Console, the extra capacity created with the addition of the secondary HDD appears to the system as unallocated space. After the system reboots, you must allocate the unallocated space. For Windows XP, the only option through the operating system is to create and format a separate volume. Windows Vista and Windows 7 contain additional capabilities that allow you to create a single RAID 0 volume. Refer to Allocating unallocated HDD space for an HP image on page 30 for further instructions.
Migrating to RAID 5 (select models only)
![]()
![]()
![]()
![]() NOTE: When using an HP supplied image, migrating to RAID 5 requires you to perform additional steps, including copying data to an additional external USB HDD. Please read the entire RAID 5 migration procedure before you begin.
NOTE: When using an HP supplied image, migrating to RAID 5 requires you to perform additional steps, including copying data to an additional external USB HDD. Please read the entire RAID 5 migration procedure before you begin.
![]()
![]()
![]()
![]() NOTE: RAID 5 requires 3 hard drives in the computer: the primary HDD, the secondary HDD, and the upgrade bay HDD.
NOTE: RAID 5 requires 3 hard drives in the computer: the primary HDD, the secondary HDD, and the upgrade bay HDD.
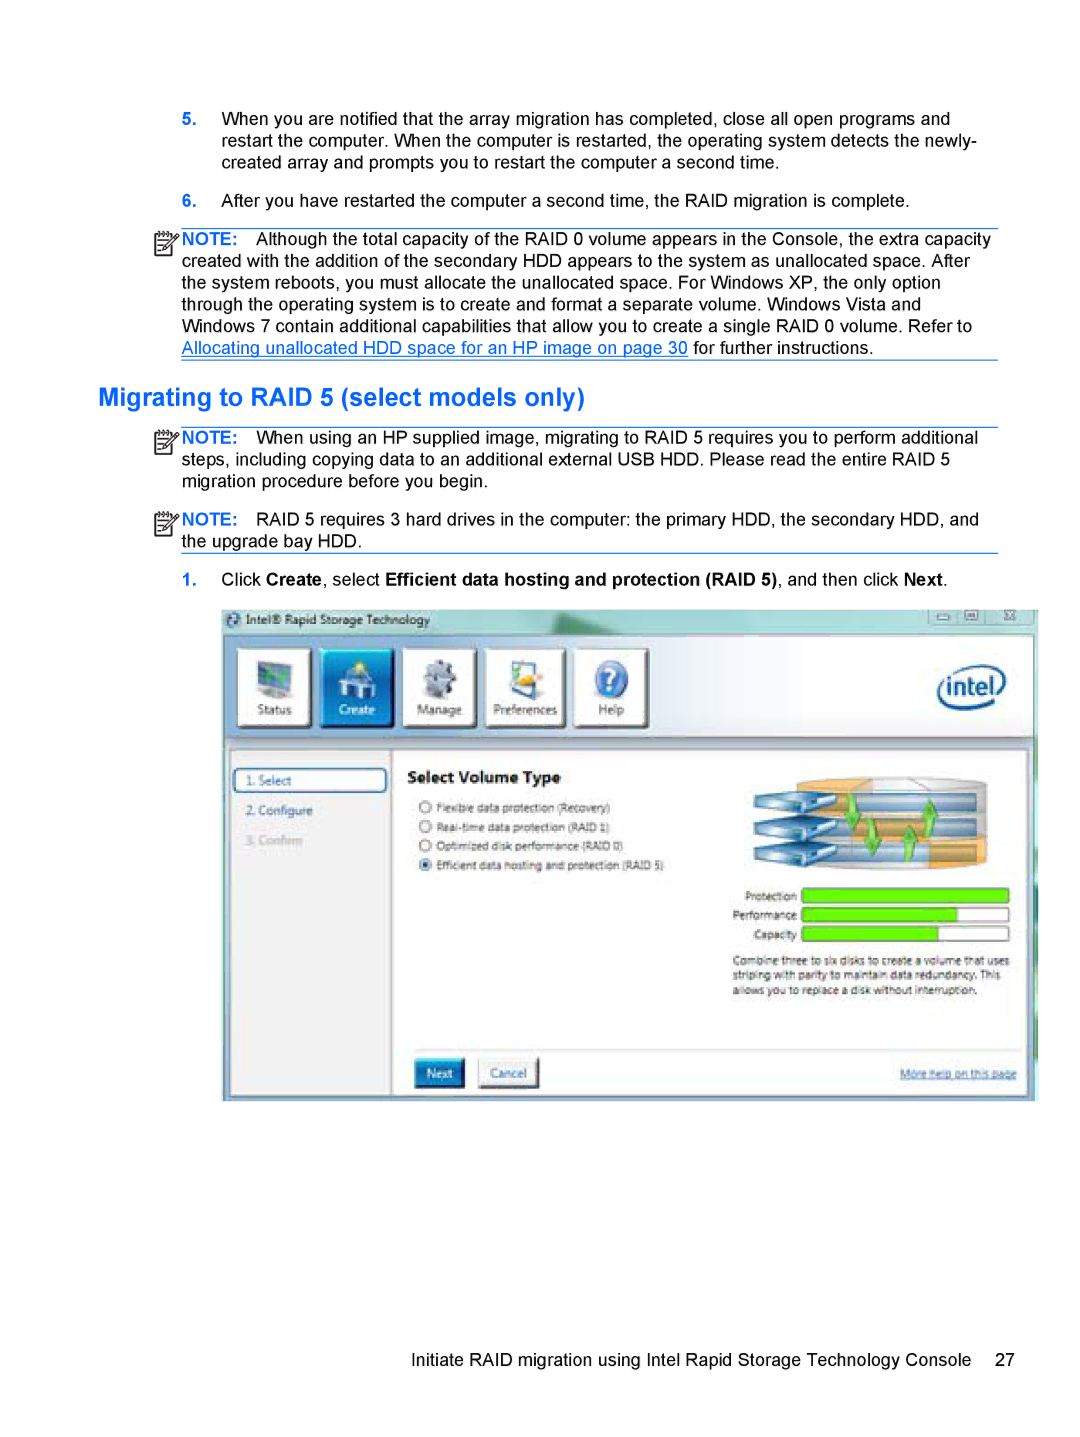
1.Click Create, select Efficient data hosting and protection (RAID 5), and then click Next.
Initiate RAID migration using Intel Rapid Storage Technology Console 27