Step 2. Choose a Suitable Location
The installation site directly impacts the functionality and lifespan of the control.
Avoid areas where surrounding air temperature exceeds 40OC (direct sunlight or near heating equipment or inside a panel without a cooling fan. Avoid locations where the front panel dial and switch may be bumped and accidentally turned on/off or damaged.
Avoid environments with corrosive gas.
Avoid locations near radioactive matter or flammable material.
Avoid locations near equipment that generate electromagnetic interference (soldering or power machinery).
Avoid mounting the control to a surface that vibrates.
Step 3 – Mount the
Control
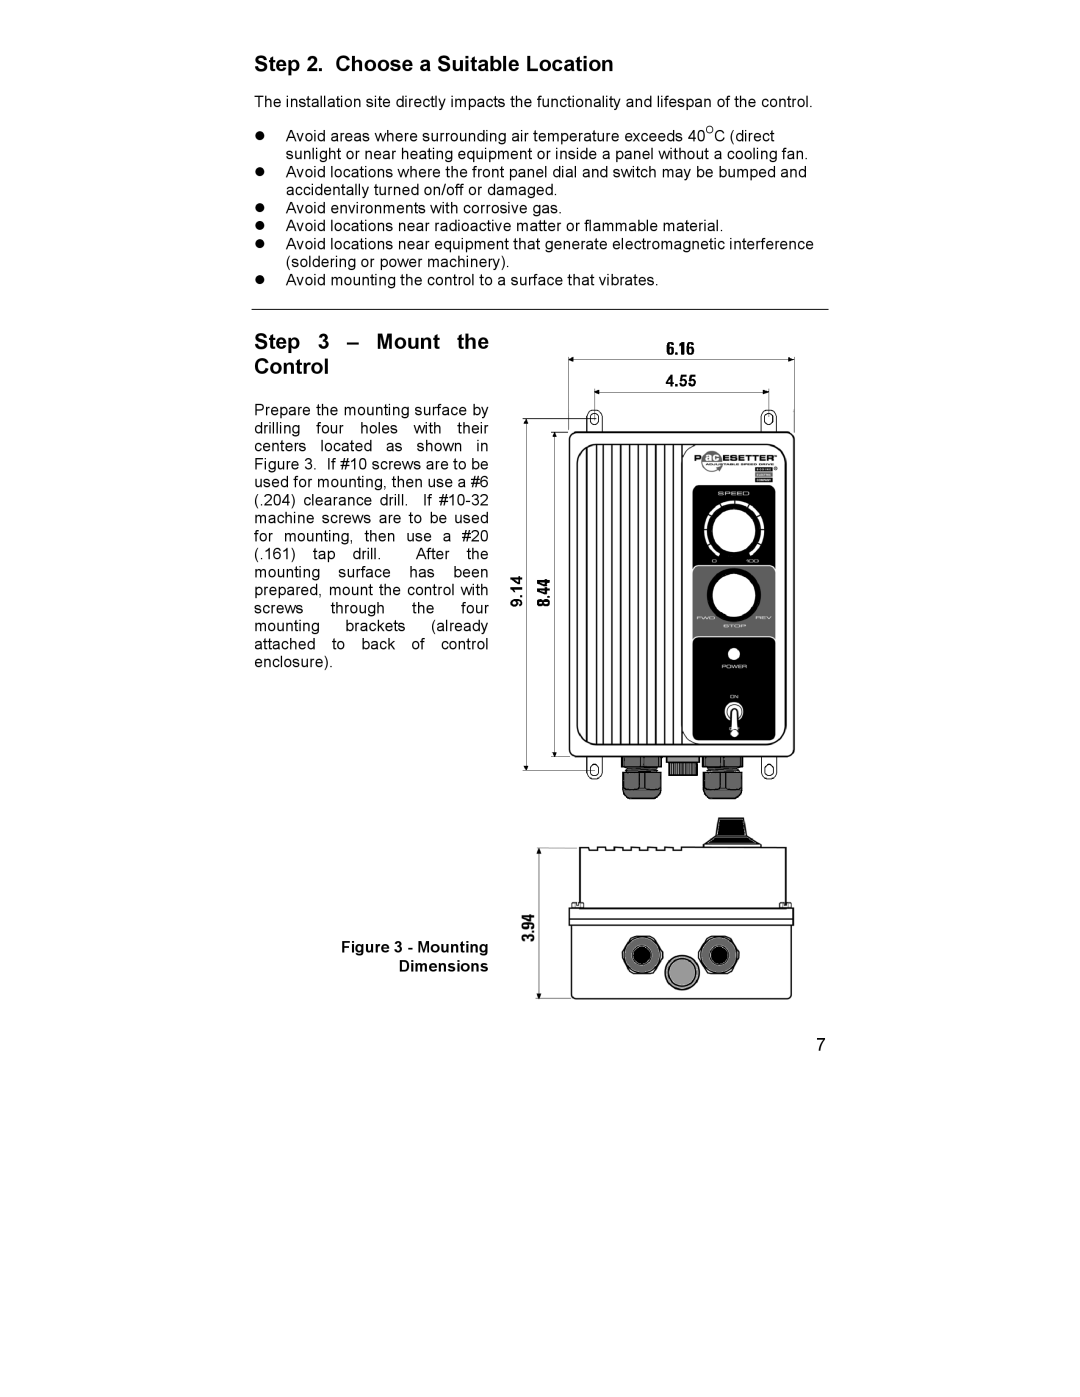
Prepare the mounting surface by drilling four holes with their centers located as shown in Figure 3. If #10 screws are to be used for mounting, then use a #6 (.204) clearance drill. If
(.161) tap drill. After the mounting surface has been prepared, mount the control with screws through the four mounting brackets (already attached to back of control enclosure).
Figure 3 - Mounting
Dimensions
7