Rear-facing webcam
Description | Spare part number |
|
|
|
|
Before removing the
1.Turn off the tablet. If you are unsure whether the tablet is off or in Hibernation, turn the tablet on, and then shut it down through the operating system.
2.Disconnect the power from the tablet by unplugging the power cord from the tablet.
3.Disconnect all external devices from the tablet.
4.Remove the back cover (see Back cover on page 11).
5.Disconnect the battery cable from the system board (see Battery on page 13).
6.Remove the top speaker (see Speakers on page 15).
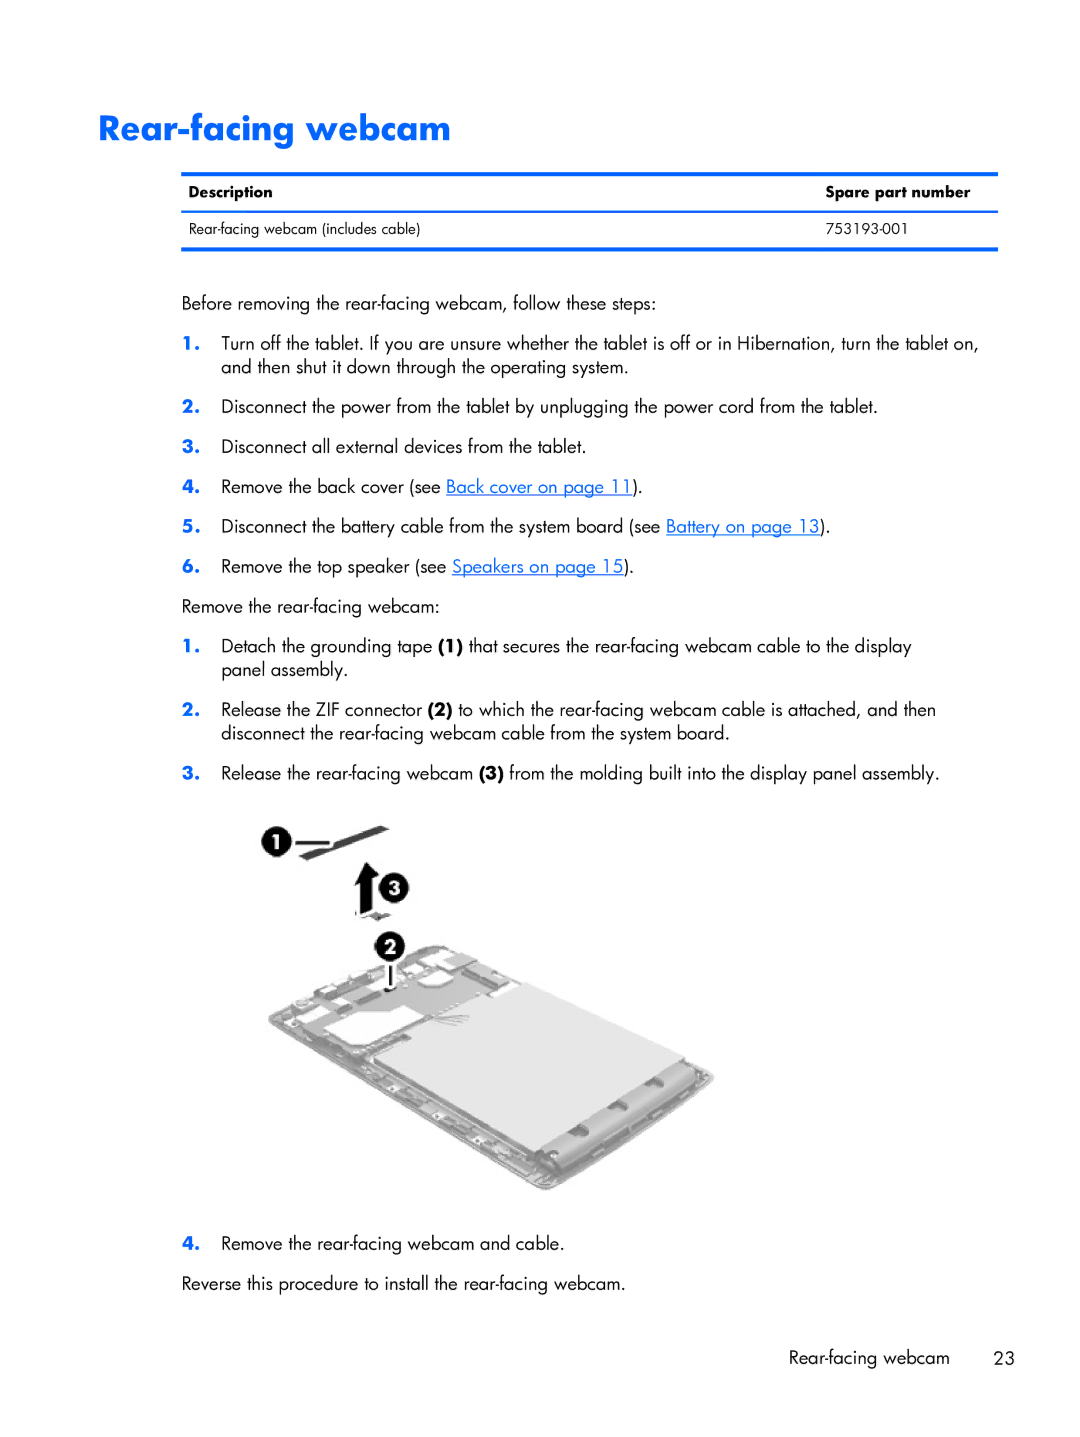
Remove the
1.Detach the grounding tape (1) that secures the
2.Release the ZIF connector (2) to which the
3.Release the
4.Remove the
23 |