Physical Installation
Physical Installation
Rack Installation
CAUTION: Do not use the enclosed small mounting brackets for rack installation. These are used for side rail installation.
If you have already mounted your system, or if your system does not require mounting, proceed to “Wiring Connections” later in this document.
You can physically install the SA8220 in either of two ways. Each installation method requires a particular type of mounting brackets, and are included in the SA8220's shipping container.
•In a standard 19” rack, cantilevered from the mounting brackets
•In a cabinet with side rail mounts
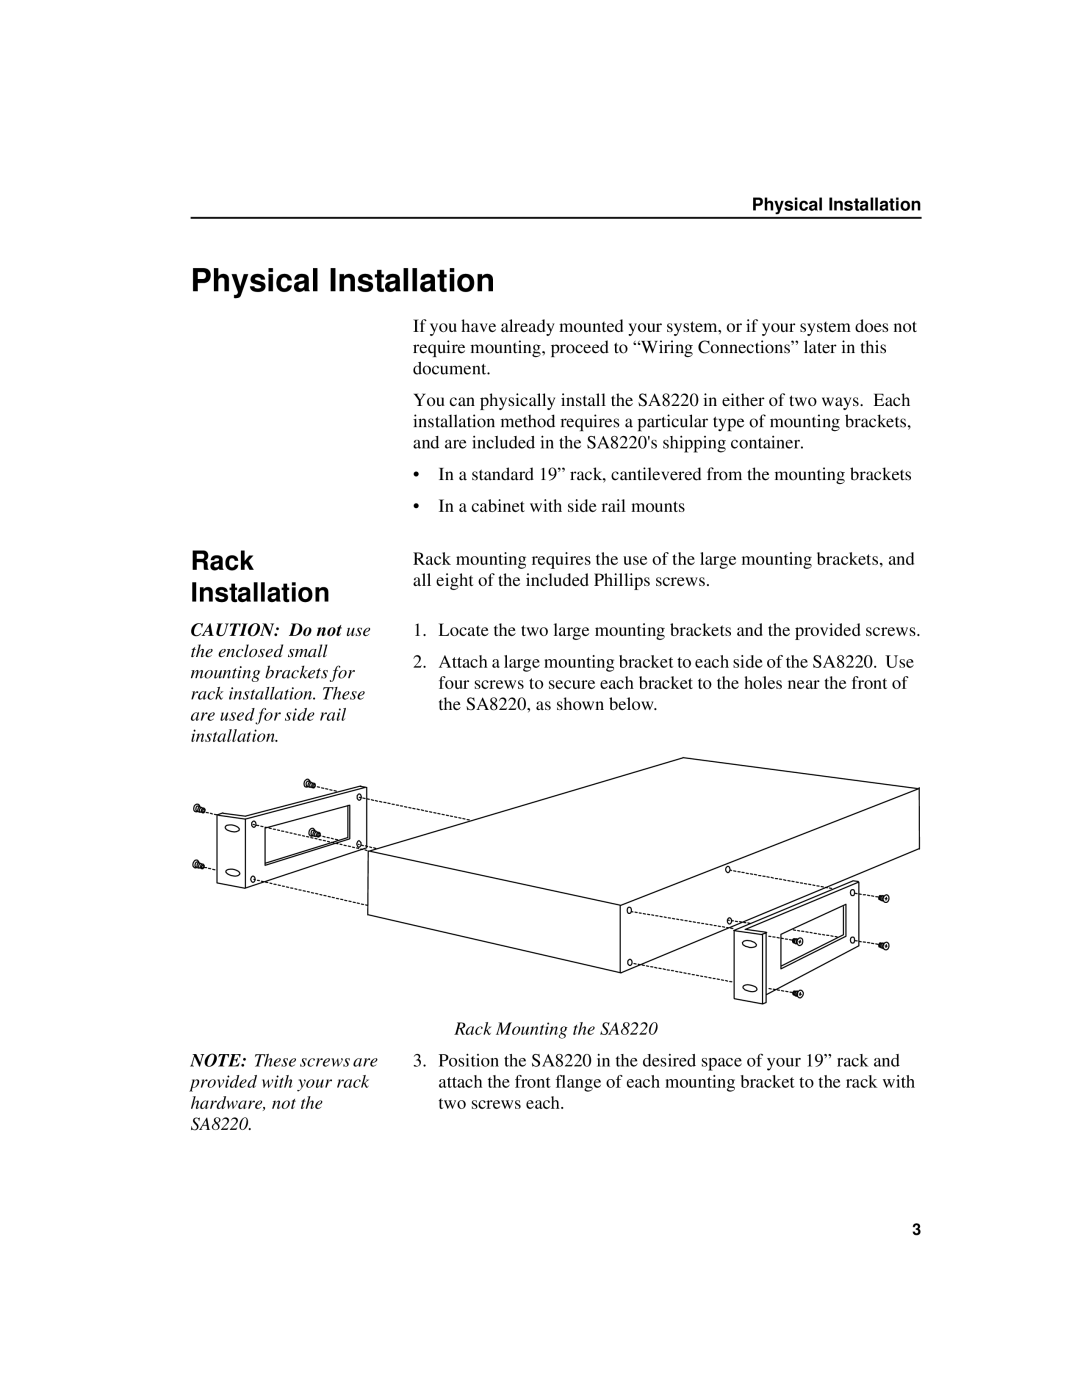
Rack mounting requires the use of the large mounting brackets, and all eight of the included Phillips screws.
1.Locate the two large mounting brackets and the provided screws.
2.Attach a large mounting bracket to each side of the SA8220. Use four screws to secure each bracket to the holes near the front of the SA8220, as shown below.
NOTE: These screws are provided with your rack hardware, not the SA8220.
Rack Mounting the SA8220
3.Position the SA8220 in the desired space of your 19” rack and attach the front flange of each mounting bracket to the rack with two screws each.
3
