Chapter 1
date and time imprint feature. See Date & Time Imprint under “Using the Picture Capture and Video Record menus” on page 15.
1.Use ![]() to adjust the highlighted value.
to adjust the highlighted value.
2.Use ![]()
![]() to move to the other selections and repeat Step 1 until the date and time are set correctly.
to move to the other selections and repeat Step 1 until the date and time are set correctly.
3.Press ![]() when the date, time, and format settings are correct, then press
when the date, time, and format settings are correct, then press ![]() again to confirm.
again to confirm.
To change the date and time later, use the ![]() Camera
Camera
Setup Menu (see “Using the Camera Setup Menu” on page 32).
Install and format an optional memory card
This camera supports standard, high speed, and high capacity Secure Digital (SD and SDHC) memory cards, 32MB to 8GB.
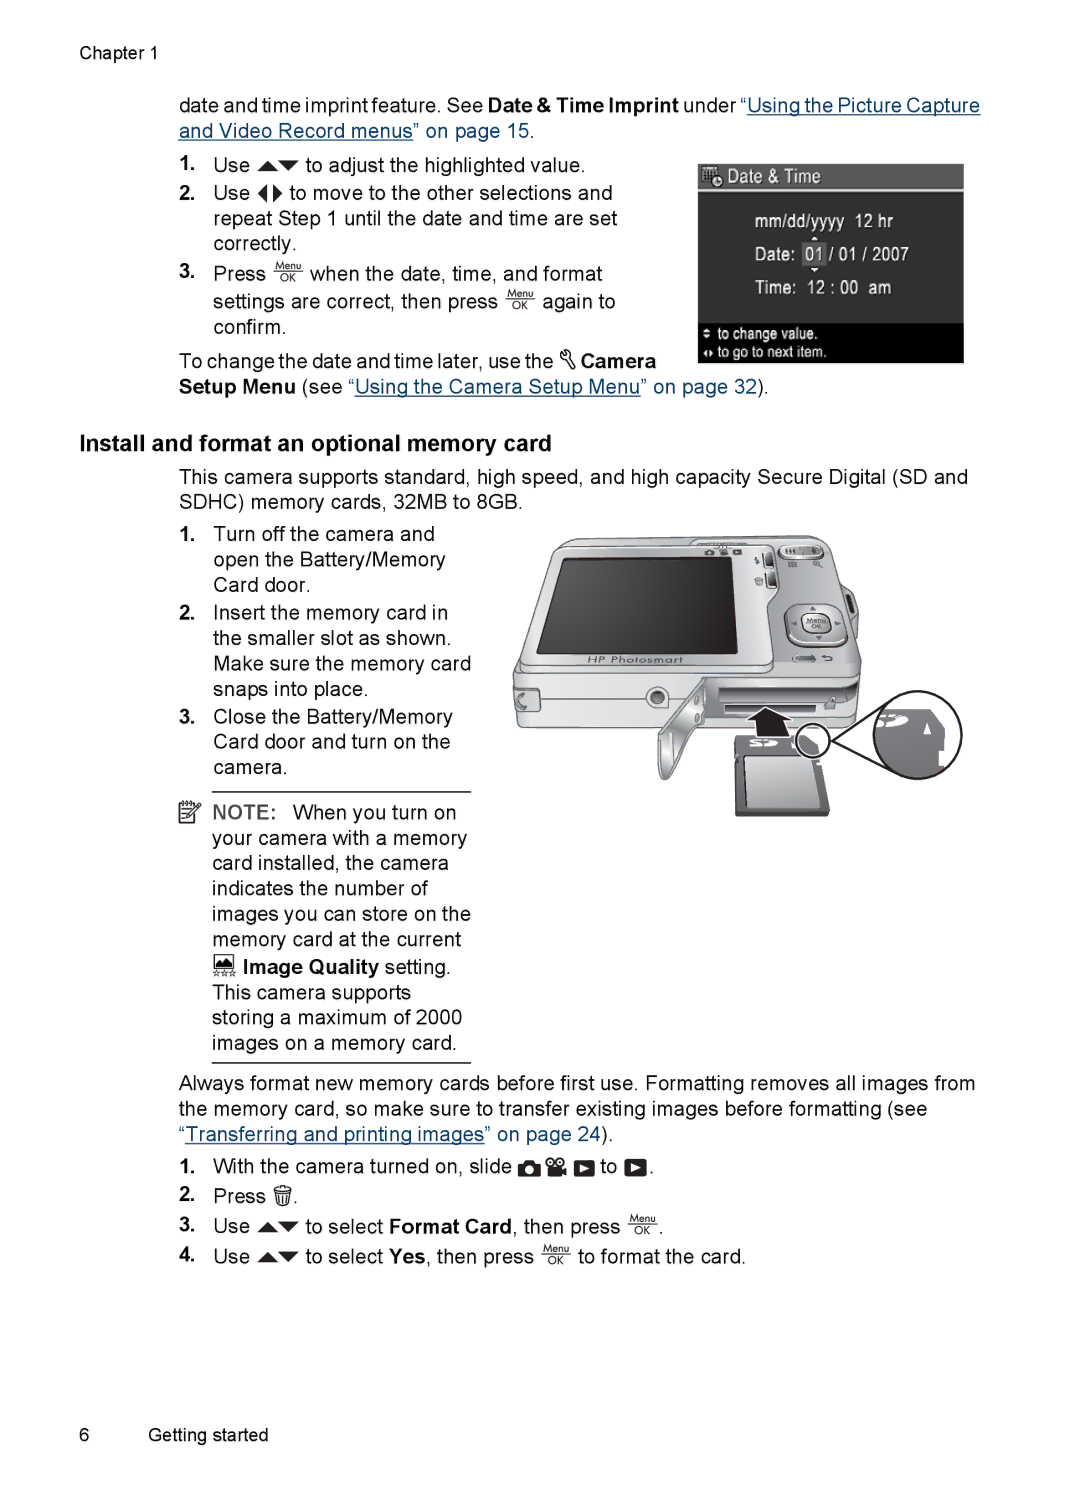
1.Turn off the camera and
open the Battery/Memory Card door.
2. Insert the memory card in the smaller slot as shown. Make sure the memory card snaps into place.
3. Close the Battery/Memory Card door and turn on the camera.
![]() NOTE: When you turn on your camera with a memory card installed, the camera indicates the number of images you can store on the memory card at the current
NOTE: When you turn on your camera with a memory card installed, the camera indicates the number of images you can store on the memory card at the current
![]()
![]() Image Quality setting. This camera supports storing a maximum of 2000 images on a memory card.
Image Quality setting. This camera supports storing a maximum of 2000 images on a memory card.
Always format new memory cards before first use. Formatting removes all images from the memory card, so make sure to transfer existing images before formatting (see “Transferring and printing images” on page 24).
1.With the camera turned on, slide ![]()
![]()
![]() to
to ![]() .
.
2.Press ![]() .
.
3.Use ![]() to select Format Card, then press
to select Format Card, then press ![]() .
.
4.Use ![]() to select Yes, then press
to select Yes, then press ![]() to format the card.
to format the card.
6 Getting started
