•One accessory kit with the following items:
◦Rack Mount Kit, including rails, rail mounting hardware, and plenum
◦HP product documentation, including Read Me First, Safety Guides, End User License Agreement and Warranty
•Two power cords
SN3000B 16Gb
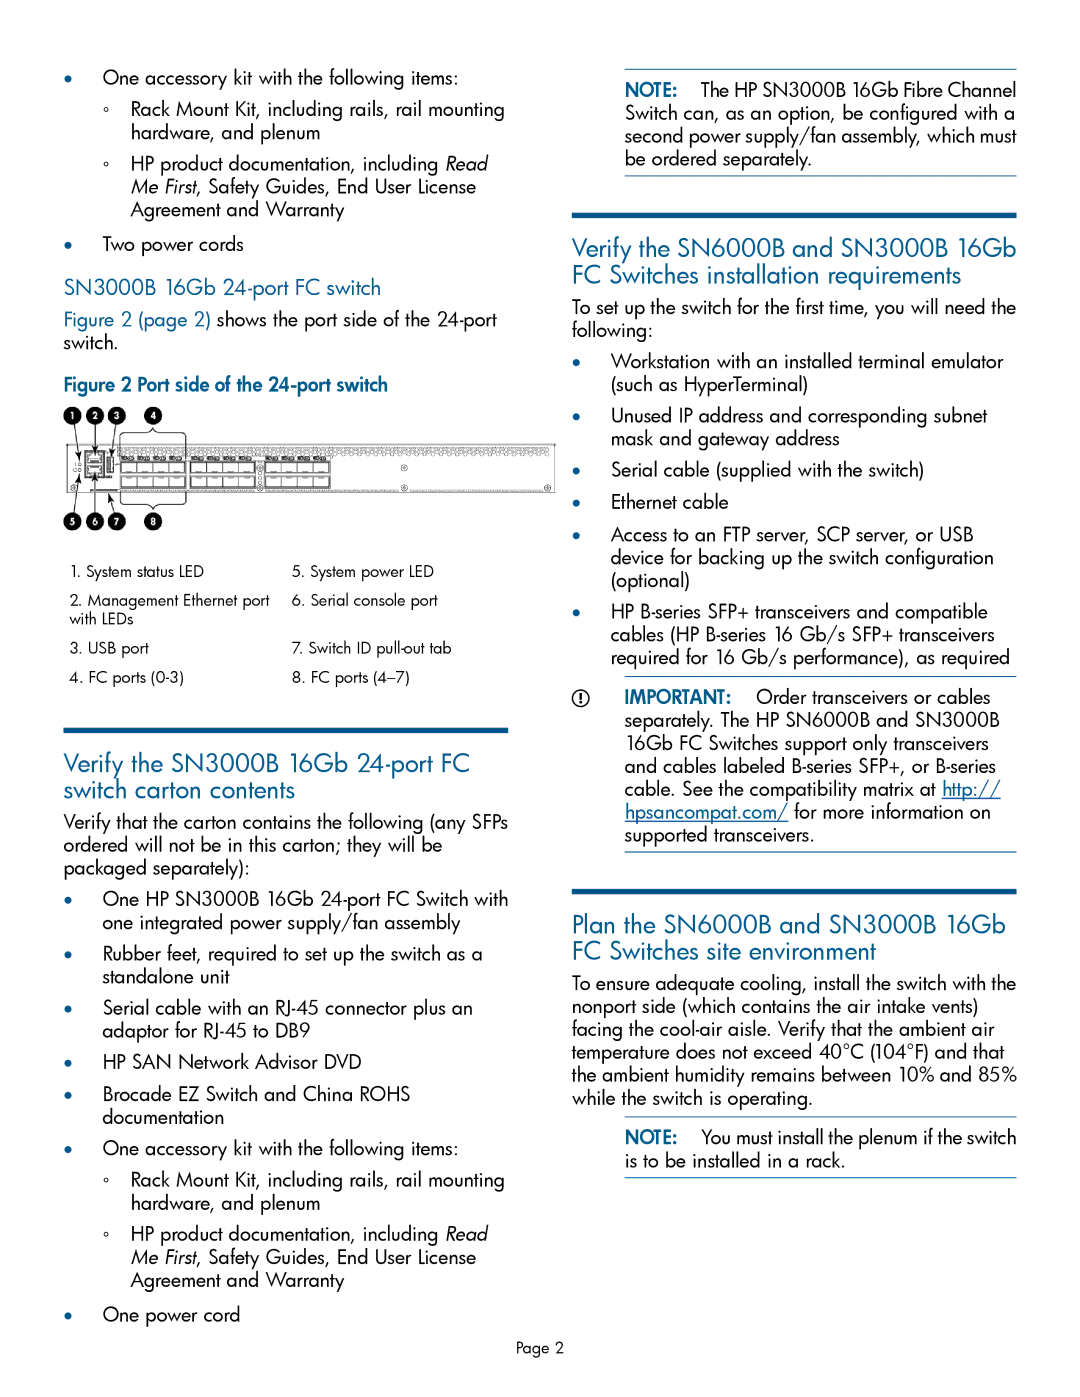
Figure 2 (page 2) shows the port side of the 24-port switch.
Figure 2 Port side of the 24-port switch
1. System status LED | 5. System power LED |
2. Management Ethernet port | 6. Serial console port |
with LEDs |
|
3. USB port | 7. Switch ID |
4. FC ports | 8. FC ports |
Verify the SN3000B 16Gb 24-port FC switch carton contents
Verify that the carton contains the following (any SFPs ordered will not be in this carton; they will be packaged separately):
•One HP SN3000B 16Gb
•Rubber feet, required to set up the switch as a standalone unit
•Serial cable with an
•HP SAN Network Advisor DVD
•Brocade EZ Switch and China ROHS documentation
•One accessory kit with the following items:
◦Rack Mount Kit, including rails, rail mounting hardware, and plenum
◦HP product documentation, including Read Me First, Safety Guides, End User License Agreement and Warranty
•One power cord
NOTE: The HP SN3000B 16Gb Fibre Channel Switch can, as an option, be configured with a second power supply/fan assembly, which must be ordered separately.
Verify the SN6000B and SN3000B 16Gb FC Switches installation requirements
To set up the switch for the first time, you will need the following:
•Workstation with an installed terminal emulator (such as HyperTerminal)
•Unused IP address and corresponding subnet mask and gateway address
•Serial cable (supplied with the switch)
•Ethernet cable
•Access to an FTP server, SCP server, or USB device for backing up the switch configuration (optional)
•HP
IMPORTANT: Order transceivers or cables separately. The HP SN6000B and SN3000B 16Gb FC Switches support only transceivers and cables labeled
Plan the SN6000B and SN3000B 16Gb FC Switches site environment
To ensure adequate cooling, install the switch with the nonport side (which contains the air intake vents) facing the
NOTE: You must install the plenum if the switch is to be installed in a rack.
Page 2
