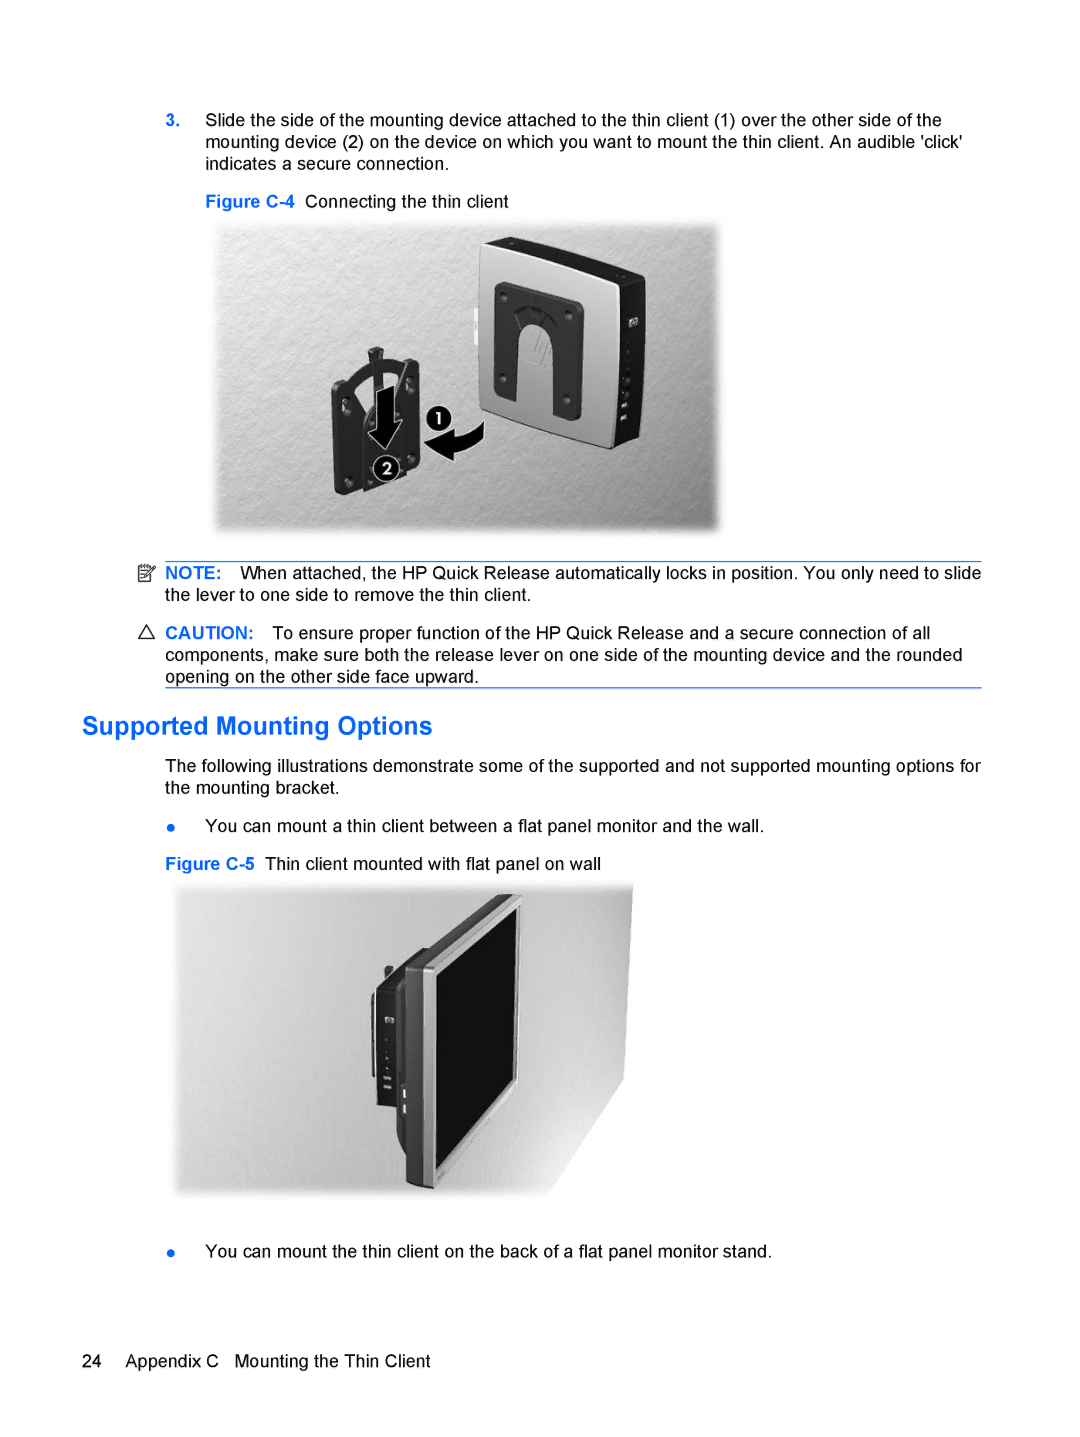
3.Slide the side of the mounting device attached to the thin client (1) over the other side of the mounting device (2) on the device on which you want to mount the thin client. An audible 'click' indicates a secure connection.
Figure C-4 Connecting the thin client
![]() NOTE: When attached, the HP Quick Release automatically locks in position. You only need to slide the lever to one side to remove the thin client.
NOTE: When attached, the HP Quick Release automatically locks in position. You only need to slide the lever to one side to remove the thin client.
![]() CAUTION: To ensure proper function of the HP Quick Release and a secure connection of all components, make sure both the release lever on one side of the mounting device and the rounded opening on the other side face upward.
CAUTION: To ensure proper function of the HP Quick Release and a secure connection of all components, make sure both the release lever on one side of the mounting device and the rounded opening on the other side face upward.
Supported Mounting Options
The following illustrations demonstrate some of the supported and not supported mounting options for the mounting bracket.
●You can mount a thin client between a flat panel monitor and the wall.
