Manuals
/
HP
/
Car Audio and Video
/
Car Video System
HP
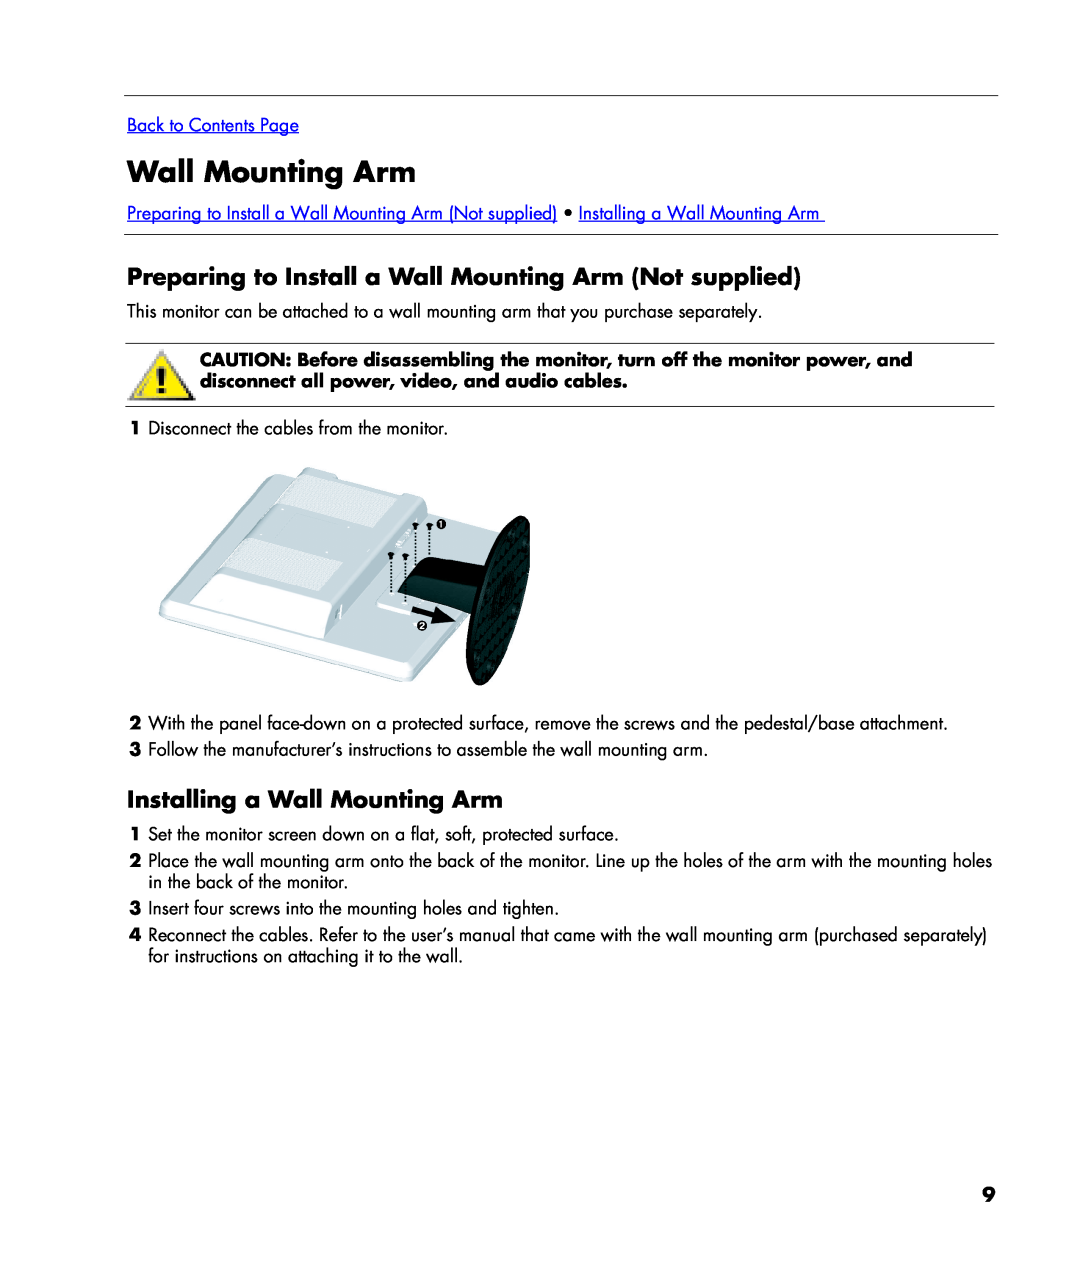
w20 Preparing to Install a Wall Mounting Arm Not supplied, Installing a Wall Mounting Arm
Models:
w22
1
9
32
32
Download
32 pages
32.47 Kb
6
7
8
9
10
11
12
13
the Signal Cable
Maintenance
Factory Preset
Adjusting the Tilt
Plug and Play DDC2B Feature
Page 9
Image 9
Page 8
Page 10
Page 9
Image 9
Page 8
Page 10
Contents
Installing Drivers and Using the Auto-Adjustment Feature
Preface Safety and Maintenance Guidelines Setup Using the Monitor
Technical Support FAQs Specifications
HP w20 / w22 LCD Monitor User’s Guide
Safety and Maintenance Guidelines Setup Using the Monitor
Back to Contents Page
Preface
About This Guide
Safety and Maintenance Guidelines
Important Safety Information
Safety Precautions
Cleaning the Monitor
Maintenance Guidelines
Attaching the Base Removing the Base Adjusting the Tilt
Setup
Base and Tilt
Attaching the Base
Removing the Base
Adjusting the Tilt
Cables
Attaching the Cables
Attaching the Cables
6 Turn on your monitor and computer
Preparing to Install a Wall Mounting Arm Not supplied
Installing a Wall Mounting Arm
Wall Mounting Arm
Operating Instructions
Using the Monitor
External Controls
Setting the Optimal Resolution
Settings
Adjusting the Volume
2 Click Settings 3 Click Control Panel
Adjusting On-Screen Display Settings
OSD Menu
Factory Preset
OSD Menu Levels
Level
OSD Menu Levels continued
Using the Auto-Adjustment Function
Installing Drivers and Using the Auto-Adjustment Feature
Downloading Drivers and Software
3 Select Download Drivers and Software
Technical Support FAQs Frequently Asked Questions
Technical Support FAQs
Problem & Question
Possible Solutions
Possible Solutions
HP w20
Specifications
HP w22
Preset
Preset Display Modes
Pixel Format
Horizontal
Pin Assignments
Power Cord Set Requirements
the Signal Cable
Pin Number
Plug and Play DDC2B Feature
LCD Monitor Quality and Pixel Policy
Federal Communications Commission Notice
Agency Regulatory Notices
Modifications
Cables
For questions regarding your product, contact Hewlett-Packard Company
Canadian Notice
Avis Canadien
European Union Regulatory Notice
Japanese Notice
Korean Notice Materials Disposal
Japanese Power Cord Notice Japanese Material Content Declaration
EPA Energy Star Compliance
HP Recycling Program
Ergonomics
Congratulations
Energy
Emissions
Ecology
Top
Page
Image
Contents