41877-01 specifications
The Hunter Fan 41877-01 is a remarkable ceiling fan that seamlessly blends style with functionality, making it a popular choice for homeowners looking to enhance their indoor spaces. This ceiling fan is designed to provide both comfort and aesthetic appeal, embodying Hunter's dedication to quality and innovation.One of the standout features of the 41877-01 is its sleek, contemporary design. The fan is available in a variety of finishes, allowing it to complement a range of interior styles from modern to traditional. The blades are crafted from durable materials and are expertly engineered to maximize airflow, ensuring a comfortable environment regardless of the season.
This model is equipped with Hunter's WhisperWind® motor technology, well-known for its powerful yet quiet operation. This means you can enjoy a cooling breeze without the distracting noise that some ceiling fans produce. The motor is also made to last, providing reliable performance whether used in summer or winter mode.
Another key characteristic of the Hunter Fan 41877-01 is its energy efficiency. It is crafted with energy-saving technologies that allow it to operate with reduced energy consumption, making it an environmentally friendly choice. This not only helps reduce electricity bills but also supports sustainable living practices.
The fan comes with different speed settings, allowing users to customize their comfort level. Whether you need a gentle breeze for a relaxing evening or a stronger airflow during hot summer days, the 41877-01 adapts easily to your preferences. Furthermore, the fan can often be integrated with smart home systems, offering remote control capabilities for added convenience.
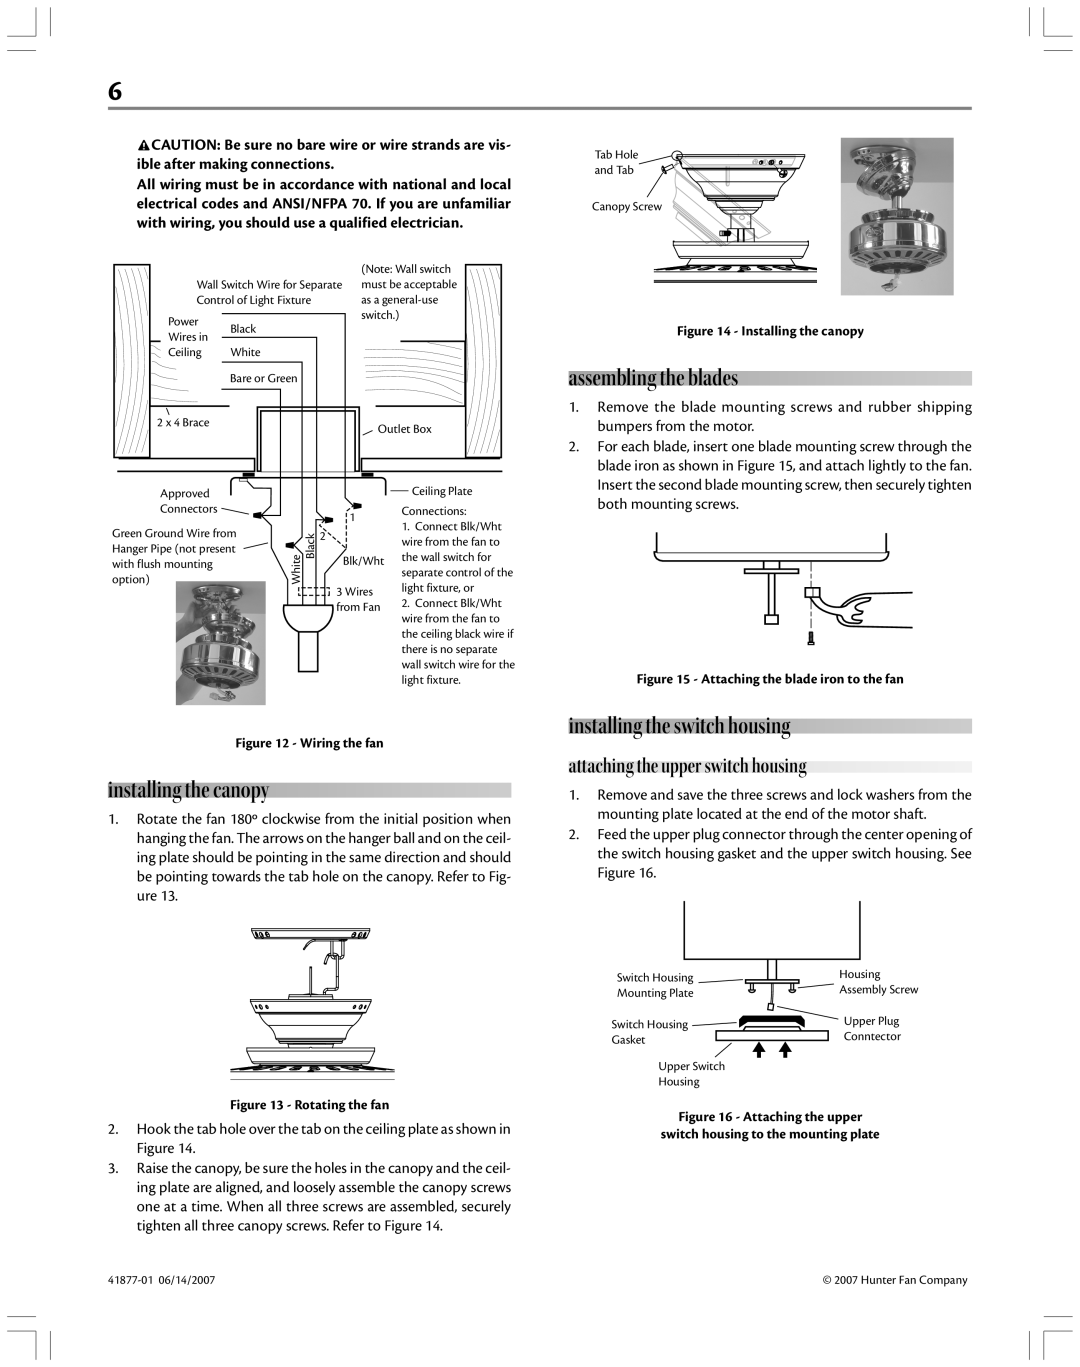
Installation is straightforward, supported by a user-friendly manual, making it accessible for those who prefer a DIY approach. The fan typically comes with all necessary hardware, ensuring a hassle-free setup.
In conclusion, the Hunter Fan 41877-01 embodies a perfect fusion of design, efficiency, and technology. Its stylish appearance, quiet operation, energy-saving features, and customizable settings make it a top choice for any room in the house. Whether you're looking to improve indoor air circulation or simply want to elevate the aesthetic of your space, this fan is an excellent investment for comfort and style.