6 • Assembling the Blades
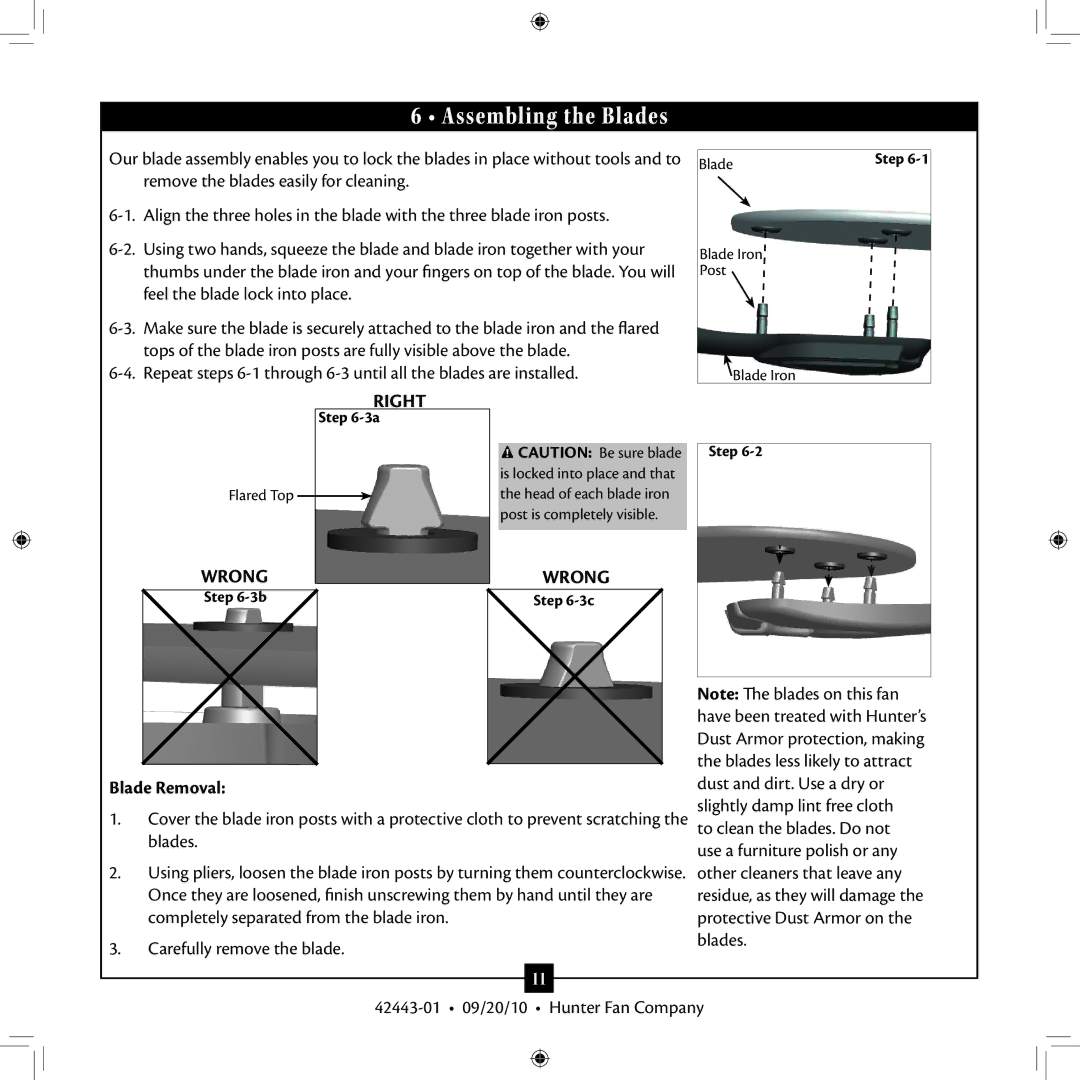
Our blade assembly enables you to lock the blades in place without tools and to remove the blades easily for cleaning..
Blade | Step |
|
Blade Iron
Post
![]() Blade Iron
Blade Iron
Flared Top
WRONG
Step
RIGHT
Step
![]() CAUTION: Be sure blade is locked into place and that the head of each blade iron post is completely visible..
CAUTION: Be sure blade is locked into place and that the head of each blade iron post is completely visible..
WRONG
Step
Step
Blade Removal:
1..Cover the blade iron posts with a protective cloth to prevent scratching the blades..
2.Using pliers, loosen the blade iron posts by turning them counterclockwise.. Once they are loosened, finish unscrewing them by hand until they are completely separated from the blade iron..
3.Carefully remove the blade..
11
Note: The blades on this fan have been treated with Hunter’s Dust Armor protection, making the blades less likely to attract dust and dirt.. Use a dry or slightly damp lint free cloth
to clean the blades.. Do not use a furniture polish or any other cleaners that leave any residue, as they will damage the protective Dust Armor on the blades..
