
42786-01 specifications
The Hunter Fan 42786-01 is a remarkable ceiling fan that combines style, efficiency, and advanced technology to enhance the comfort and aesthetic appeal of any indoor space. This model offers a elegant design with a contemporary aesthetic, making it a suitable choice for a variety of interior decor styles, from modern to traditional.One of the standout features of the Hunter Fan 42786-01 is its powerful yet quiet motor. Designed to provide a comfortable airflow while minimizing noise, this fan ensures a peaceful environment, making it ideal for bedrooms, living rooms, or office spaces. The WhisperWind motor technology is engineered specifically to deliver a full range of airflow options, allowing users to customize their comfort experience without disruptive noise.
The fan is equipped with multiple speed settings, giving users the flexibility to adjust the airflow according to their needs. Whether you desire a gentle breeze on a warm day or a more robust airflow for cooling, the Hunter Fan 42786-01 caters to varied preferences. Additionally, the fan's reversible motor adds to its versatility, providing year-round comfort. In the summer, the fan can be set to spin counterclockwise to create a cooling breeze, while in winter, it can spin clockwise to circulate warm air effectively.
Another key characteristic of the Hunter Fan 42786-01 is its energy efficiency. It not only provides optimal cooling but also helps reduce energy consumption, contributing to lower electricity bills. Its Energy Star certification highlights its commitment to sustainable practices, making it an eco-friendly choice for homeowners.
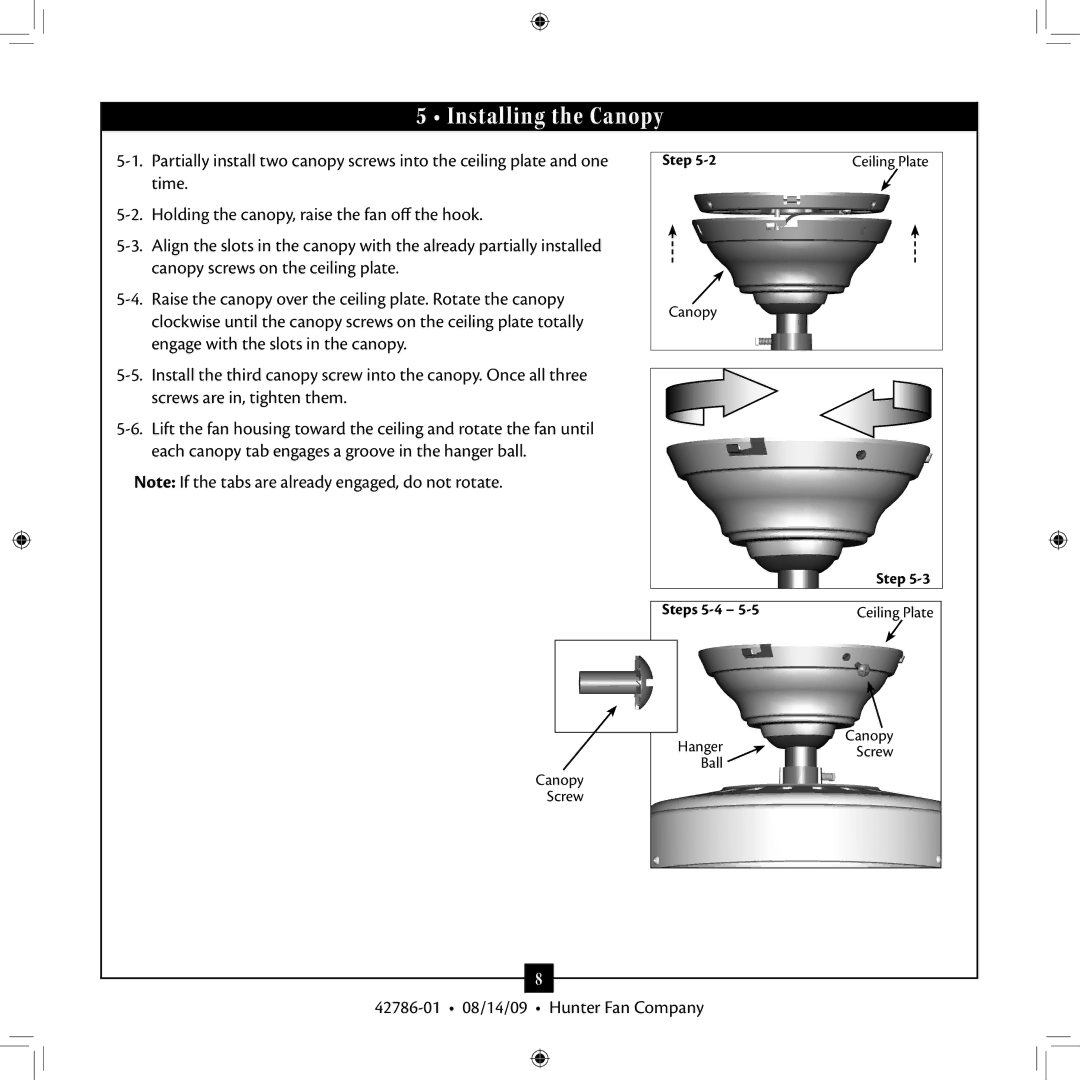
Installation is made easy with the included mounting hardware and clear instructions. The fan features a versatile mounting system that allows for both standard and angled ceiling applications, ensuring compatibility with a variety of ceiling heights and orientations.
Aesthetic appeal is further enhanced with the fan’s available finishes, which can seamlessly blend with different room themes. The integrated LED light kit provides bright, energy-efficient illumination, allowing for focused lighting in specific areas while illuminating the entire room.
Overall, the Hunter Fan 42786-01 stands out with its combination of modern design, advanced motor technology, and energy efficiency. This ceiling fan not only enhances comfort but also contributes to an eco-conscious lifestyle, making it a smart choice for today’s discerning homeowners.