Illumi-Heat specifications
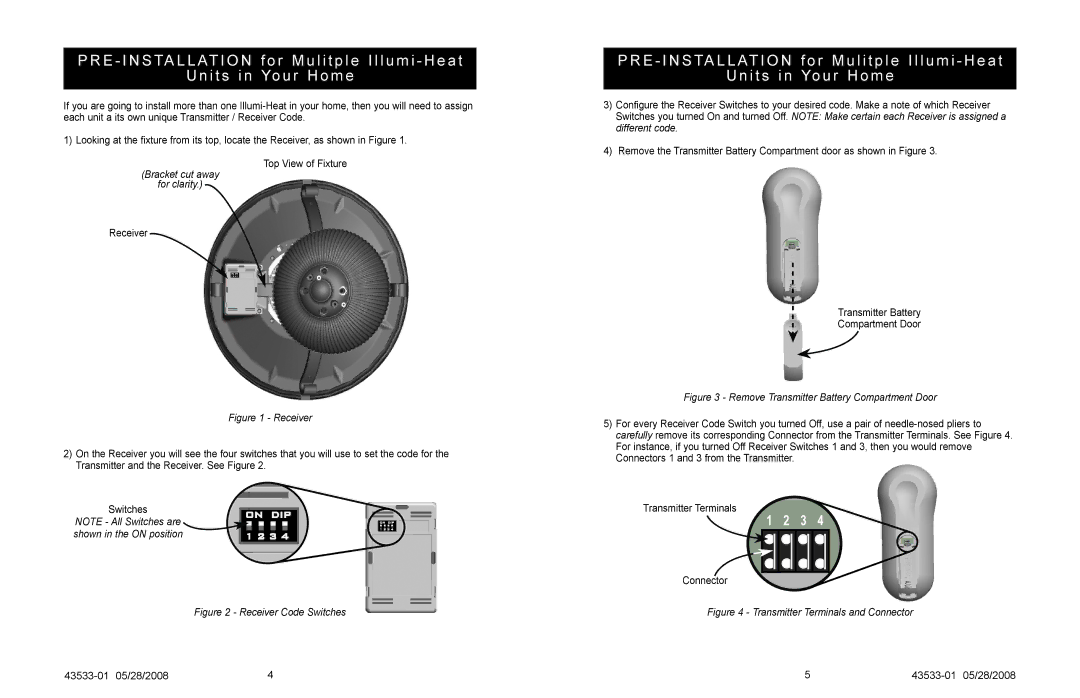
The Hunter Fan Illumi-Heat is a revolutionary advancement in home comfort, seamlessly blending innovative heating technology with stylish design to create a versatile ceiling fan that enhances any living space. This unique product combines the benefits of traditional ceiling fans with modern heating functionality, making it an ideal choice for year-round climate control.One of the main features of the Illumi-Heat is its integrated heating element that provides supplemental warmth during colder months. This capability not only helps to maintain a cozy atmosphere but also allows homeowners to reduce their reliance on central heating systems, leading to potential energy savings. The fan's heating element operates quietly, ensuring that it does not disrupt your comfort or activities while in use.
Equipped with a powerful motor, the Hunter Fan Illumi-Heat delivers efficient airflow, ensuring that every corner of the room receives adequate circulation. The fan has multiple speed settings, allowing users to customize the airflow to match their preferences. This versatility means that you can enjoy a gentle breeze in the summer and effective heating in the winter with just the flip of a switch.
Another noteworthy characteristic of the Illumi-Heat is its stylish design. Available in various finishes and blade styles, this fan seamlessly integrates with different home décor styles, from modern to traditional. The sleek lines and contemporary aesthetic not only serve functional purposes but also elevate the overall appearance of any room.
The Illumi-Heat is equipped with smart technologies, including compatibility with mobile applications and voice-activated systems. This ensures that users can conveniently control the fan's settings from anywhere in the house, making it easier to adjust preferences without having to get up. Some models come with integrated LED lighting, providing additional illumination while maintaining energy efficiency.
Safety is also a top priority for Hunter Fans, and the Illumi-Heat features built-in thermal overload protection for the heating element, ensuring safe and reliable operation. With its combination of advanced technology, pleasing design, and user-friendly features, the Hunter Fan Illumi-Heat stands out as a cutting-edge solution for achieving optimal comfort throughout the year. Whether you're seeking relief from the heat or warmth on a chilly night, this fan is engineered to deliver excellent performance and style in equal measure.

