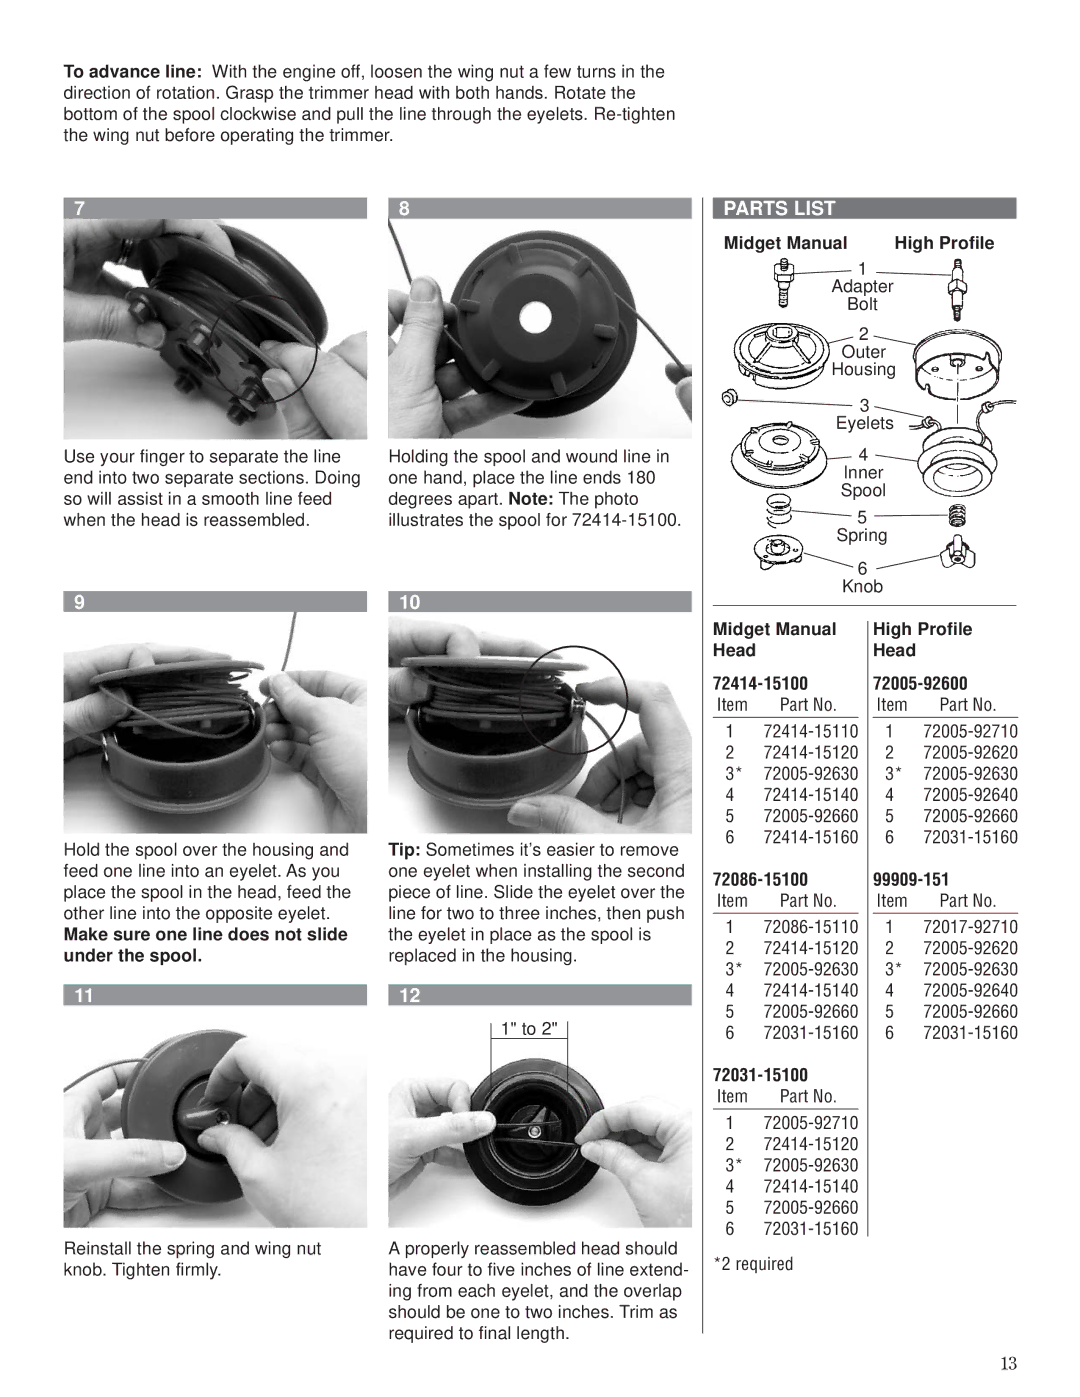
To advance line: With the engine off, loosen the wing nut a few turns in the direction of rotation. Grasp the trimmer head with both hands. Rotate the bottom of the spool clockwise and pull the line through the eyelets.
7
Use your finger to separate the line end into two separate sections. Doing so will assist in a smooth line feed when the head is reassembled.
9
8
Holding the spool and wound line in one hand, place the line ends 180 degrees apart. Note: The photo illustrates the spool for
10
PARTS LIST
Midget Manual | High Profile |
![]() 1
1
Adapter
Bolt
2
Outer
Housing
![]() 3
3
Eyelets
4
Inner
Spool
5
Spring
6
Knob
Hold the spool over the housing and feed one line into an eyelet. As you place the spool in the head, feed the other line into the opposite eyelet.
Make sure one line does not slide under the spool.
11
Tip: Sometimes it’s easier to remove one eyelet when installing the second piece of line. Slide the eyelet over the line for two to three inches, then push the eyelet in place as the spool is replaced in the housing.
12
1" to 2"
Midget Manual Head
72414-15100
Item | Part No. |
1
2
3*
4
5
6
Item | Part No. |
1
2
3*
4
5
6
Item | Part No. |
1
2
3*
4
5
6
High Profile
Head
72005-92600
Item | Part No. |
1
2
3*
4
5
6
Item | Part No. |
1
2
3*
4
5
6
Reinstall the spring and wing nut knob. Tighten firmly.
A properly reassembled head should have four to five inches of line extend- ing from each eyelet, and the overlap should be one to two inches. Trim as required to final length.
*2 required
13
