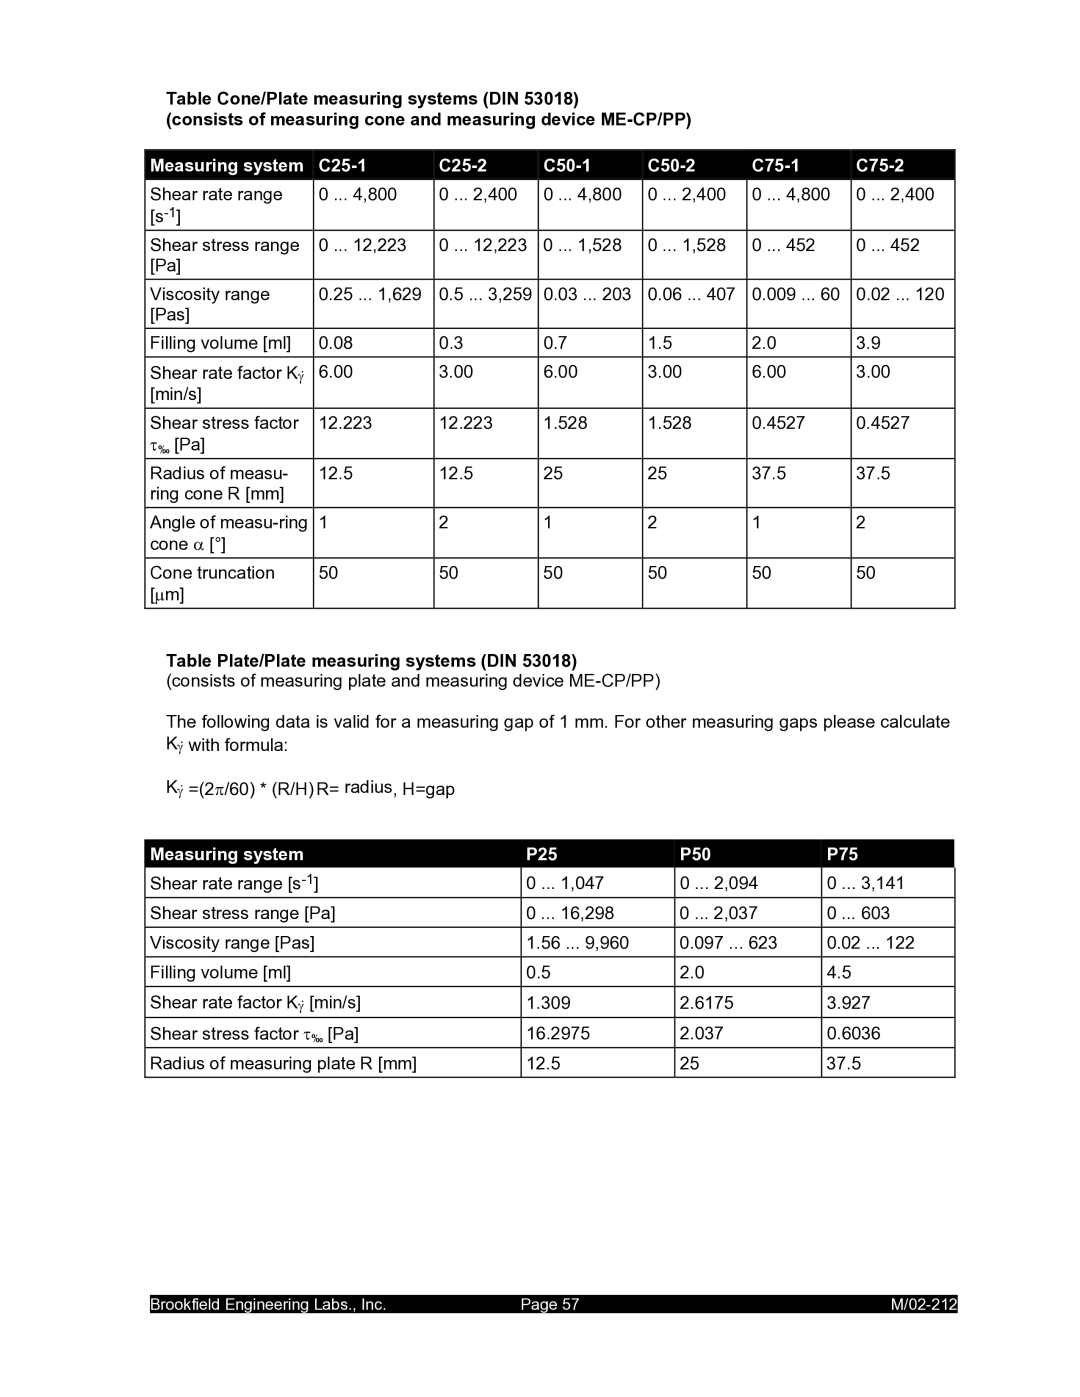
M/02-212 specifications
The IBM M/02-212 is a cutting-edge platform that showcases the company’s dedication to excellence in technology and innovation. Designed for both enterprise performance and flexibility, this model adheres to IBM's high standards for processing power and reliability, making it a standout option for businesses looking to enhance their operations.One of the main features of the M/02-212 is its powerful multi-core processor, which provides exceptional speed and efficiency. This architecture enables the system to handle multiple tasks simultaneously without compromising performance, making it ideal for data-intensive applications and complex processing tasks. It supports a range of workloads, from traditional enterprise applications to modern cloud-based solutions.
In terms of memory, the M/02-212 offers extensive capacity options, utilizing high-speed RAM technology that ensures swift data access and reduced latency. The combination of powerful processing and ample memory resources allows organizations to execute demanding applications and large-scale databases seamlessly.
The system is designed with advanced security features that are integral for protecting sensitive information. Encryption capabilities, secure boot options, and comprehensive identity management functionalities are built-in, providing a robust defense against potential cyber threats. This is particularly valuable for industries like finance and healthcare, where data integrity is paramount.
Moreover, the IBM M/02-212 leverages state-of-the-art virtualization technologies, enabling companies to optimize resource utilization and increase operational efficiency. Through virtualization, multiple virtual machines can run on a single physical server, allowing businesses to reduce hardware costs and improve overall system management.
The M/02-212 also emphasizes scalability, which means organizations can easily expand their capabilities as their needs evolve. This flexibility allows businesses to adapt to changing market conditions without requiring a complete overhaul of their existing infrastructure.
Additionally, it comes equipped with a user-friendly management interface, providing administrators with the tools necessary to monitor system performance, allocate resources, and troubleshoot issues efficiently.
In summary, the IBM M/02-212 combines powerful processing capabilities, robust security measures, advanced virtualization, and exceptional scalability. These characteristics make it an excellent choice for enterprises looking to enhance their IT infrastructure while ensuring efficiency and data security.
