Displaying a video image
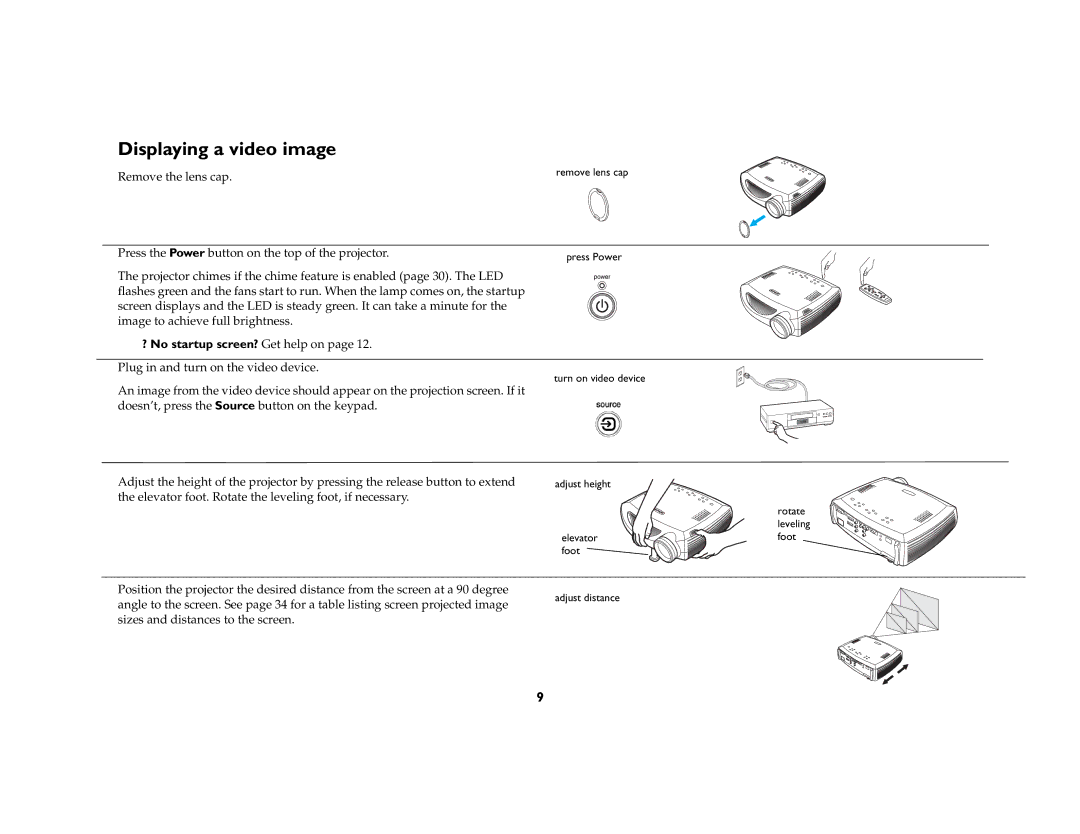
Remove the lens cap. | remove lens cap |
|
Press the Power button on the top of the projector. | press Power | |||
The projector chimes if the chime feature is enabled (page 30). The LED |
|
|
| |
flashes green and the fans start to run. When the lamp comes on, the startup |
|
|
| |
screen displays and the LED is steady green. It can take a minute for the |
|
|
| |
image to achieve full brightness. |
|
|
| |
? No startup screen? Get help on page 12. |
|
|
| |
|
|
|
| |
Plug in and turn on the video device. | turn on video device | |||
An image from the video device should appear on the projection screen. If it | ||||
|
|
| ||
doesn’t, press the Source button on the keypad. |
|
|
| |
|
|
|
| |
|
|
|
| |
Adjust the height of the projector by pressing the release button to extend | adjust height |
|
the elevator foot. Rotate the leveling foot, if necessary. |
|
|
|
| rotate |
|
| leveling |
| elevator | foot |
| foot |
|
Position the projector the desired distance from the screen at a 90 degree | adjust distance |
|
angle to the screen. See page 34 for a table listing screen projected image |
| |
|
| |
sizes and distances to the screen. |
|
|
9
