Flush Mount Installation
![]()
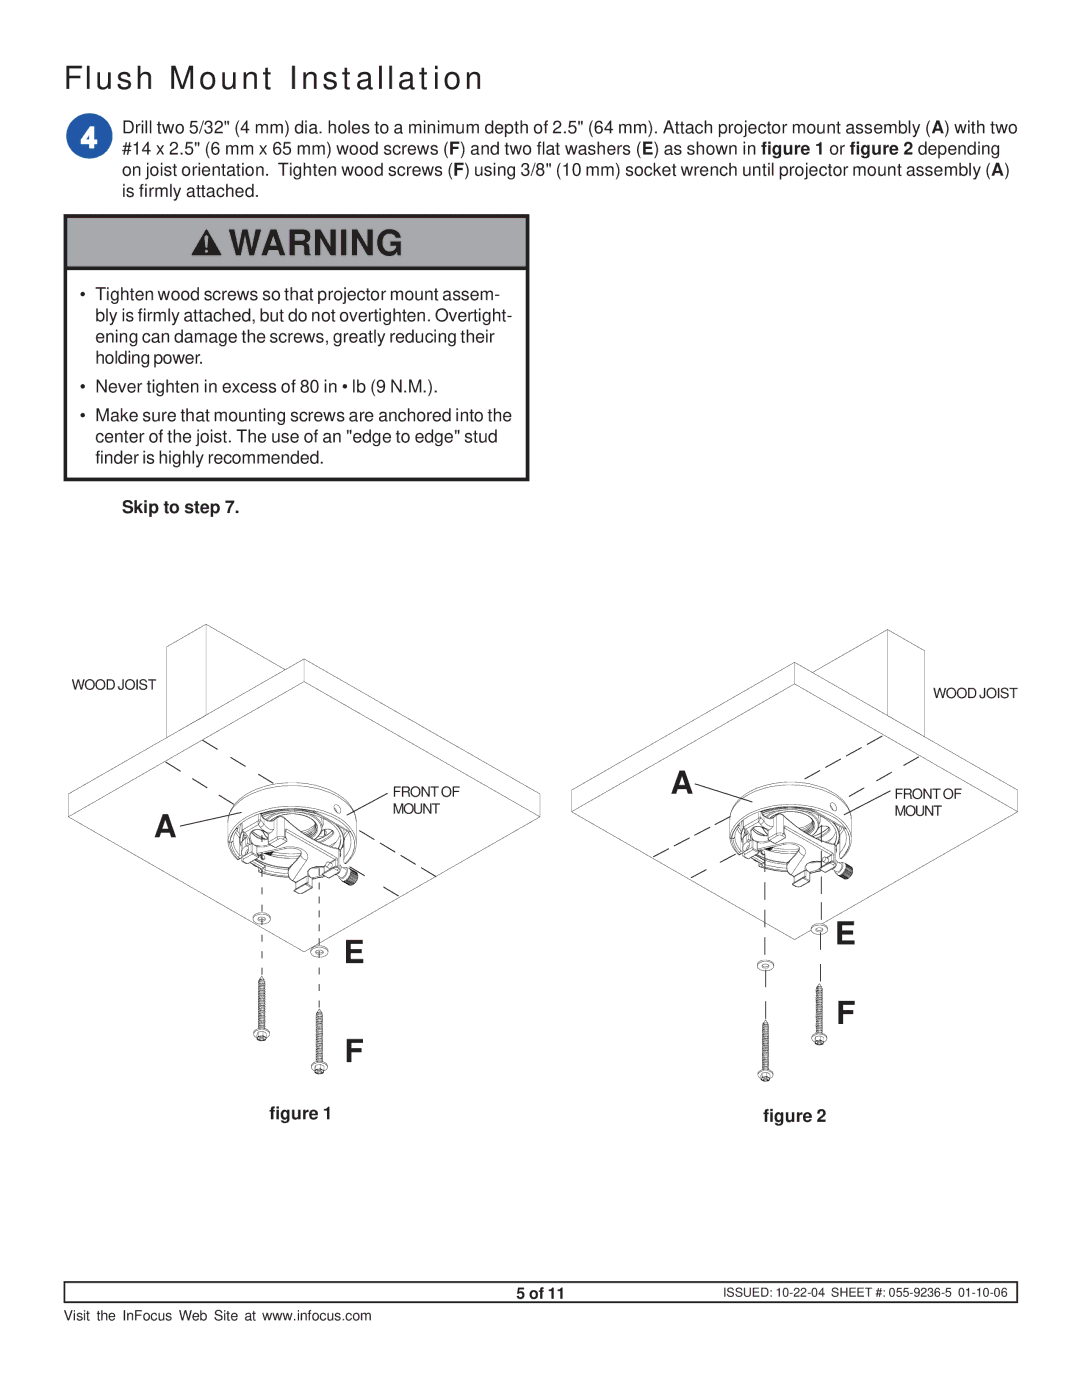
![]() Drill two 5/32" (4 mm) dia. holes to a minimum depth of 2.5" (64 mm). Attach projector mount assembly (A) with two
Drill two 5/32" (4 mm) dia. holes to a minimum depth of 2.5" (64 mm). Attach projector mount assembly (A) with two ![]()
![]()
![]() #14 x 2.5" (6 mm x 65 mm) wood screws (F) and two flat washers (E) as shown in figure 1 or figure 2 depending on joist orientation. Tighten wood screws (F) using 3/8" (10 mm) socket wrench until projector mount assembly (A) is firmly attached.
#14 x 2.5" (6 mm x 65 mm) wood screws (F) and two flat washers (E) as shown in figure 1 or figure 2 depending on joist orientation. Tighten wood screws (F) using 3/8" (10 mm) socket wrench until projector mount assembly (A) is firmly attached.
![]() WARNING
WARNING
•Tighten wood screws so that projector mount assem- bly is firmly attached, but do not overtighten. Overtight- ening can damage the screws, greatly reducing their holding power.
•Never tighten in excess of 80 in • lb (9 N.M.).
•Make sure that mounting screws are anchored into the center of the joist. The use of an "edge to edge" stud finder is highly recommended.
Skip to step 7.
WOOD JOIST
| FRONT OF | A |
A | MOUNT |
|
|
|
E
F
WOOD JOIST
FRONT OF
MOUNT
E
F
figure 1 | figure 2 |
5 of 11 | ISSUED: |
Visit the InFocus Web Site at www.infocus.com
