Quick Start Guide
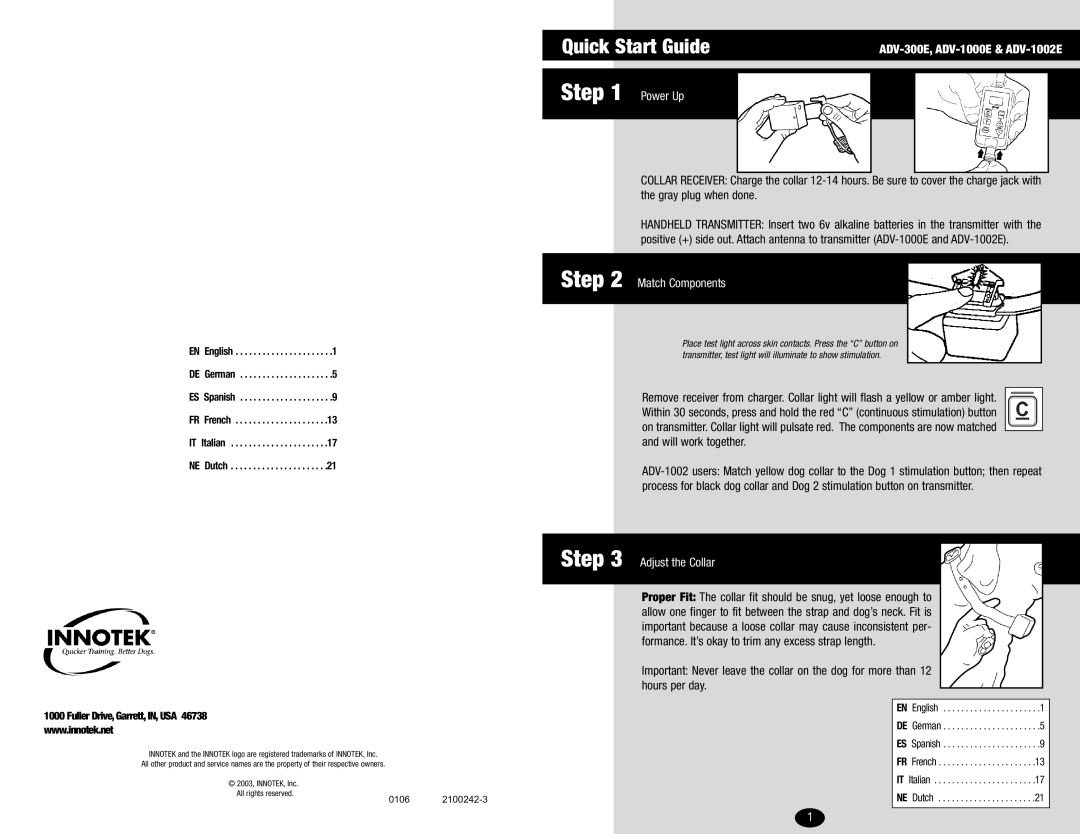
Step 1 Power Up
COLLAR RECEIVER: Charge the collar
HANDHELD TRANSMITTER: Insert two 6v alkaline batteries in the transmitter with the positive (+) side out. Attach antenna to transmitter
Step 2 Match Components
EN English . . . . . . . . . . . . . . . . . . . . . .1
DE German . . . . . . . . . . . . . . . . . . . . .5
ES Spanish . . . . . . . . . . . . . . . . . . . . .9
FR French . . . . . . . . . . . . . . . . . . . . .13
IT Italian . . . . . . . . . . . . . . . . . . . . . .17
NE Dutch . . . . . . . . . . . . . . . . . . . . . .21
Place test light across skin contacts. Press the “C” button on transmitter, test light will illuminate to show stimulation.
Remove receiver from charger. Collar light will flash a yellow or amber light. Within 30 seconds, press and hold the red “C” (continuous stimulation) button on transmitter. Collar light will pulsate red. The components are now matched and will work together.
Step 3 Adjust the Collar
1000 Fuller Drive, Garrett, IN, USA 46738 www.innotek.net
INNOTEK and the INNOTEK logo are registered trademarks of INNOTEK, Inc.
All other product and service names are the property of their respective owners.
© 2003, INNOTEK, Inc. All rights reserved.
0106 2100242-3
Proper Fit: The collar fit should be snug, yet loose enough to |
|
allow one finger to fit between the strap and dog’s neck. Fit is |
|
important because a loose collar may cause inconsistent per- |
|
formance. It’s okay to trim any excess strap length. |
|
Important: Never leave the collar on the dog for more than 12 |
|
hours per day. |
|
EN English | . .1 |
DE German | . .5 |
ES Spanish | . .9 |
FR French | .13 |
IT Italian | .17 |
NE Dutch | .21 |
1