SECTION
Replacing Back Upholstery
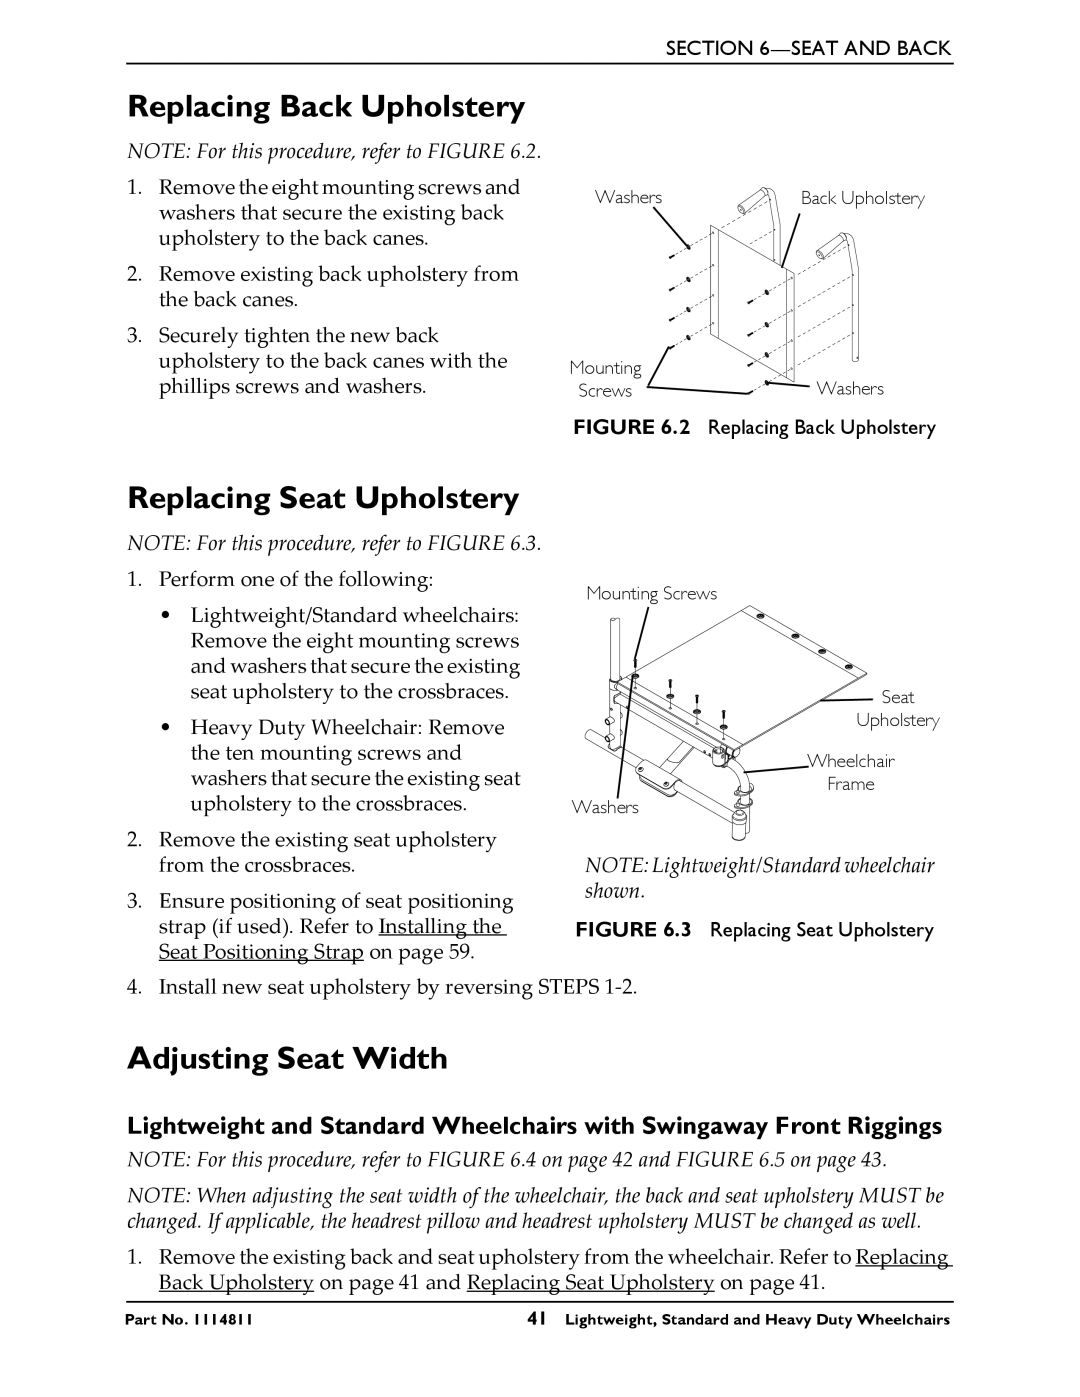
NOTE: For this procedure, refer to FIGURE 6.2.
1.Remove the eight mounting screws and washers that secure the existing back upholstery to the back canes.
2.Remove existing back upholstery from the back canes.
3.Securely tighten the new back upholstery to the back canes with the phillips screws and washers.
Replacing Seat Upholstery
NOTE: For this procedure, refer to FIGURE 6.3.
1. Perform one of the following:
Mounting Screws
•Lightweight/Standard wheelchairs: Remove the eight mounting screws and washers that secure the existing seat upholstery to the crossbraces.
•Heavy Duty Wheelchair: Remove the ten mounting screws and washers that secure the existing seat upholstery to the crossbraces.
2.Remove the existing seat upholstery from the crossbraces.
3.Ensure positioning of seat positioning strap (if used). Refer to Installing the Seat Positioning Strap on page 59.
Seat
Upholstery
Wheelchair
Frame
Washers
NOTE: Lightweight/Standard wheelchair shown.
FIGURE 6.3 Replacing Seat Upholstery
4. Install new seat upholstery by reversing STEPS
Adjusting Seat Width
Lightweight and Standard Wheelchairs with Swingaway Front Riggings
NOTE: For this procedure, refer to FIGURE 6.4 on page 42 and FIGURE 6.5 on page 43.
NOTE: When adjusting the seat width of the wheelchair, the back and seat upholstery MUST be changed. If applicable, the headrest pillow and headrest upholstery MUST be changed as well.
1.Remove the existing back and seat upholstery from the wheelchair. Refer to Replacing Back Upholstery on page 41 and Replacing Seat Upholstery on page 41.
Part No. 1114811 | 41 Lightweight, Standard and Heavy Duty Wheelchairs |
