Assembly
Getting Started - The Ironman Fitness Viper Recumbent Bike will require some assembly. Unpack the box in a clear area. Remove packing material. Do not dispose of packing material until assembly is complete and unit is working properly. Place the unit on a clean level surface for assembly. Make sure there is easy access to an electrical outlet. Before assembling, the unit should be placed as close as possible to its final location. If you are missing any parts, please call Ironman Fitness at
Figure 1
Figure 2
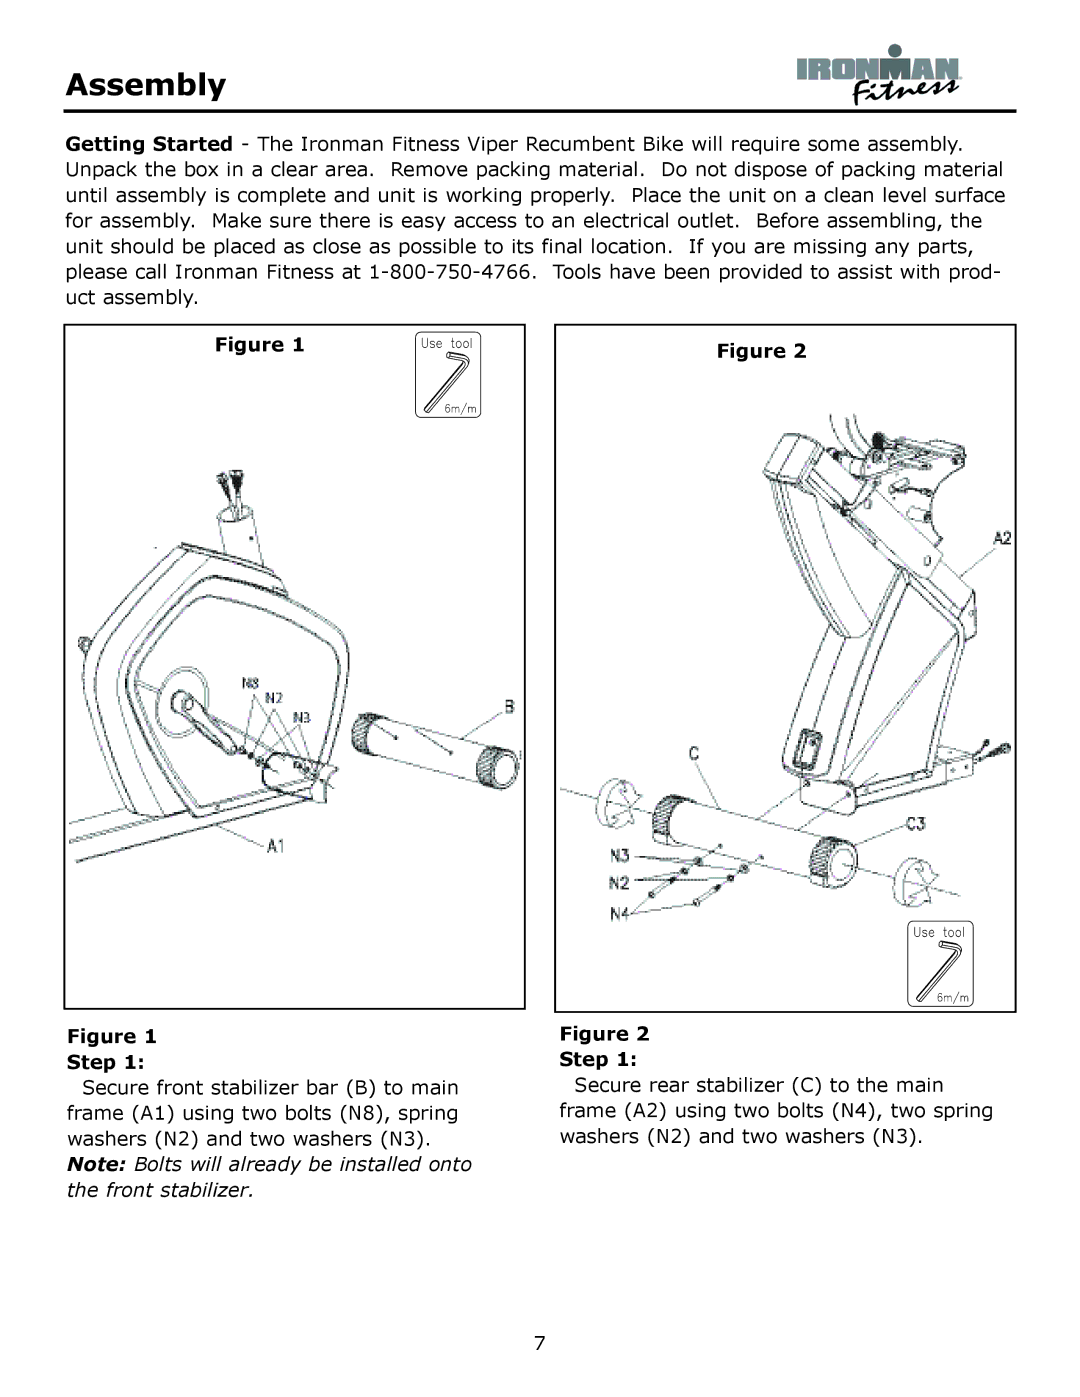
Figure 1
Step 1:
Secure front stabilizer bar (B) to main frame (A1) using two bolts (N8), spring washers (N2) and two washers (N3).
Note: Bolts will already be installed onto the front stabilizer.
Figure 2
Step 1:
Secure rear stabilizer (C) to the main frame (A2) using two bolts (N4), two spring washers (N2) and two washers (N3).
7